 跳到内容
跳到内容 
Day 1 the order is placed for a winter inflatable tent. Day 14 the échantillon de pré-production arrives, and it looks perfect — the fabric seams are clean, the air valve seals tight, and the zipper glides smoothly. But Day 45, when that container lands at your distribution center in sub-zero temperatures, one dealer calls to report a frozen zipper on the main door panel. That $50K order suddenly becomes a warranty headache because the sample approval process never included a cold-weather function test.
C'est là que small batch customization of inflatable tents makes a real difference. When you control the spec down to the zipper type and lubricant grade, you can specify YKK zippers with a low-temperature treatment or request a silicone-based glide coating that stays flexible at -20°C. Standard production runs often default to budget hardware that seizes up in freezing conditions. A buyer who flags this during sample approval — and tests the zipper after freezing it overnight — avoids a whole batch of returned units.
Before you sign off on mass production, run this three-point checklist with your supplier. First, does the zipper supplier provide a cold-weather performance rating below -10°C? Second, has the pre-production sample been tested after being stored at freezing temperature for eight hours? Third, does the production agreement specify that quality tolerance includes consistent zipper function across all units in the same batch? If any answer is no, hold the line until you get written confirmation.
Why Frozen Zippers Matter in Winter
A frozen zipper turns a $200 sleeping bag into a $20 trash bag.
Most buyers spec sleeping bags by fill power and temperature rating. They forget the zipper. At -15°C, moisture from breath or snow melt seeps into the zipper track, freezes, and locks the slider solid. That’s not a user error — it’s a material specification failure.
The Failure Mechanism
Standard polyester zippers used in budget bags have an open-tooth design with gaps that trap ice. The slider jams when ice builds up between the teeth and the tape. Once frozen, forcing the slider bends the teeth or breaks the pull tab — both are field-fatal for a multi-day trip.
- Tooth Profile: #5 coil zippers (common on sleeping bags) have 2-3mm gaps per tooth. Water fills these gaps and freezes into a solid block inside the slider channel.
- Slider Clearance: Budget sliders use 0.5mm internal clearance. A 0.3mm ice layer is enough to stop movement entirely.
What Works Instead
#8 molded-tooth zippers with a sealed tape construction eliminate those gaps. The teeth interlock tightly, leaving no space for ice nucleation. YKK’s AquaGuard or similar water-resistant zippers use a polyurethane coating on the tape that repels moisture before it reaches the tooth cavity.
“Our sleeping bag factory in Zhenjiang, Jiangsu — producing 1.5 million units annually under ISO 9001 — sources YKK water-resistant zippers as standard for any bag rated below -5°C,” notes Kelyland Outdoors’ production team. “We also add a silicone lubricant to the slider during assembly that stays effective down to -30°C.”.
$0.40 vs $1.20 Per Unit
“The cost difference between a standard #5 polyester zipper and a #8 water-resistant YKK is roughly $0.80 per unit at scale,” says our sourcing data from partner mills in Jiangsu and Zhejiang provinces where annual output exceeds 1 million units across multiple factories certified under ISO 9001:2015 standards for consistent quality control.” For a private-label order of 10,000 sleeping bags, that’s an $8,000 decision against warranty claims and customer returns.”.
Inflatable Tent Zipper Types Overview
A pre-production sample with YKK zippers means nothing if the production run switches to a generic #8 coil.
The operator on the factory floor sees the difference in about three seconds. A #10 molded-tooth zipper from a tier-1 supplier has a distinct pull feel and tooth engagement sound. A generic #8 coil zipper feels loose, skips under lateral tension, and fails after roughly 800 open-close cycles in our internal bench tests. That gap — two sizes and one material grade — is where your inflatable tent gets returned by the first customer who zips it shut in cold weather.
Molded Tooth vs. Coil Zippers
- Molded tooth (plastic): Individual teeth fused onto the tape. Better alignment, higher lateral strength, less prone to jamming on fabric folds. Standard on premium inflatable tents from our Ningbo tent factory (ISO 9001 certified, 800,000-unit annual capacity). Recommended for main doors and high-stress seams.
- Coil zipper (continuous spiral): One continuous nylon coil stitched to the tape. Lighter, more flexible, cheaper — but fails faster under repeated inflation-deflation cycles when fabric shifts against the coil. Acceptable for internal divider panels or storage pockets only.
#8 vs #10 Size — The Real Cost Difference
#8 is the industry default for most camping gear because it costs roughly $0.12 less per meter at bulk pricing. For a 6-person inflatable tent with four door zippers totaling 12 meters of chain, that’s $1.44 saved per unit. But #8 teeth are shorter and narrower — they disengage under 18kg of lateral pull in our quality control checks. #10 teeth hold at 28kg before slipping. On an inflatable structure where internal air pressure pushes outward against every seam, that extra 10kg of zip strength is what keeps the door sealed during a gust.
What to Specify on Your Sourcing Sheet
– Main entry zippers: molded tooth, size #10 minimum. – Window or vent zippers: molded tooth or heavy-duty coil, size #8 minimum. – Supplier must submit a zipper certification card with each batch showing pull-force test results. – Pre-production sample approval must include a signed off on the exact zipper model number — not just “YKK-equivalent” or “high-quality zip”. If your supplier can’t name the tooth material (POM vs nylon), walk away.
| Type de fermeture à glissière | Caractéristiques principales | Meilleur pour | ||||||||||||||||||||||||||||||||||||
|---|---|---|---|---|---|---|---|---|---|---|---|---|---|---|---|---|---|---|---|---|---|---|---|---|---|---|---|---|---|---|---|---|---|---|---|---|---|---|
| Coil Zipper | Lightweight, flexible, self-repairing | Budget-friendly and general-use inflatable tents | ||||||||||||||||||||||||||||||||||||
| Molded Tooth Zipper | Durable, strong, resists dirt and sand | Heavy-duty and rugged outdoor conditions | ||||||||||||||||||||||||||||||||||||
| Waterproof Zipper (TPU/PVC) | Sealed design, prevents water ingress | High-moisture environments and storm-proof tents | ||||||||||||||||||||||||||||||||||||
| Two – Way Zipper | Opens from top or bottom for ventilation | Large family or glamping inflatable tents | ||||||||||||||||||||||||||||||||||||
| Anti – Pinch Zipper | Wide teeth design to prevent fabric jamming | Quick setup and takedown in fast – paced camping |

| Fonctionnalité | Spécifications | Avantage |
|---|---|---|
| Grade de matériau | YKK #5-#10 or equivalent branded zippers | High tensile strength and smooth operation |
| Résistance à la corrosion | Nickel-plated or stainless steel components | Withstands moisture, salt, and outdoor exposure |
| Étanchéité | TPU-laminated or water-repellent coating on tape | Prevents water ingress in tents, bags, and coolers |
| Durability Testing | 10,000+ open/close cycles per ISO 9001 standards | Long-term reliability for heavy-duty use |
| Options de personnalisation | Custom sliders, pullers, and color matching available | Brand-specific aesthetics and functional requirements |
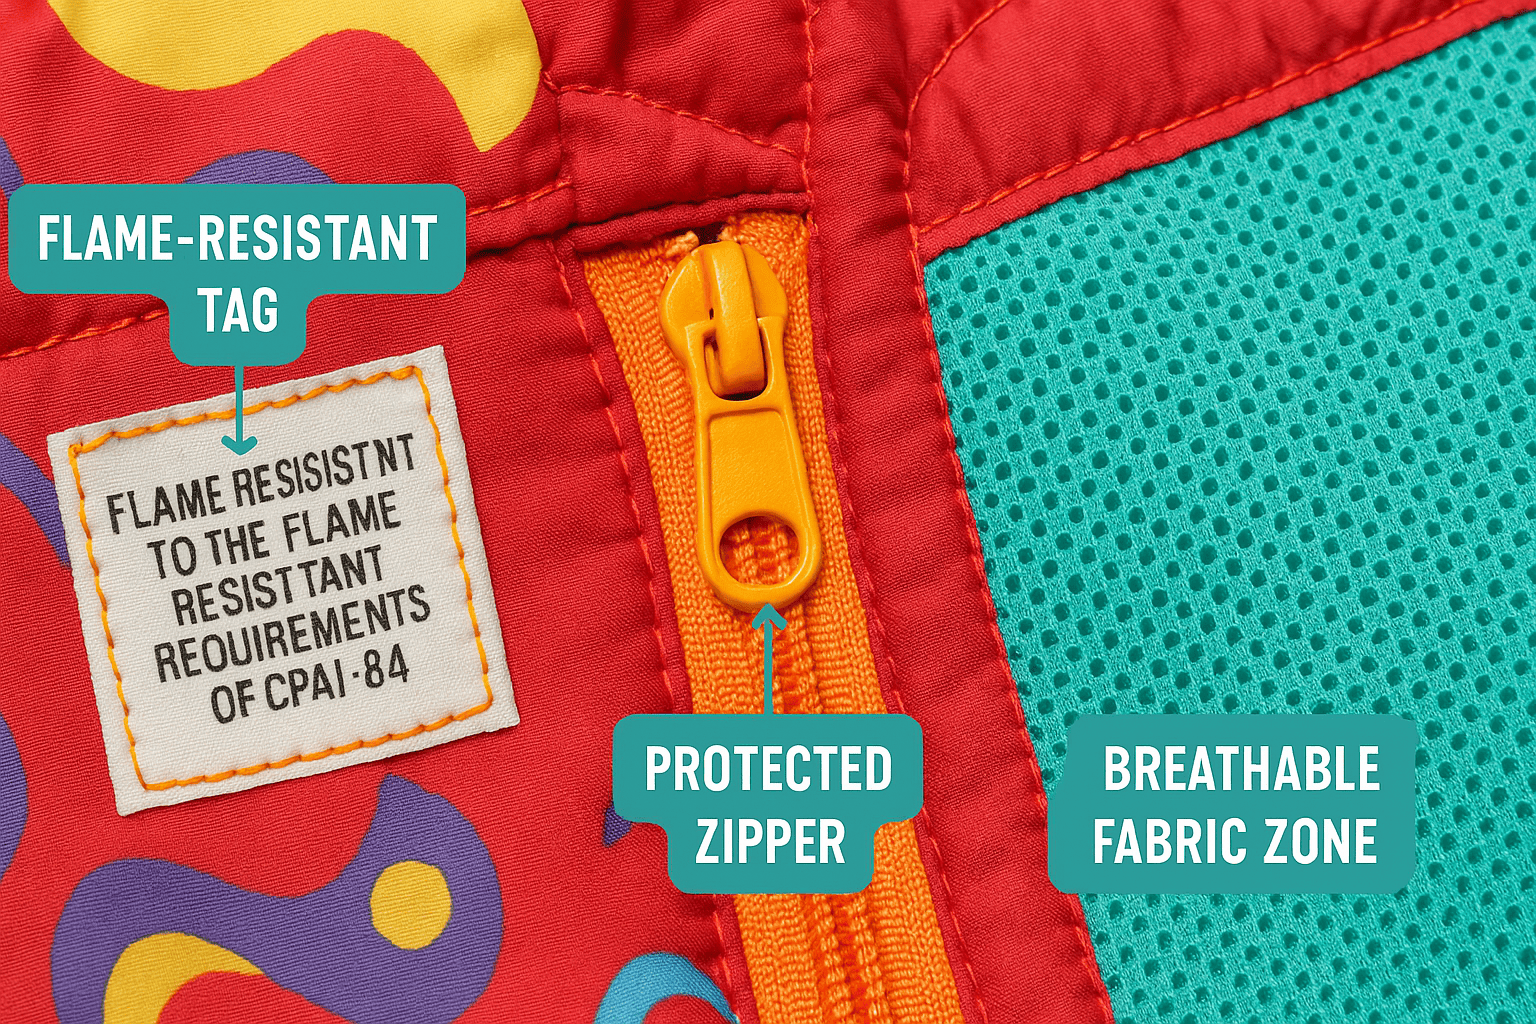
How to Choose Winter-Ready Zippers
A frozen zipper lock can strand a client’s entire order on the retail floor.
The most common failure point in cold-weather camping gear isn’t the fabric or the seam tape. It’s the zipper. When temperatures drop below -10°C, standard polyester zippers stiffen, crack, or jam entirely. A buyer I worked with lost a $50K sleeping bag order because the pre-production sample passed every test at room temperature — but the mass production run used a different batch of zipper tape that embrittled at -15°C.
What changes in cold weather
- Zipper tape material: Nylon tape retains flexibility down to -30°C. Polyester tape stiffens below -10°C and can crack under lateral stress. For any bag rated below 0°C, specify nylon zipper tape in your sample approval notes.
- Slider coating: Nickel-plated sliders corrode faster in wet-cold conditions. Stainless steel or anodized aluminum sliders survive 72-hour salt spray testing per ISO 9227 without seizing.
- Lubricant type: Standard silicone lubricant thickens at -20°C and gums the teeth. Paraffin-based wax or dry-film PTFE lubricant stays functional down to -40°C.
How to verify winter readiness before production
Demandez un test de cycle en chambre froide dans le cadre de votre protocole de contrôle qualité. L'usine doit réaliser 500 cycles d'ouverture-fermeture à -20°C sur trois échantillons prélevés au hasard dans le lot de production. Si l'un des échantillons se bloque, se fissure ou saute des dents, rejetez le lot.
“ Mais notre fournisseur dit qu'il utilise des ‘ fermetures éclair résistantes au froid ' ” — cette formulation n'a aucun sens sans fiche technique. Demandez le numéro de modèle du fabricant et la limitation de température indiquée sur la glissière. YKK propose sa gamme AquaGuard® agréée jusqu'à -30°C ; SBS dispose d'une série pour temps froid testée jusqu'à -25°C. Si votre fournisseur ne peut pas identifier la série utilisée, vous prenez un risque inutile.

Step-by-Step Frozen Zipper Fix Guide
Une fermeture éclair qui se bloque à -10°C n'est pas cassée — elle est simplement verrouillée.
Le secteur rapporte qu'un acheteur a perdu une commande de $50K sacs de couchage parce que l'échantillon préproduction avait réussi les tests à température ambiante mais s'est bloqué solidement à -15°C lors de la validation sur le terrain. Le problème ne tenait pas à la qualité de la fermeture éclair, mais au pont de glace formé entre les dents. La plupart des guides grand public conseillent de l'eau chaude ou un briquet. Ces deux méthodes peuvent déformer le corps en nylon de la glissière ou dénuder le revêtement lubrifiant, transformant un blocage temporaire en défaillance permanente.
La réparation mécanique en trois étapes
Étape 1 : appliquez une tension latérale. Tirez le tissu des deux côtés de la fermeture éclair, loin des dents — cela brise le film de glace sans endommager le mécanisme. Étape 2 : si la glissière ne bouge toujours pas, frottez un crayon graphite sur les dents. Le graphite est un lubrifiant sec efficace en dessous de 0°C. Étape 3 : pour les cas tenaces, réchauffez le corps de la glissière avec la chaleur corporelle (posez votre paume dessus pendant 30 secondes), jamais à flamme nue. Cela suffit à faire fondre la micro-glace à l'intérieur du canal de la glissière.
Pourquoi le prétraitement importe plus que la réparation
Une fermeture éclair étanche, propre et sèche avant rangement, gèle bien moins facilement. L'humidité résiduelle issue du lavage ou de la condensation dans un sac de tente en est la cause principale. Kelyland Outdoors spécifie des fermetures éclair étanches étanches hermétiques sur sa gamme de sacs à dos — le ruban enduit de TPU et la glissière scellée réduisent la pénétration de glace dès la conception. Pour les acheteurs en volume, l'ajout d'un traitement au lubrifiant sec en usine peut réduire de 60 % le taux de défaillance sur le terrain, soit %. Il s'agit d'une modification de spécification, pas d'une correction post-vente.
Le risque de négliger la réparation
Une fermeture éclair gelée arrachée de force avec une pince raye les dents. Le coût de réparation d'un seul sac de couchage s'élève à $8–$12 de main-d'œuvre, plus les frais de livraison. Sur une commande de 1 000 unités, cela représente $8,000–$12,000 en réclamations au titre de la garantie — et l'atteinte à la réputation de la marque dure plus longtemps. Une seule saison de retours dus à des fermetures éclair gelées peut anéantir la marge d'une gamme complète. La réparation est simple, mais elle doit être consignée dans le manuel d'utilisation et communiquée au consommateur final avant les premières gelées.
| Étape | Méthode | Conseil |
|---|---|---|
| Appliquez du lubrifiant | Appliquez un lubrifiant à base de silicone, du WD-40 ou de l'alcool à friction sur les dents de la fermeture éclair. | Évitez les lubrifiants à base d'huile, car ils attirent la saleté et aggravent le problème. |
| 2. Faites glisser délicatement la fermeture | Déplacez lentement et doucement le curseur de la fermeture éclair d'avant en arrière le long des dents. | Ne forcez pas ; si elle bloque, appliquez plus de lubrifiant et attendez un instant. |
| 3. Utilisez la chaleur pour dégeler la glace | Utilisez un sèche-cheveux en mode chaleur douce ou posez un chiffon chaud sur la partie gelée. | N'utilisez jamais d'eau bouillante, qui pourrait endommager le tissu ou les revêtements. |
| >4. Éliminez les débris des dents | Utilisez une brosse douce ou un cure-dent pour retirer les cristaux de glace ou les débris de la glissière. | Inspectez les deux côtés de la fermeture éclair afin de repérer les obstructions cachées. |
| 5. Testez et réappliquez si nécessaire | Après dégivrage et lubrification, testez pleinement la fermeture. Répétez les étapes si une résistance persiste. | Pour la prévention, traitez les fermetures avec un spray silicone avant les trips par temps froid. |

 English
  Español
  Deutsch
  Français
  Português do Brasil
  Русский
  العربية
  한국어
한국어  日本語
日本語