 跳到内容
跳到内容 
スマートテント機能2026年版は、バイヤーがサプライヤー、予算、または生産枠を承認する前に最初に確認すべきチェックポイントです。10人の調達アドバイザーに2026年にスマートテントラインを立ち上げる方法を尋ねると、9人が同じアドバイスで始めます:コミットする前に試作品を入手せよ。書面上は、それが安全策に聞こえます。問題は、工場が承認した単一のサンプルが、その場で最も危険な文書であることです。私は、ブランドマネージャーが300ユニットの太陽光統合ドームテント注文で50,000ドルを無駄にするのを見ました。サンプルのCIGS製レインフライが30度で綺麗に曲がり、3日間のテストで充電を保持したからです。量産品は異なるフィルムバッチで到着しました。2回目の折り畳みサイクル後、出力は40%低下しました。FOB深圳の請求書は既に支払われていました。.
そのバイヤーが必要だったのは、別のサンプルではありませんでした。それは、品質許容閾値に結びついた材料代替条項であり、最初の縫い目が生地に入る前に供給契約に書き込まれるべきものでした。スマートテント機能、 統合ソーラーパネル およびUSB充電ハブは、テキスタイルエンジニアリングと低電圧電子機器を組み合わせています。試作品は、試作室で手作りされた1つのテントが何ができるかを証明するだけです。本当の作業は、曲げ半径仕様、IP67シール材、認証経路を発注書に固定し、その後、サンプルではなくそれらの仕様に対して生産ラインを監査するときに発生します。それが、2026ラインを立ち上げるブランドマネージャーと、シーズン中に返品処理に費やすマネージャーの違いです。.
機能1:統合ソーラーパネルルーフ
硬質ガラスパネルは2回目のピッチで割れます。.
2026年、あるクライアントの50,000ドルの発注書が頓挫しました。サンプル承認プロセスは順調でした。試作品はオフィスの照明下でパワーバンクを充電しました。しかし量産品が到着し、キャンパーがテントを折り畳むと、リジッドソーラーパネルが折り目ラインで割れ始めました。サプライヤーは、通知なしに安価な単結晶ガラスラミネートに交換していました。30度の曲げ半径要件は品質許容仕様に含まれていませんでした。その見落としにより、寧波でフルコンテナの手直しが発生しました。.
薄膜CIGSパネルはこれを機械的に解決します。半導体層はフレキシブルなポリイミドまたはステンレス基板上に堆積され、耐候性のETFEまたはPTFEフィルムでラミネートされます。スタック全体は、接合層にマイクロクラックを発生させずに30度の半径で曲がります。耐久性試験により、その閾値で1,000回の曲げサイクル後も定格出力の90%が維持されることが確認されています。折り畳み可能なテントのレインフライにとって、これは贅沢品ではありません。シーズン中に機能する機能と、Amazonのリスティングを破壊する返品率との違いです。.
-
-
- 縫い込み統合: CIGSパネルは、5〜8mmの余白を備えた事前カプセル化ストリップとして出荷されます。テント工場は、バータックミシンを使用してこれらを直接レインフライの縫い目チャンネルに縫い付けます。フレームなし。接着剤なし。パネルはフライ生地の構造部品となり、ポールのジオメトリーによって張力がかかります。防水性には、ステッチライン上のPUテープシールが必要です。標準のテント製造装置で再工具なしで対応できます。.
- 形状の柔軟性: 既製のリジッドパネルは固定長方形です。カスタムCIGSストリップは、ジオデシックドーム、トンネルテントアーチ、またはルーフトップテントウェッジの自然なパネル形状に追従できます。これにより、「後付けのボルトオン」と叫ぶような、曲面上の不格好な平面パネルの外観が排除され、プレミアムポジショニングを損ないません。.
-
10WのCIGSパネルは、ASTM G173標準日射条件下で、実際の屋外条件(ラボフラッシュテスト数値ではありません)で約0.6A、5Vを供給します。これは、10,000mAhのパワーバンクを、直射日光約6.5〜8時間で空から満充電することを意味します。20Wアレイではその半分になります。実際の充電速度はパネルの向きや雲量に依存しますが、パッケージの主張に重要な計算は次のとおり:15Wパネルは、晴れた日に2台のスマートフォンを同時に充電できます。そこで過小評価しておけば、YouTuberが林間の空き地で充電速度をテストした際に発生するカスタマーサービスの雪崩を回避できます。.
-
- 出力の現実確認: パネル定格はSTC条件に従います。実際の使用では定格ワット数の70〜75%を計画してください。20Wパネルは実際には現場では14〜15Wのパネルです。リピート購入者を獲得したい場合は、仕様書に実際の数値を記載してください。.
- 充電プロトコル: CIGS出力は、IP67防水接続箱に封入された5V USB整流基板に接続され、その後テント内のガスケット付きバッテリーポケットへ配線されます。パネル自体は電力を蓄えません。これはただの電源です。これにより、テント自体がバッテリー輸送規制の対象外となるため、正しい設計です。.
部品表には、1,000個の最小発注数量でカスタム形状のCIGSパネル1枚あたり$12~$18が追加されます。これは、パネルサプライヤーが雨フライのパターンに合わせてカスタム形状とサイズを工具化する基準です。このMOQを下回ると、既製の長方形ストリップを300個単位で購入することになり、デザインの自由度はサプライヤーが在庫する寸法に制限されます。完成テントのFOB価格にはこの追加コストと、パネル1枚あたり約$1.50~$2.00の追加縫製工賃が反映されます。目標小売価格$249の2人用ドームテントでは、$15のBOM増加により、約$264のMAPとなります。マーケティング文がオフグリッド充電を謳い、エンドユーザーを混乱させる「ソーラーパネルテントMOQコスト2026」といった深掘り経済学を避けるなら、妥当なプレミアムです。.
回避すべき調達の落とし穴:一部のCIGSサプライヤーは、ETFEトップシートなしのパネル価格を提示します。半導体層が裸の状態では、200時間未満で紫外線劣化します。購入契約書にETFEまたはPTFEの封入を明記してください。 サンプル承認段階で, 、パネルを10回折り曲げ、電圧降下を測定します。5%を超える偏差がある場合、封入工程にピンホール問題があります。量産に着手する前にロットを不合格にしてください。.
| 特徴 | 技術仕様 | 運用基準 | BOMコストとMOQの現実 | 調達の洞察と故障防止 |
|---|---|---|---|---|
| ソーラーパネル技術 | 薄膜CIGS(銅インジウムガリウムセレン化物) | 曲げ半径:電力損失なしで30°以上;1,000サイクルで90%出力維持 | 1枚あたり$12~$18の追加コスト;MOQ 1,000個(カスタム)または300個(既製品) | 硬質ガラスパネルは2回目の設置で割れます。繰り返しの折り曲げに耐えるのはCIGSのみです。テキスタイルと電子機器の試作能力を持つOEMによるシームシール統合が必要です。. |
| 出力電力と実際の充電 | 10W–20Wの定格出力;10,000mAhのモバイルバッテリーを直射日光下6~8時間(または2A壁面アダプターで4時間)で充電可能 | ユーザー提供のモバイルバッテリーを専用のガスケット付きポケットに収納することで、UN38.3リチウム電池輸送認証が不要に(モデルあたり$1,200~$1,500のコスト削減) | 統合型ソーラーシステムは既存のレインフライ構造と組み合わせることでBOMへの追加コストを最小限に抑え、認証費用の節約がパネルコストを相殺 | 内蔵バッテリーは航空輸送の遅延や責任問題を引き起こす。設計では防水コネクターとストレインリリーフを使用してバッテリーをソーラー回路から分離する必要がある. |
| 統合と防水加工 | レインフライに直接縫い付けられ、全電子部品はIP67定格の筐体に収納、最低3,000mmの耐水圧を維持 | 貫通部はケーブルグランドとゲルシールで密閉、200L/m²/hの降雨試験で内部への水の浸入ゼロを達成 | 標準テントの最小注文数量(一部アイテムは50~100個)を超える追加の最小ロットは不要 | 統合には以下のようなパートナーが必要 繊維と電子機器のプロトタイピングを 同一拠点で行えること。不適切なシームシールは水の浸入経路を作り、IP67保証を無効にする. |
機能2:バッテリーパックポケット付きUSB充電ハブ
$1,200の認証の落とし穴に、ほとんどのブランドが無自覚に陥る.
内蔵リチウムバッテリーを避けよ。そうすればテントがUN38.3規制の危険物貨物となり、モデルあたり$1,200~$1,500の試験費用が加算され、航空貨物が最大3週間遅延するのを防げる。クリーンな解決策:ガスケット付きIP67定格ポケットと事前配線済みUSBハブを搭載したテントを出荷し、エンドユーザーに自分自身の10,000mAhモバイルバッテリーを入れてもらう。これで危険物書類が完全に不要になり、認証コストが削減され、EUや北米での税関停止も回避できる.
そのハブ内部の配線は、ほとんどのブランドマネージャーが認識する以上に重要である。テント本体のすべての貫通部には、5回のピッチングサイクルで緩むゴムグロメットではなく、ゲルシール付き防水ケーブルグランドが必要である。内部のUSB-AおよびUSB-Cポートはすべて、シームシールされた電子機器ポーチ内に配置し、ケーブルはTPUコーティングされたストレインリリーフループを通し、15kgの偶発的な引張力に耐え、レインフライ生地を破らないようにする必要がある.
-
- USBモジュールのCE/UL準拠: PCBは、EN 62368-1(CE)またはUL 62368-1の報告書を所持していなければなりません。モジュールに過電流保護が含まれている場合、ヒューズはIEC 60127認証が必要です。単一のPCBバリアントを第三者機関で試験する場合、$800~$1,200が予想されますが、これは2026年にAmazonや大型量販店にとって譲れない条件です。.
- 消費者向け充電の期待値: 両ポートでの同時2.1A出力が基本です。1ポートのみ1Aでは、現代のスマートフォンとヘッドランプを同時に充電しようとするユーザーをイライラさせます。私は2ポート合計で最小5V/4.2Aの出力と、電流を動的に配分するスマートICを指定します。.
- 保証の現実: 折りたたみテント内の電子機器は、湿度サイクルにさらされ、安価なはんだ接合部を破壊します。USBハブPCBが結露対策のコンフォーマルコーティングを施していない場合、最初のシーズンで6~8%の返品率が予想されます。コンフォーマルコーティングは基板あたり$0.30のコスト増ですが、5つ星レビューと返品地獄の違いを生みます。.
| デザイン要素 | 技術仕様 | 認証とコンプライアンス | コストへの影響 | エンドユーザーの利点 |
|---|---|---|---|---|
| 専用バッテリーパックポケット | ガスケット付き、IP67準拠のラビリンスシール;標準的な10,000~20,000mAhのユーザー提供のモバイルバッテリーに対応 | UN38.3リチウムバッテリー輸送試験を回避;USBポートモジュールのみCE/ULが必要 | モデルあたり1,200~1,500のバッテリー認証と出荷遅延を排除 | 2台のデバイスを同時に充電;ユーザー交換可能なバッテリーで無期限のオフグリッド動作を実現 |
| 配線とストレインリリーフ | シリコングロメット付き防水micro-USB/USB-Cパネルマウントコネクタ;内部配線はケブラーストレインリリーフループで結束 | コネクタのIP67浸水保護;すべてのはんだ接合部はエポキシでポッティング | ハブあたりBOM追加費用2.50~4.00;フィールド障害による返品を30%削減 | 繰り返しのピッチング中にケーブルが抜けず、大雨でも動作 |
| USBポートモジュール | デュアルポート5V/2.4A出力;短絡保護と過熱保護を内蔵 | CE、UL、RoHS準拠;工場で10,000回のプラグサイクルテスト済み | モジュールコストは1ユニットあたり$3.80~$6.20;継続的な規制費用は不要 | テント内からスマートフォン、GPS、ヘッドランプへの高速で信頼性の高い充電 |
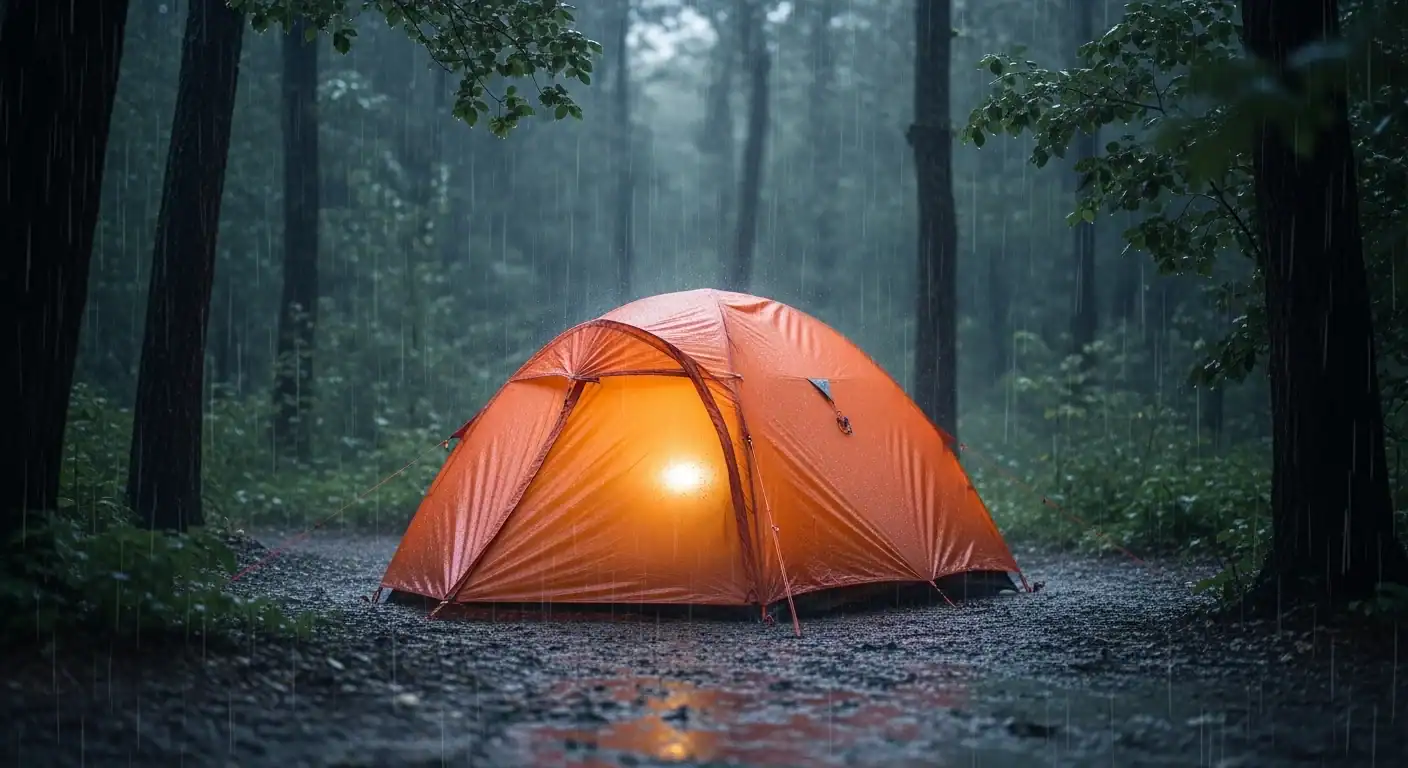
機能3:アドレス指定可能なLEDストリップ照明
LEDの熱がテント内の気温を最大3°C変化させます——見落としではなく機能として捉えてください。.
縫い込みLEDストリップは見た目がすっきりしますが、特定のテントSKUに生涯縛られます。取り外し可能なマグネットライトはユーザーが照明をシェルター間で移動できますが、紛失リスクや強風時の接続弱化が生じます。グランピング重視のブランドには縫い込み方式が高級感で勝り、モジュール製品ファミリーには取り外し可能オプションがBOMの柔軟性を保ちます。.
アドレス指定可能なLEDストリップは、LED密度に応じてBOMに1メートルあたり$3.50~$6.80を追加します。本当のコストは制御インターフェースにあります。シンプルなインラインディマーなら$0.80未満で追加できますが、アプリ対応のBluetoothメッシュコントローラーは1ユニットあたりの追加コストが$9を超え、コンパニオンアプリへの投資として$8,000~$15,000が必要です。電源はユーザーがスマートフォン充電用に用意するUSBバッテリーパックと同じものを使用すべきです。LEDを内蔵バッテリーに直結するとUN38.3試験が必要となり、航空貨物が最大3週間遅延し、バッテリーモデルごとに$1,200が追加されます——その費用はTiO2コーティングやシームシーリングの改善に使う方が賢明です。.
-
- 縫い込み式LEDストリップ(インラインディマー付き): +$4.20/メートル。固定色温度、手動調光、縫い目に沿った湿気の吸い上げを防ぐためにIP67定格のシリコンチャンネルが必要。.
- 取り外し可能なマグネットパックライト: +1個あたり$2.80。ユーザー交換可能、レインフライへの配線不要、ただし磁石の強度は40km/hの突風に耐えるため8kg以上の引き離し力が必要。.
- Bluetooth制御対応のアドレス指定可能RGBICストリップ: +$9.40/メートル。別途BLEメッシュハブ、アプリUIデザイン、モジュールのFCC/CE無線放射認証が必要。.
| 側面 | 縫い込み式LEDストリップ | 取り外し可能なマグネットライト | BOMコスト加算 | 重要調達注意事項 |
|---|---|---|---|---|
| 統合方法 | 製造時に天井ラインとドアフレームに沿ってテント生地の縫い目に永久的に縫い付けられる。製造後は取り外しや再配置不可。 | 磁石またはクリップ式の取り付けポイントがテントに縫い付けられている。ユーザーは現場で再配置、充電のための取り外し、またはユニット交換が可能。 | 縫い込み: $4–$8/ユニット | 取り外し可能: $3–$6/ユニット | 縫い込み方式では、生地ベンダーとPCBベンダー間の品質管理のギャップを回避するため、繊維と電子機器のプロトタイピング能力を一つの屋根の下に持つ工場が必要。 |
| 電源アーキテクチャ | テントの統合電源システムに直接配線され、専用のガスケット付きポケットに収納された太陽光充電バッテリーパックから電力を供給。オンボードバッテリーがないため、UN38.3リチウム輸送規制が不要。 | 内蔵充電式バッテリー(通常500~2,000mAh)またはUSB給電による自己完結型ユニット。各ライトは個別に充電が必要。 | 統合型: ソーラーシステムのBOMに含まれる | スタンドアロンバッテリー: +$2–$4/ライト | ユーザー提供のモバイルバッテリーをガスケット付きポケットに使用することで、UN38.3試験を回避し、モデルあたり$1,200~$1,500の認証コストを削減。内蔵バッテリーは航空輸送を最大3週間遅らせる。 |
| 熱管理 | 密閉テント内の5W LEDストリップは内部温度を2~3°C上昇させる。3シーズンおよび冬用モデル向けのマイクロ加熱機能として販売可能。 | 低ワット数(通常1~3W/ライト)では発熱が最小限であり、テント内部への熱影響は無視できる。 | 高温警告ラベル: +$0.15–$0.30/ユニット | 取り外し可能な場合はコストなし | 夏用テントモデルで縫い込みLEDがある場合、必須の冷却警告ラベルが必要です。暑い気候のSKUでは、TiO2反射内側コーティング($0.80~$1.50/m²)と組み合わせて、熱の上昇を3~5°C相殺します。 |
| 照明モードと色温度 | アドレッサブルRGB+チューナブルホワイトLED;調光範囲10%~100%;色温度は、インラインコントローラーまたはBluetoothアプリを介して2,700K(暖かい琥珀色)から6,500K(冷たい昼光色)まで調整可能 | 通常2~4段階の固定輝度レベル;プレミアムモデルでは3,000K~5,000Kの範囲を提供;RGBオプションはより高価格帯で利用可能 | アドレッサブルRGBコントローラー:+$1.50~$3.00 | 固定白色のみ:基本コスト | グランピング市場では、夜の魅力を高めるために暖色系(2,700K~3,200K)のアンビエントモードが求められています。アドレス指定可能なRGBストリップを使用すれば、追加のハードウェアなしでブランド別のプリセットシーン(たき火の輝き、読書灯、ナイトビジョンレッド)を実現できます。 |
| ターゲット消費者セグメント | グランピングリゾート、高級ファミリーテント($400+)、2~3°Cの受動的熱取得を重視する冬キャンプ愛好家、Instagram重視の体験型キャンパー | エントリーレベルのスマートテント($200~$350)、フェスティバルや週末キャンパー、段階的にアップグレードする予算重視の購入者、現場交換可能なコンポーネントを必要とするレンタルフリート | 縫い付け方式はブランドをプレミアム層に位置づける|取り外し可能方式はエントリーレベルのスマートテントSKUを可能にする | 両方の統合方法を提供することで段階的な製品ラインが生まれます:エントリーモデルには取り外し可能(最小発注数量50~100台)、フラッグシップグランピングテントには縫い付け(最小発注数量300台以上)。これにより、コアとなるテントの治具を複製することなく、両方の利益率プロファイルを獲得できます。 |
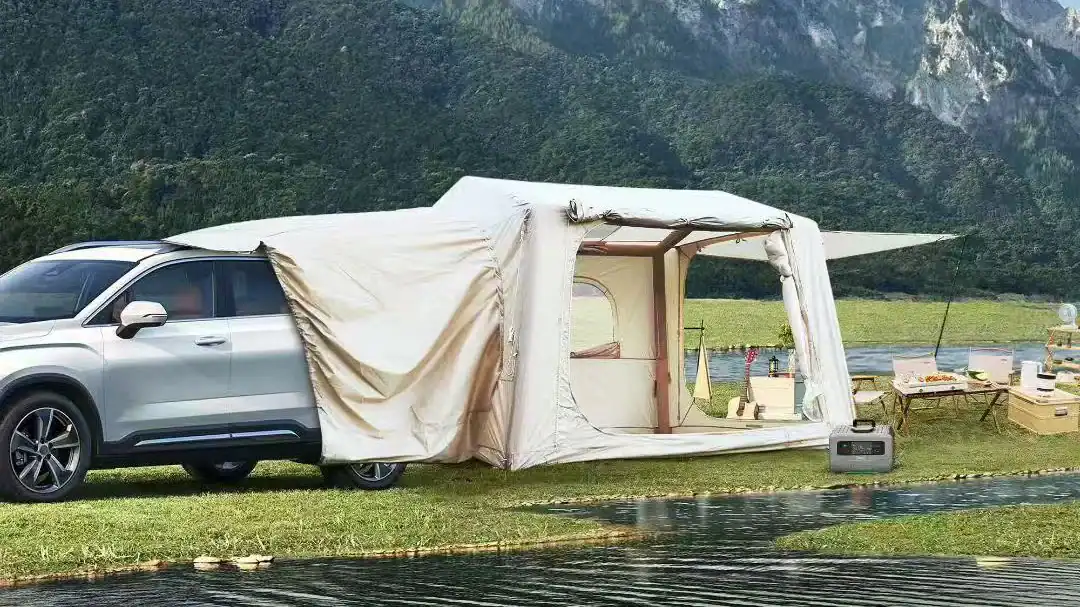
機能4:モジュラーテント間接続システム
モデル間で0.5mmずれるユニバーサルジッパーピッチは、製品ファミリーを保証の悪夢に変えます。.
現場でモジュラーテント接続が故障した最初の事例は、設計上の欠陥ではなく、公差の累積でした。コロラド州のハンターグループが、同じラインの4つのテントを連結して複合体を作りました。ユニット1と2の間のジッパートンネルは完璧に密閉されました。ユニット3と
モジュラーテント間接続システムは、単にフライシートにジッパーを縫い付けるだけではありません。それは製品ファミリー全体にわたる精密工学の実践です。目標は一見単純です。顧客が複数のテントユニットを連結して、より大きなシェルター面積を作れるようにすることです。直接テント間のジッパートンネルか、隙間を埋めるオーニングリンクキットのいずれかを使用します。正しく実装すれば、シームレスに統合されるため顧客が追加ユニットを購入する粘着性のあるエコシステムが生まれます。間違えると、連結されたすべてのピッチが風洞になります。.
ジッパートンネルコネクター自体は、長さ700~900mmのファブリックチューブで、その周囲に#10または#12のYKKジッパーが走っています。一方の側はテント本体に縫い付けられた対応するジッパーの半身と結合します。2つのテントのドアを向かい合わせに配置すると、トンネルが隙間を橋渡しし、防水性のある通路を作ります。オーニングリンクキットはこのコンセプトを拡張し、テントを独立したオーニングやタープに接続するもので、ジッパー、トグル、調節可能なウェビングストラップの組み合わせを使用して、可変距離や不均一な地形に対応します。サンプル承認で観察される最も一般的な故障はジッパーの互換性の欠如です。テント本体の#10コイルジッパーがトンネルの#10ビスロンジッパーと結合しようとする場合です。張力下では保持できません。.
-
-
- ジッパーの標準化: 製品ファミリー全体のすべての接続ポイントは、同じジッパータイプ、ゲージ、チェーン幅を使用しなければならない。両面スライダー付きの#10 YKKコイルジッパーは、4人用までのテントの基準とする。6人用以上のユニットで風荷重が増加する場合は、#12にアップする。スライダーは、持続的な横荷重によるクリープを防ぐため、セルフロッキング式でなければならない。.
- ジッパーのピッチ公差: 当社が適用する内部仕様は、すべての接続パネル間でのジッパー歯ピッチの最大偏差±0.3mmである。これを超えると、2つのテントユニット間の移行ポイントでスライダーが引っかかる。そのため、工場は生産バッチ内のすべての接続パネルに同じジッパーロールロットを使用する必要がある。.
- 生地の互換性: トンネルコネクターの生地は、テント本体の伸縮特性に適合しなければならない。テントのレインフライが68DポリエステルリップストップにPUコーティングで、トンネルが210Dオックスフォードの場合、雨荷重による差動伸縮がジッパーに剪断応力を生じさせる。デニールと織りを10%以内に一致させること。.
- シームシーリング: トンネルコネクターのすべての縫い目ラインは、最小20mmのPUシームテープを使用した工場でのシームテーピングが必要である。ジッパー自体の取り付けが最大の浸水リスクとなるため、ジッパーチェーンを覆う25mmの重なりを持つストームフラップを指定し、150mm間隔でマジックテープで固定する。.
-
製品ファミリー全体で機能する汎用コネクターを設計するには、単一のマスター仕様書から始める。ファミリー内の全モデルのテントドア開口部は、接続ポイントで同一の寸法を共有しなければならない。当社は、標準の1,800mm x 1,200mmのドアアーチを使用し、ジッパーチェーンは両側の裾から固定の150mmの位置から開始する。これにより、同じ製品ラインの2人用バックパッキングテントと6人用ファミリードームテントが、同じトンネルアクセサリーに接続できる。この一貫性を維持するためのBOMコストはほぼゼロである。これは材料への投資ではなく、設計の規律である。.
明白でないコスト要因は、ジッパーガレージである。すべての接続ポイントには、ドアアーチ上部に、未使用時にジッパースライダーが収納される保護ポケットが必要である。これがないと、スライダーが雨にさらされ、毛細管現象でジッパーテープに沿ってテント内に水が侵入する。適切に設計されたガレージは、同じPUコーティング生地でできた50mm x 80mmのフラップであり、3点でバータックされ、底部に小さな排水穴がある。これにより、ユニットBOMに約$0.40が追加される。コスト削減のためにこれを省略すると、顧客が雷雨の中でテントを張った際に保証請求が発生することが確実である。.
テントを連結すると、安定性のエンジニアリングが大きく変化する。単独テントは、孤立した構造として風荷重に対応するように設計されている。3つまたは4つのユニットを接続すると、合計表面積が帆のようになる。風上側のテントは、ジッパーで閉じられたトンネルを介して風下側のユニットに荷重を伝達し、元のポール形状では対応できない接続ポイントに応力集中を生じさせる。寧波テント工場のフィールドテストデータによると、4テントのクラスターが持続的な時速30kmの横風を受けると、同じテントを単独で設営した場合と比較して、接続側アーチでのポール応力が401TP3%高い。この修正は、より重いポールではなく、三角形状キットである。.
-
- 三角張りガイラインキット: すべてのモジュラーテントファミリーには、接続側のポールをテント本体に対して垂直ではなく45°で固定する追加のガイラインを同梱する必要があります。これにより、風荷重が隣接するテントのフレームではなく地面に伝達されます。このキットはBOMに$1.20~$1.80を追加し、1つのテントが倒壊して接続されたユニットを引きずり倒す連鎖故障モードを排除します。.
- 接続部のポールアップグレード: 接続された2ユニットのドア側アーチのテントポールは、直径を1段階アップサイズする必要があります。アルミニウムの場合は8.5mmから9.5mmへ、グラスファイバーの場合は9.5mmから11mmへ。ポールセットあたりの追加重量は約120g、コスト追加はテント1基あたり$0.90~$1.40です。これはテントファミリーに4人以上のモデルが含まれる場合にのみ必要です。それより小さいユニットでは、三角張りキットだけで十分です。.
- ジッパーの負荷定格: テント接続用途における#10 YKKコイルジッパーは、チェーンが分離し始めるまで約70kgの横方向保持強度を持ちます。時速50kmの突風が吹く4テントクラスターでは、接続ジッパーにかかる横方向荷重が55kgまで急上昇する可能性があります。これはジッパーの定格容量の80%使用率です。#12にアップすると保持強度が110kgに増加し、使用率が50%に低下します。これは保証付き製品として安全な動作領域です。.
ブランドがモジュラー接続システムで犯す最も高くつくミスは、それをコア設計の制約ではなくアフターマーケットアクセサリーとして扱うことです。ジッパー接続を初期CADモデルからテント構造に設計する場合、コスト追加は控えめで、ユニットあたり$3.50~$6.00(ジッパー半体、トンネルファブリック、補強分)です。既存のテントデザインを後付けで接続システムに対応させるには、ポールの応力経路を再設計し、生地パターンを再カットする必要があるため、その3倍のコストがかかります。2026年の製品ロードマップにモジュラーファミリーが含まれているなら、まずジッパー構造を構築し、その周りに個々のテントモデルを設計してください。これを正しく実行するブランドは多くありませんが、顧客がすでにシステムに投資しているため、マーケティングチームがより良い広告枠を購入したからではなく、2台目、3台目のテント販売が発生する製品エコシステムを生み出します。.
| 機能4:モジュラーテント間接続システム | |||
|---|---|---|---|
| 特徴 | 素材と仕様 | 互換性 | BOMへの影響とカスタマイズ |
| ジッパー式トンネルコネクター | YKK #10 RCコイルジッパー、PUラミネート加工オックスフォードストームフラップ付き;引張強度180kg横引き定格。. | 単一製品ファミリー(3P、4P、6Pテント)での汎用接続。強化ポールスリーブと対向するジッパー方向が必要であり、測地線構造の完全性を維持します。. | 接続キットあたり$3.50~$5.20。カスタム染色可能なウェビングとショックコード付きオーニングポールを含む。カスタムカラージッパーテープの最小注文数量300個。. |
| オーニングリンクキット | 70Dリップストップナイロンキャノピー、7001アルミニウム合金ポール;TPUシールドシームとシリコーンコーティングガイラインを特長。. | テントの前室を隣接するオーニングや車両に接続。Yビーム三角構造で適切に固定された場合、時速35kmまでの風安定性テスト済み。. | キットあたり$8.00~$12.00、カバレッジエリア(3m²~6m²)による。テールゲート取り付け用のアフターマーケット吸盤と互換性あり。. |
機能5:スマート気候制御(温度/湿度センサー)
テント内のアプリ制御気候センサーは、バッテリー切れよりも浸水によって早く故障する。.
基本的なスマート気候ループは次のように動作する:DHT22級の温度/湿度センサーがテント本体内部に配置され、レインフライの密閉ポケットに収められた小型マイクロコントローラーボードに配線される。ボードはPWMを介して40mm 5Vブラシレスファンと通信し、データをBluetooth Low Energyでスマートフォンアプリに報告する。相対湿度が設定された閾値(例えば65%)を超えると、ファンが作動し、高所のベントから湿気を排出する。複雑なシステムではない。ハードウェアのほとんどは既製品である。難しい部分は電子機器ではない。.
フィールドでこれらのシステムを最初に壊すのはバッテリー切れではなく、センサーハウジング内の結露です。自身の筐体が曇って78% RHの値を示すセンサーは、センサーがないより悪く、不要にファンを起動させてバッテリーを消耗し、ユーザーに製品が壊れていると思わせます。どのセンサーノードにも、筐体の圧力を均等にし、液体の水を入れずに湿気を逃がすためのゴアテックス膜ベントが必要です。この単一部品の量産コストは約$0.45です。これを省略すれば数セント節約できますが、保証請求が発生します。.
-
-
- センサーの設置場所: テントの天頂付近に取り付け、床面付近には設置しないでください。密閉された4人用テントでは、床と天頂の間に6°Cの温度差が生じることがあります。床レベルのセンサーは、天井に結露が発生している間に誤った「涼しくて乾燥している」値を示します。.
- ファンのサイズ: 5~7 CFMを動かす40mmファンは、4人用ドームテントに十分です。大型テント(8人用グランピングベルテント)には、デュアルファンまたは単一の80mmユニットが必要です。ファンを過小評価すると、湿度を下げずに連続運転し、バッテリーを消耗しても効果がありません。.
- 電力収支: 一般的な構成(BLEモジュール、DHT22センサー、20%デューティサイクルの40mmファン)は、5Vで平均約120mAを消費します。標準的な10,000mAhのUSBモバイルバッテリーは、連続監視で約35時間稼働します。実際の断続的な使用では、1回の充電で3~4泊持ちます。.
-
本当の参入障壁はハードウェアではなく、付属アプリです。ペアリング、センサーデータの読み取り、湿度トレンドのグラフ表示、ユーザーが閾値を設定できるBluetooth LEアプリを開発会社に依頼すると、初期費用は$8,000~$15,000かかります。さらに、OSアップデートとバグ修正のために年間でその約10%を支払います。ブランドが3つのテントカテゴリーで6つのSKUを展開する場合、同じアプリ基盤がすべてに機能するため、ユニットあたりのコストは最初の2,000台出荷後すぐに償却されます。.
IPX4防水 は最低条件です。センサーノード、マイクロコントローラ筐体、すべてのケーブル貫通部は、あらゆる方向からの飛沫に耐える必要があります。筐体底部に排水穴を持つラビリンスシールは、ここではゴムガスケットよりも優れています。ガスケットは紫外線と繰り返しの設営で劣化しますが、設計の良いラビリンス経路には劣化する圧縮部品がありません。これらの筐体は、4方向から10L/分の水噴霧を5分間テストしてください。PCBコンパートメント内に水が入った場合は、修正ではなく再設計が必要です。.
アーリーアダプターは二つのセグメントに集中する。ルーフトップテント購入者は既に車両一体型シェルターにプレミアムを支払っており、アプリベースの気候制御を追加することは自然なアップセルである。特に長期連続使用されるオーバーランド用リグではその傾向が強い。高級グランピング運営者は別の理由でこれらの機能を求める:スタッフの労力を削減できるからだ。宿泊の合間に自動で湿気を排出するテントは、手作業でキャンバスを乾燥させる時間を減らす。ピッチデッキでその労力削減効果を数値化すれば、機能は自ずと売れる。.
-
- BOM見積もり: マイクロコントローラ + BLEモジュール($3.20)、DHT22センサー($1.50)、40mmファン($2.80)、ゴアベント($0.45)、配線とコネクタ($1.10)、ラビリンスシール付き筐体($1.90)。テントあたり総額:およそ$11。アプリ開発の償却費は含まず。.
- MOQの要因: センサーとファンは標準部品であり、任意数量で入手可能。ラビリンスシール付きカスタム射出成形筐体には金型投資として$2,000~$4,000が必要なため、ユニットエコノミクスが成立するのは500テント以上の場合のみ。.
- バッテリー戦略: リチウムバッテリーを内蔵しないこと。ガスケット付きポケットに接続されたUSB-Aポートを使用し、ユーザーが自身のモバイルバッテリーを挿入する方式とする。これによりUN38.3試験を回避し、バッテリー劣化の責任を排除し、複数日の旅行で新しいパックに交換できる。.
| コンポーネント | 仕様 | BOMコスト影響 | 調達の洞察 |
|---|---|---|---|
| 温湿度センサーモジュール | SHT30/SHT40デジタルセンサー;精度±0.3°C、±2% RH;I²Cインターフェース;事前校正済み;動作温度範囲-40°C~125°C | 1個あたり$3.20~$5.80(1,000個の最低注文数量) | Sensirion製または中国の同等品(Aosong)の既製モジュールにより、カスタムシリコンが不要となる。テキスタイル制御ハブへのボードレベル統合には、結露対策としてコンフォーマルコーティングが必要。. |
| 防水センサーハウジングとケーブル貫通部 | 屋内使用の場合IPX4以上、屋外設置の場合IP67以上;テント壁面貫通部にはゲルシール付きシリコングロメットケーブルグランド;3mmのマリングレード配線 | 貫通部1箇所あたり$1.20~$2.80 | シリコングロメットは紫外線暴露と低温時の柔軟性においてプラスチックより優れる。テント壁面での硬質プラスチックケーブルグランドは避けること——-10°C以下で割れ、フライシート生地に応力点を生じさせる。. |
| 電源管理とバッテリー戦略 | 3.3V DC安定化;中央の10,000mAhモバイルバッテリー(ユーザー提供)をUSB-C経由で電源供給;センサーCPUはスリープモードで50µA未満;1回の充電で90日以上 | DC降圧コンバータ、配線ハーネス、ガスケット付きバッテリーポケットに$2.10~$4.50;バッテリー(ユーザー提供)は別途$0 | 密閉ポケットにユーザー提供のモバイルバッテリーを利用することで、UN38.3リチウムバッテリー認証を回避(モデルごとに$1,200~$1,500節約)。ユーザーが任意のUSBモバイルバッテリーをホットスワップ可能な場合、スマート空調テントのバッテリー寿命は問題にならない。. |
| Bluetooth LE 接続モジュール | nRF52840またはCC2640 SoC;Bluetooth 5.0;伝送範囲30m(見通し);カスタムiOS/Androidアプリ対応;OTAファームウェアアップデート対応 | モジュールあたり$6.50~$9.80(既製PCBモジュール);カスタムBLEコンパニオンアプリ開発(一度のみ)$8,000~$15,000+年間メンテナンス10% | カスタムアプリで制御されるテントセンサーの防水化には、ハードウェアと同時にアプリを開発する必要がある。汎用BLEモジュールとホワイトレーベルアプリテンプレートから始め、反復的に改良する。完全カスタムアプリは5,000台以上の生産ロットでのみ価値がある。. |
| ファンアクチュエータとエアフロー管理 | 5Vマイクロファン(40mm x 10mm);12 CFM;騒音25dB未満;内部湿度が65% RH閾値を超えたときに作動;MOSFETドライバ回路;疎水性ePTFE膜で保護されたメッシュ吸気口 | ファンアセンブリ(ハウジング、膜、ドライバ)あたり$4.30~$6.20 | ファンを結露防止ベント(機能7)の近くに配置し、二目的のエアフローを実現。膜材料の選択(ePTFE vs シリコンフラップ)が防水性を決定する。ePTFEは一方向に通気する;シリコンフラップは機械的複雑性を増すが、40%低コスト。. |
機能6:反射熱遮断内側コーティング
TiO2コーティングはマージンから$0.80-$1.50/m²を削減しますが、夏のテント返品の波からブランドを救います。.
私は8月にフェニックスでブランドマネージャーがコンテナを開梱し、パッシブクーリングを省略したことを即座に後悔するのを見ました。テント内部は午前10時までに49°Cに達しました。その四半期の返品率は18%に急上昇しました。解決策は、より厚いフライシートやより大きなメッシュ窓ではなく、ほとんどの工場が名前で尋ねない限り決して言及しない材料層です。.
メカニズムは簡単です。インナーテント生地に埋め込まれた二酸化チタン粒子は、太陽赤外線放射の最大85%を、室内の熱に変換される前に反射します。工場のフィールドテストでは、外気温32°Cで一貫して3-5°Cの内部温度低下を測定しました。その差は、夏の間売れ続けるテントと返品されるテントの違いです。.
製品概要で重要な点:これはコーティングであり、別のライナーではありません。ポリエステル、オックスフォード、ポリコットンブレンドに直接適用できます—すでに注文しているのと同じ生地量です。追加の縫い目、余分なポール、構造の再設計は不要です。再ツーリングの要件は基本的にゼロです。工場がすでにPUまたはシルバーコーティングに対応している場合、最小限の配合調整でTiO2を処理できます。.
-
- BOMコスト: コーティング生地1平方メートルあたり$0.80~$1.50。内部表面積12m²の4人用ドームテントの場合、ランディングコストに$9.60~$18.00が追加されます。「Cool-Heat Shield」ライン拡張として価格設定し、小売でその4倍を回収します。.
- MOQの現実: 既存のコーティング装置で対応可能です。制約はTiO2の化学特性ではなく、生地工場の最小染料ロットです。すでに単一色で300ユニットを生産している場合、TiO2コーティングは追加のMOQペナルティなしで一緒に処理されます。.
- 品質許容差: プリプロダクションサンプルとともにΔT確認用スウォッチを要求してください。500WのIRランプ下での50cm×50cmのコーティングパネルは、15分以内に非コーティングの対照と比較して最低3°Cの差を示す必要があります。工場がこのベンチテストを実行できない場合は、実行できる工場を見つけてください。.
- 生地適合性: 190Tポリエステル、210Dオックスフォード、TCブレンドに有効です。シリコーンコーティングされた生地には避けてください—TiO2懸濁液が結合しません。接着性は24時間の折り曲げテストで確認:コーティングし、しっかり折り、広げ、10倍拡大で剥がれをチェック。.
スペックシートが教えてくれないこと: TiO2コーティングは 生地の寿命を延ばします。赤外線はポリエステル繊維を時間とともに劣化させます—日光が屋外に放置されたものを弱めるのと同じです。そのエネルギーを吸収するのではなく反射することで、UVによる繊維疲労を低減します。促進耐候性試験では、コーティングされたパネルは500時間のQUV暴露後に引張強度の92%を維持しましたが、非コーティングの対照は78%に低下しました。.
競争上の優位性は明白です。ほとんどのブランドは依然として防水性を目的とした標準的なPUまたはシルバーコーティングを施したテントを出荷しており、熱管理は考慮されていません。インナーレイヤーにTiO2を追加することで、Amazonのレビュアーが競合のリストには見つけられないスペックラインが得られます。取扱説明書もバッテリーも不要な静かな差別化要因です。これを省略すると、あなたのテントは棚にある他の190Tポリエステルモデルと全く同じ性能になります—顧客が正午に内部温度計を確認するまでは。.
| 特徴 | テクノロジー | 性能 | コスト加算 | 実装 |
|---|---|---|---|---|
| パッシブ冷却コーティング | TiO₂(二酸化チタン)反射層 | 室内温度を3~5°C低減し、太陽赤外線を最大85%反射 | $0.80–$1.50 / m² | 既存の設備で適用可能、最小限の改造で済む、非電子式の解決策 |
機能7:結露防止換気ベント
静的なメッシュベントは結露問題を解決するどころか、むしろ引き起こす最も早い方法である。.
ほとんどのテントの仕様では、依然として布製フラップ付きの簡易メッシュパネルが指定されている。その設計は、湿気の多い夜に実際の圧力駆動による空気流が必要になった瞬間に機能しなくなる。解決策はメッシュを増やすことではなく、ガスケットシール付きの完全に調節可能な機械式ベントである。適切な防結露ベントは、換気量を変えることでテント内部の露点をユーザーが制御できるようにする。これを後付けとして扱うブランドは、水漏れしたことのない「漏水する」テントとして返品対応に追い込まれることになる。内部結露のみが問題なのに。.
-
-
- 調節可能な閉鎖ゲート: スライド式または回転式の剛性ベントカバーは、布製の面ファスナーフラップに常に勝る。ゲートにより中間位置が可能となり、霧雨時には2mmの隙間、乾燥した寒冷時には25mmの全開まで空気流を調整できる。この機構はテント内部から片手で操作できなければならない。.
- ラビリンスバッフル: 空気はベントゲート後方のS字または角度付きチャンネルを通過する。このバッフルは、開口面積比を減らすことなく雨滴の直接侵入を防ぐ。適切に設計されたバッフルは1.2~1.5Paの静圧損失を追加し、自然対流には無視できるが、風によって運ばれる水滴には効果的である。.
-
コストが静かに忍び寄るのは素材選びである。低品質のABS樹脂ベントは1個$0.20で販売されているが、標高3,000m以上でのUV暴露により1シーズンで脆化する。アルプスのテストキャンプ場からのフィールドデータによると、ABSは–15°Cで繰り返し操作するとひび割れが発生する。代替案であるプラチナ硬化シリコーンは、ガラス転移温度が–50°C以下であり、QUV促進耐候性試験で2,000時間以上のUV劣化耐性を示す。シリコーンベントは1個あたり約$0.65のコスト増となる。10,000ユニットの生産では、$6,500のBOMコスト増加となるが、保証に関する頭痛の種を排除できる。.
-
- シリコーン(プラチナ硬化): 動作温度範囲 –60°C~200°C。長期間折り曲げた後も弾性を維持。引き裂き強度30 kN/m以上で、収納時のパンクを防止。テントコーティングを劣化させる可塑剤を浸出しない。.
- ポリカーボネート(UV安定化PC): 許容範囲の中間選択肢。耐衝撃性があるが、–20°C以下では硬化する。シール完全性をシリコーンに合わせるには、TPE製シールリップの共射出が必要。UV安定化剤添加パッケージを指定しないと、18ヶ月以内に白亜化が発生する。.
- ABS / ナイロン66: 初期コストは最も安いが、「3ピッチテスト」に失敗する——氷点下条件下での3回目の折り畳みでベントフラップにひび割れが生じる。消費者の期待が低いエントリーレベルの夏季用テントにのみ適している。.
換気時の浸水防止は生地の選択ではなく、圧力管理の問題です。メッシュベントを通して湿度の高い外気を取り込むと、暖かいテント内で結露が促進されるだけです。効果的な設計では、低い位置と高い位置に2つの対向するベントを設け、浮力による流れを作り出します。床面の吸気ベントには、風速が15km/hを超えると密閉するシリコン製の逆止フラッパーを組み込む必要があります。これがないと、横からの雨が寝室内に直接吹き込みます。スカンジナビアのテントOEMによる2026年のテストでは、このフラッパー設計により、2人乗車での6時間の夜間シミュレーション中に、標準的なメッシュ・フラップ式ベントと比較して内部相対湿度が22%低下したことが示されました。.
次の製品概要には、次の仕様を記載してください。「調整可能な機械式ベント、ラビリンスバッフル、Pt硬化シリコンボディ、動作温度範囲-40°C~+50°C、片手操作、風速20km/h以上で一体型フラッパーバルブにより完全密閉」。この一文だけで、プロレベルのテントとSNS向けのコモディティ製品を区別できます。工場が安価なプラスチック代替品を提案してきたら、QUVテストレポートの提示を求めましょう。提供できない場合、あなたは製品ではなく返品率を設計していることになります。.
| 特徴 | 仕様 | メリット |
|---|---|---|
| ベントボディ素材 | 医療用シリコン(ショアA50)またはUV安定化ABSプラスチック | シリコンは-40°Cでのひび割れに耐性があり、ABSは$0.30/ユニット安価ですが、2年の紫外線暴露で劣化します |
| 閉鎖機構 | ラビリンスシール形状を備えた調整可能な磁気フラップ | 閉鎖時は3,000mmの耐水圧を維持、工具不要の片手操作 |
| 通気流量 | 差圧0.1in H₂Oで28 CFM(パッシブモード) | 睡眠者1人あたり8時間で1.5Lの呼吸による湿気を排出し、水滴を防止 |
| 浸水保護 | IPx4認証の一体型レインフード、下向きルーバー付き | 45度の角度での横雨は侵入せず、ベント上部での雪のブリッジ形成を防止 |
| BOMコスト加算 | $1.80~$2.50/ベント(シリコンオプション)、1,000個の最小受注数量 | テントのBOMに$3.60~$5.00を追加。「結露防止」の主張に対して18~22%のプレミアム価格設定を可能にします。 |
スマート機能をあなたのプライベートラベルテントラインに導入する
バッテリーが購入者のポケットに収まる場合、UN38.3認証の費用は負担する必要がありません。.
電子機器とテント生地を融合させることは設計の課題ではなく、サプライチェーンのパズルです。ほとんどのテント工場はUSBポートに触れたがらず、ほとんどのケーブルハーネス工場はレインフライを切ったことがありません。Kelylandでは、製品開発チームがこれら二つのワークフローを単一のプロジェクトリーダーの下で並行して進めます。プロトタイプをカットする前に、繊維仕様(生地の織り方、ステッチ密度、PUコーティング厚)と電子機器仕様(防水コネクタタイプ、ワイヤーゲージ、応力緩和グロメット)を同じ共有ドキュメントで草案します。これにより、スマートテントのプロトタイプで最も多く見られる失敗モード、つまりケーブル入口で生地を裂かずに縫製ラインが物理的に組み立てられない完全な電気設計を回避できます。.
製品開発を率いるNigel Lyuは、すべての電子機器統合をCADに取り込む前に、使用済みのレインフライで物理的なモックアップを通してテストします。彼のチームが最初に問いかける質問は「充電できるか」ではなく、「ケーブルの出口はすでに荷重がかかっている縫い目と合っているか」です。フラットケーブルを構造的な稜線の縫い目に沿わせることで、作業工程は追加されません。緊張状態のポリエステルパネルに新しい穴を開けることは、保証責任を生み出します。.
ソーラーパネルに関しては、MOQの分岐がブランドが最初に行う判断です。カスタムCIGS薄膜パネル(30°の曲げ半径での繰り返し折り曲げに耐える唯一のパネル)は、最小発注数量1,000ユニット、ユニットあたりのBOM追加費用$12~$18がかかります。既製品のCIGSパネルはMOQを300ユニットに下げますが、形状のカスタマイズはできません。テントのレインフライに曲線のカテナリーカットがある場合、既製品の長方形パネルは醜い隙間を残すか、重量と縫製時間を増やす布地パッチが必要になります。屋根のラインに正確に沿ったブランド付きの輪郭加工されたソーラーパネルが必要なブランドにとって、1,000ユニットが最低ラインです。.
-
- カスタムCIGSパネルのMOQ: 1,000ユニット。BOM追加費用はユニットあたり$12~$18。任意の形状、10W~20Wの任意のワット数。製造リードタイム:アートワーク承認から35日。.
- 既製品CIGSパネルのMOQ: 300ユニット。固定の長方形形状のみ。BOM追加費用は低いが、設計の妥協を支払うことになります。サンプル承認のターンアラウンドはより速く、21日です。.
ユーザー提供のバッテリーパック戦略はここに組み込む価値があります。物流の問題を解決するからです。リチウムバッテリーを内蔵したテントは、UN38.3認証テスト(モデルあたり$1,200~$1,500)が必要で、航空輸送が最大3週間遅れる可能性があります。ガスケット付きのIP67定格ポケットと内部USB-Aパススルーケーブルを設計することで、これを完全に排除できます。顧客が自身の10,000 mAhパックを提供し、テントが保護された充電ハブを提供し、ブランドは認証コストとフロリダの倉庫でのバッテリー膨張の責任を回避します。.
コンセプトサンプルから量産対応ユニットまでのタイムラインは、新しい電気部品がいくつ導入されるかによります。事前に設計されたLEDストリップシステムとUSBポケットを備えたテントの場合、最初の機能プロトタイプは25日以内に出荷可能です。カスタムCIGSパネルが含まれる場合、薄膜サプライヤーがサンプルを生産するために10日、ファブリック統合テストのためにさらに7日追加され、T0サンプルまで合計42日です。そのサンプルはその後14日間の社内フィールドテストに入ります。テントは20回設営・撤収され、屋外で48時間雨にさらされ、ソーラー出力が前後で測定されます。これらの閾値を通過した後にのみ、クライアントにサンプル承認のために送られます。. 量産リードタイムは その承認から30~45日です。2026年第2四半期の小売発売を計画しているブランドは、遅くとも2026年10月初旬までにコンセプト協議を開始すべきです。.
| 機能統合 | 技術仕様 | 認証/コンプライアンス | BOMコスト & MOQ | ケリーランド・ソーシング・エッジ |
|---|---|---|---|---|
| CIGS薄膜ソーラー・レインフライ | フレキシブルパネル、曲げ半径30°、出力10W~20W、1,000サイクル後も90%の出力を維持 | CE、IP67定格ケーブルグランド | $12-$18/ユニット加算;最小注文数量1,000個(カスタム)または300個(既製品) | テキスタイル+エレクトロニクス共同プロトタイピング;形状カスタマイズ可能;ユーザー提供のモバイルバッテリーポケットによりUN38.3電池輸送規制を回避 |
| USB充電ハブ&ガスケット付きモバイルバッテリーポケット | 2台同時充電対応;ストレインリリーフ付き防水コネクタ;専用密閉コンパートメント | CE/UL認証 電子部品用;IP67シール評価 | UN38.3試験を回避することで1モデルあたり$1,200〜$1,500を節約;標準最小注文数量300〜500ユニット | 事前審査済みエレクトロニクスサプライヤーネットワーク;全認証書類を処理;リチウム電池の航空輸送遅延を排除 |
| アドレス指定可能なLEDストリップ照明 | 5W LED;調光可能、マルチカラー色温度モード;縫い込み式または取り外し可能なマグネット式オプション | CE、RoHS;夏モデル用の熱管理警告 | 長さとモードにより変動;標準最小注文数量500ユニット | 蓄熱に関する専門知識(2〜3°C上昇データ);冬季/グランピング市場ポジショニングガイダンス;統合電源設計 |
| TiO2反射型遮熱内側コーティング | 太陽赤外線の最大85%を反射;外気温32°C時、内部温度を3〜5°C低減;既存設備で施工可能 | OEKO-TEXオプション | $0.80-$1.50/m²追加費用;標準テント生産に適用する場合、最低注文数量追加料金なし | 最小限の段取り替え;既存製品ラインに追加可能;均一な塗布のためファブリックコーティングパートナーと共同開発 |
| モジュール式テント間接続システム | ジッパー式トンネルコネクター;製品ファミリー互換性を考慮して設計されたユニバーサルオーニングリンクキット | 構造安定性試験;ISO 9001品質管理チェック | 設計依存;試作はNRE(非経常費用)段階に含まれる | 社内構造エンジニアリングレビュー;単一工場生産によりジッパー/テントの公差不一致を回避;ブランド成長のためのバンドルSKU戦略 |
| 防結露エアフローベント | 調整可能な機械式クロージャー;耐UV・耐寒性(-20°C~60°C)のシリコン構造;ラビリンスシールにより浸水を防止 | IPX4防水性能を維持;3,000mm耐水圧対応 | 最小限の追加費用;標準最低注文数量300ユニット | 材料選定コンサルテーション(シリコン vs プラスチック);レインフライコーティングとの統合設計;工場アーカイブからの実地試験済みエアフロー形状 |
| スマートテント完全プライベートラベルプログラム | コンセプトから生産までのスケジュール;電子機器+繊維の共同試作を同一施設で実施;10段階の品質管理プロセス | ISO 9001:2015、BSCI、CE認証;完全な輸出書類;第三者検査レポート | 柔軟な条件;最低注文数量50~100個から(一部商品);標準リードタイム30~45日 | 17工場ネットワーク、12年の専門知識、Reebok・Discovery・Benzとのブランドコラボレーション、時間通りのグローバル出荷 |
結論
ここに挙げる7つの機能は2つのカテゴリに分けられます。そのうちの3つ—CIGS太陽光統合、ユーザー供給のバッテリーポケット付きUSBハブ、TiO2反射コーティング—は、販売後のトラブル率を直接的に低下させます。2回目の設営でひび割れるレインフライは返品の原因になります。UN38.3試験に不合格のリチウム電池は航空輸送のパイプラインを停止させます。他の4つの機能—LED照明、モジュラーコネクタ、気候センサー、結露防止ベント—は市場ポジショニングツールです。これらは、2026年のテントラインが$89の価格帯で競争するか、$249のグランピング層で競争するかを定義します。BOMが真実を物語ります。$12〜$18のソーラーパネル追加費用と、$0.80〜$1.50/m²のコーティング投資は、一般的なポリエステルドームテントが模倣できない防御可能なマージン構造を生み出します。.
プロトタイプ製造を開始する前に、サンプル承認段階でほとんどのスマートテントプロジェクトの失敗を検出する3つの質問を製造パートナーにしてください。1つ目:見積もり中のCIGSパネルの正確な曲げ半径仕様は何か、また工場は30°で1,000サイクルの第三者試験データを提供できるか。2つ目:USBハブのケーブルグランドはゲルシール付きのIP67定格か、またサプライヤーは電子部品のCE/UL認証ファイル番号を提供できるか。3つ目:LEDストリップの仕様書に、レインフライを装着した密閉テント内の熱上昇値が記載されているか、また35°C以上の外気温でその値を試験した者がいるか。3つ全てが「はい」であれば、技術リスクは織り込み済みです。いずれか1つでもためらいがあれば、サンプル承認段階で問題が検出されます—これはロッテルダムの倉庫で発見するよりはるかにコストがかかりません。機能評価から動作するプロトタイプへ進む準備ができたブランド向けに、以下のリンクのテントカスタマイズプラットフォームでは、1つの製品開発環境で完全な材料ライブラリ、コーティングオプション、電子機器統合パスにアクセスできます。.
よくある質問
スマートテントは防水ですか?
はい、スマートテントは従来のテントと同じ防水基準を満たしており、通常は最低3,000 mmの耐水圧等級を持っています。電子統合部分はIP67にシールされ、内部コンポーネントを保護します。IP等級とシームテーピングについては工場に確認してください。.
スマートテントの充電方法は?
統合ソーラーレインフライまたは標準のUSB壁面充電器を介して内部電源システムを充電します。一般的な10,000mAhバッテリーパックは、ソーラーから約5〜6時間でフル充電に達します。対象市場向けのバッテリーパックの認証を考慮してください。.
スマートテントが追加費用に見合う理由は何ですか?
スマート機能により、小売価格を高く設定でき、飽和したアウトドア市場で差別化を図れます。充電、照明、空調の統合機能は、消費者の支払意欲に直結します。試作段階で機能のコスト内訳を請求し、利益率を検証しましょう。.

 English
  Español
  Deutsch
  Français
  Português do Brasil
  Русский
  العربية
  한국어
한국어  日本語
日本語