 Zum Inhalt springen
Die Überprüfung der Zeltstichqualität ist der erste Kontrollpunkt, den Käufer festlegen sollten, bevor sie einen Lieferanten, ein Budget oder einen Produktionsslot genehmigen. Viele E-Commerce-Verkäufer haben dies auf die harte Tour gelernt: Das Vorserienmuster besteht jede optische Prüfung, der FOB-Preis wirkt knapp kalkuliert, und dann landet der Container mit 500 Einheiten, die nicht einmal einen einzigen Wochenendausflug überstehen. Ich habe erlebt, wie ein Käufer $50K für eine Charge von 4-Personen-Zelten verlor, weil die Massenproduktion TEX 70 Garn an Nähten verwendete, die für TEX 90 spezifiziert waren. Das Muster sah gut aus. Die Ware kam mit einer Stichdichte von eher 6 SPI anstatt der vereinbarten 10 an. Sie bekommen keine zweite Chance, die Zeltstichqualität zu überprüfen, sobald die Versandrechnung bezahlt ist – Sie tun dies im Stadium der Musterfreigabe, bevor auch nur ein Produktionsmeter zugeschnitten wird.
Die Stichzahl ist keine kosmetische Spezifikation. Für einen Online-Verkäufer ist es der Unterschied zwischen einer Rücklaufquote von 2% und einer Rücklaufquote von 15%, die Ihre Verkäufermetriken zerstört. Nahtversagen macht etwa 70% der Zeltretouren im Online-Kanal aus, basierend auf Berichten von Kategoriemanagern, und die Behebung ist selten ein vollständiger Stoffaustausch – es geht fast immer auf Game-Spezifikation, Nadelgröße oder fehlende Bartacks zurück. Wenn Sie einen einzigen Benchmark wollen, der schwache Lieferanten aussortiert, legen Sie diese Qualitätstoleranz fest: Hauptstrukturnähte bei 8–10 SPI, gebondetes Nylon TEX 90 (Spec 92) Garn und 28 Bartacks an jeder Ecke und jedem Befestigungspunkt der Gurte. Notieren Sie diese Zahlen und werfen Sie sie in Ihren nächsten Lieferantenanruf. Wenn die Fabrik bei einem der drei Punkte zögert, brechen Sie ab.
Warum die Stichzahl ein versteckter Qualitätsindikator ist
Nahtversagen macht etwa 70% der Zeltretouren in E-Commerce-Kanälen aus.
Ich bin durch Fabrikhallen gegangen, in denen ein Käufer vor einem zerrissenen 6-Personen-Kuppelzelt stand, der FOB-Preis bereits bezahlt, der Container bereits auf dem Wasser. Die Musterfreigabe war drei Monate zuvor perfekt verlaufen. Das Vorserienmuster bestand alle optischen Kontrollen. Aber die Massenproduktion verwendete eine andere Nadelgröße – und niemand bemerkte es, bis die Retouren von Amazon eintrudelten. Der Schaden? $50.000 in Rückbelastungen und eine Listung, die sich nie erholte.
Die Stichzahl ist kein kosmetisches Detail. Es ist der einzige aussagekräftigste Indikator dafür, ob eine Zeltnaht unter Belastung hält oder bei 30 Knoten Wind auseinanderreißt. Und die meisten Käufer, die Muster prüfen, wissen nicht, wie man sie richtig liest.
Eine niedrige Stichdichte erzeugt eine Kaskade von Fehlerpunkten. Wenn der SPI unter 8 an einer strukturellen Naht fällt, wird jeder Stich zu einem individuellen Spannungskonzentrator. Die Windlast verteilt sich nicht gleichmäßig über die Naht – sie findet den schwächsten Punkt und reißt hindurch wie ein Reißverschluss. Ein Zelt mit 6 SPI an der Hauptfirstnaht hält in Ihrem Wohnzimmer gut. Stellen Sie es auf einem Berggrat bei 25 mph Böen auf und der Stoff beginnt zwischen den Stichen zu driften, belastet jeden Faden einzeln, bis einer reißt, dann der nächste, dann der nächste. Ich habe dies in einem Fabriktestgerät in weniger als 90 Sekunden beobachtet.
Hier ist die Fertigungsrealität, die die meisten Käufer übersehen: Eine Fabrik kann 10-12 SPI an der Nähmaschineneinstellung angeben und dennoch eine effektive 7-8 SPI am fertigen Produkt liefern. Warum? Nadelgröße. Eine schwerere Nadel – sagen wir #18 statt #14 – stanzt größere Löcher. Der Faden sitzt tiefer in diesen Löchern. Wenn Sie einen Stichzähler an die fertige Naht anlegen, verringert der größere Abstand durch die überdimensionierte Nadel die effektive Dichte um 1-2 SPI. Geben Sie immer an, dass die Stichzahl mit einem physischen Stichzähler am fertigen Produkt gemessen wird, nicht vom Maschinendisplay abgelesen wird. Machen Sie dies zu einem Punkt in der Qualitätstoleranzvereinbarung vor Beginn der Bemusterung.
-
- Hauptstrukturnähte: 8–10 SPI Minimum. Dies umfasst Firstnähte, Stangenmanschettenbefestigungen und Boden-Wand-Verbindungen. Unter 8 SPI an diesen Punkten versagt die Naht beim Rutschtest gemäß ASTM D1683.
- Säume und nicht-tragende Kanten: 6–8 SPI akzeptabel. Diese Nähte tragen minimale Last. Verschwenden Sie hier kein Fadenbudget – lenken Sie es auf die relevanten Stellen.
- Fadenspezifikation für lasttragende Nähte: Gebondeter Nylon TEX 90 (Spec 92). TEX 70 Faden – häufig in Zelten unter $80 Großhandel – reduziert die Nahtbruchfestigkeit um 30-40%. Bei jedem Zelt über 2 kg Gesamtgewicht ist TEX 70 ein wartendes Versagen.
Nun zur Frage Lockstitch versus Chainstitch. Das ist nicht akademisch – es bestimmt, ob eine defekte Naht vollständig aufribbelt oder an einem einzelnen gebrochenen Stich stoppt.
Ein Lockstitch verwendet zwei Fäden: einen Nadel- und einen Unterfaden. Sie verriegeln sich im Stoff. Wenn ein Stich bricht, verhindert die Verriegelung ein weiteres Aufribbeln der Naht. Dies ist der Standard für Zelt-Strukturnähte. Nachteil: Lockstitch-Maschinen laufen langsamer, und der Unterfaden geht häufig aus, was manche Fabriken hassen, da es die Produktion verlangsamt.
Ein Chainstitch verwendet einen oder mehrere Nadelfäden, die mit sich selbst verschlingen. Es ist schneller zu nähen, verwendet größere Fadenkegel, die keine ständigen Spulenwechsel erfordern, und Fabriken lieben den Durchsatz. Aber hier liegt der fatale Fehler: Zieht man an einem losen Ende eines Chainstitch, ribbelt die gesamte Naht auf wie ein Pullover. Ich habe gesehen, wie ein einzelner hängengebliebener Faden an einer Packsacknaht einen 14-Zoll-Reißverschluss zum Versagen brachte, weil die Fabrik durchgängig Chainstitch verwendete, um sechs Cent pro Einheit zu sparen.
Für den Zeltbau ist Lockstitch bei allen Strukturnähten nicht verhandelbar. Chainstitch hat legitime Anwendungen – Überwendlichkanten gegen Ausfransen, Heftnähte für temporäre Montage und das Schließen von Packsäcken, wo Aufribbeln keinen Zeltausfall verursacht. Aber akzeptieren Sie niemals Chainstitch an einer Firstnaht, Stangenbefestigung oder Bodennäht. Wenn die Fabrik sich sträubt, suchen Sie eine andere Fabrik.
Noch etwas zu Nadellöchern, das die meisten B2B-Zelt-Qualitätskontrollen völlig ignorieren. Eine Naht kann einen trockenen Zugtest bestehen und dennoch lecken. Das Problem: Eine überdimensionierte Nadel hinterlässt Löcher, die größer sind als der Faden, der sie füllt. Nach 30 Minuten gleichmäßiger Regensimulation – speziell einem Wassersäulentest bei 1.300 mm – zieht Wasser durch diese Lücken, selbst wenn der Faden perfekt hält. Ich habe ganze Produktionschargen abgelehnt, weil der Wasser-Eindringtest nach dem Nahtband zeigte, dass Farbe nach 18 Minuten eindrang. Die Nähte sahen trocken makellos aus. Die Nadel war zwei Größen zu groß. Die Fabrik hatte gewechselt, ohne es jemandem zu sagen, weil sie so 15% schneller nähen konnten.
Die Benchmark, die Sie vor Ihrem nächsten Lieferantengespräch notieren sollten: Hauptstrukturnähte bei 8-10 SPI, gemessen am fertigen Produkt mit einem Stichzähler, nicht am Maschineneinstellrad; TEX 90 gebondeter Nylonfaden an allen lasttragenden Stellen; nur Lockstitch bei Strukturnähten; und ein bestandener Wassersäulentest bei 1.300 mm für volle 30 Minuten nach dem Nahtband. Wenn die Fabrik bei einem dieser vier Punkte zögert, ist ihre Produktionslinie nicht für Zelte ausgelegt, die echtes Wetter überstehen.
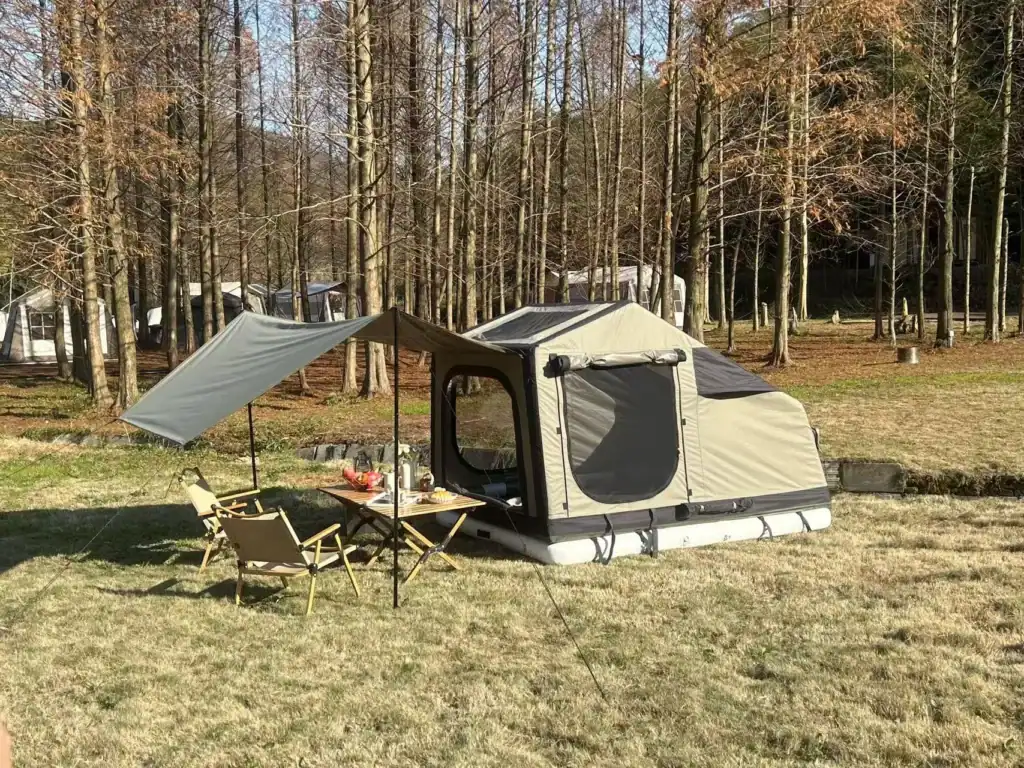
Wichtige zu überprüfende Spezifikationen
Maschineneinstellung ist nicht die Stichzahl.
Nahtversagen macht etwa 70% der Zelt-Garantierückgaben im E-Commerce aus. Drei Spezifikationen bestimmen, ob ein Zelt Windlast übersteht oder am First reißt: Stiche pro Zoll, Fadenzusammensetzung und Bartack-Dichte. Kennen Sie diese Zahlen, bevor Sie ein Muster genehmigen. Wenn Ihre Fabrik sie nicht in einem Inspektionsbericht liefern kann, gehen Sie.
-
- Hauptstrukturnähte (First, Stangenmanschetten, Boden-Wand-Verbindungen): 8–10 SPI gemessen am fertigen Produkt mit einem physischen Stichzähler. Nicht die Maschineneinstellung. Eine überdimensionierte Nadel reduziert die effektive Dichte um 1–2 SPI, selbst wenn die Maschine richtig eingestellt ist. Dies ist der häufigste Betrug in der Zeltproduktion.
- Säume und nicht-tragende Kanten: 6–8 SPI. Eine geringere Dichte ist hier akzeptabel, da diese Nähte nur minimale Last tragen. Unter 6 SPI wird der Saum nach wiederholtem Packen und Auspacken klaffen und ausfransen. Auf dem Mustertisch sieht es gut aus. Nach drei Monaten Kundennutzung versagt es.
-
- Gebondetes Nylon TEX 90 (Spezifikation 92): Erforderlich für alle lasttragenden Nähte bei Zelten über 2 kg. Erhöht die Nahtbruchfestigkeit um 30–40 % im Vergleich zu TEX 70. Überlegene UV-Beständigkeit – Polyesterfaden zersetzt sich unter direkter Sonneneinstrahlung merklich schneller. Schreiben Sie diese Spezifikation in Ihr Tech Pack und überprüfen Sie das Fadenkonelettiket während der Inline-Inspektion.
- TEX 70 (beliebiges Material): Unzureichend für Strukturnähte an jedem Zelt, das Wind ausgesetzt ist. Taucht dennoch in sogenannten Premiumzelten auf, weil es schneller auf der Maschine läuft und pro Kone günstiger ist. Eine Fabrik, die ohne Rückfrage auf TEX 70 zurückgreift, priorisiert die Produktionsgeschwindigkeit über Ihre Rücklaufquote.
-
- Standardbelastungspunkte (Eckverbindungen, Stangenhülsenabschlüsse): Mindestens 28 Stiche pro Bartack. Zählen Sie mit einer Lupe. Ein 20-Stich-Bartack sieht mit bloßem Auge dicht aus, versagt aber bei etwa 60 % der Last, die ein ordentlicher 28-Stich-Bartack hält. Überprüfen Sie beide Seiten der Befestigung – einseitiges Bartacken halbiert die Festigkeit.
- Hochlast-Befestigungspunkte (Gurtanker, Heringeschlaufen, Abspann-D-Ringe): Mindestens 42 Stiche. Diese Punkte nehmen konzentrierte Stoßbelastungen bei Windböen auf. Ein Bartack mit weniger als 42 Stichen löst sich auf, bevor der umgebende Stoff Anzeichen von Belastung zeigt. Hier versagen Zelte vor der Kamera in Kundenbewertungsvideos.
| Spezifikation | Anforderung | Risiko bei Nichtbeachtung | Überprüfungsmethode | Kritischer Hinweis |
|---|---|---|---|---|
| SPI (Stiche pro Zoll) | Hauptnähte: 8–10 SPI; Säume: 6–8 SPI | Nahtversagen unter Windlast; etwa 70 % der Zeltretouren sind auf Nahtversagen zurückzuführen. | Physischer Stichzähler am fertigen Produkt, nicht am Maschinendrehregler | Überdimensionierte Nadel kann die effektive Dichte im Vergleich zur Maschineneinstellung um 1–2 SPI verringern |
| Fadentyp & Spezifikation | Bonded Nylon TEX 90 (Spezifikation 92) für lasttragende Nähte | TEX 70 verringert die Nahtbruchfestigkeit um 30–40 %; unzureichend für Zelte über 2 kg | Überprüfen Sie das Fadenetikett auf der Spule während der Inline-Produktion; fordern Sie das Datenblatt an. | Viele ‘Premium’-Zelte werden immer noch mit TEX 70 ausgeliefert – überprüfen Sie, gehen Sie nicht davon aus. |
| Bartack-Verstärkung | Mindestens 28 Stiche an den Ecken; 42 Stiche an hochbelasteten Punkten (Gurtbandbefestigungen) | Reißverschluss- und Stangenhülsen-Ausbrüche an Spannungskonzentrationspunkten | Zählen Sie die Bartack-Stiche mit einer Lupe; fotografieren Sie während der Vorversandkontrolle | Die Bartack-Länge ist ebenso wichtig wie die Anzahl – weisen Sie kurze, dichte Bartacks zurück, die den Stoff zerreißen |
| Wassereintritt nach Nahtbandversiegelung | Hydrostatischer Test: ≥1.300 mm Wassersäule für 30 Minuten ohne Farbstoffeindringen | Naht optisch intakt, leckt aber nach 30 Minuten Regen – Nadelstiche zu groß | Fordern Sie eine Nachbandversiegelung an Wassersäulentest Video oder ASTM D1683-Bericht | Test nach dem Taping, nicht davor; ungetapte Nähte versagen immer |
| Nahtfestigkeitskonformität | ASTM D1683 Nahtrutsch- und Festigkeitsbericht; Inline-, End- und Vorversandprüfungen nach ISO 9001:2015 | Chargeninkonsistenzen; eine schwache Nahtart kann zu Massenrückgaben führen | Fordern Sie Nahtfotos aus 3 Phasen an; bestätigen Sie den ISO 9001 Prüfpfad | Kelyland Fabriken führen 3-stufige Nahtprüfungen durch – bitten Sie Ihren Agenten, diesen Standard zu erfüllen |
Einfache Tests, die Käufer an Mustern durchführen können
Die Vorserienprobe sah perfekt aus.
Sie brauchen keinen Zugprüfmaschine oder einen Laborbericht, um 80% der Nahtprobleme zu erkennen. Drei Tests, die Sie auf Ihrem Küchentisch durchführen, sagen Ihnen mehr über die Nahtdisziplin einer Fabrik als jedes Pflichtenblatt. Ich habe Sendungen abgelehnt, nur mit meinen Händen, einer Lupe und einer Plastikwasserflasche.
-
-
- Der Zugtest — Nähte: Greifen Sie den Stoff auf beiden Seiten 1 cm von der Nahtlinie, Daumen berühren die Stiche. Ziehen Sie gleichmäßig mit beiden Händen – kein Ruck, sondern eine feste, kontinuierliche Belastung für etwa 5 Sekunden. Der Stoff sollte sich verformen, bevor sich die Nahtlinie öffnet. Wenn Sie an irgendeiner Stelle Tageslicht zwischen den Bahnen sehen, bevor sich der Grundstoff verformt, ist die Probe nicht bestanden. Dies erfasst unzureichende Fadenspannung, falsche Nadelgröße und ausgelassene Doppelsteppstich Verzahnung. Achten Sie besonders auf den Boden-Wand-Übergang bei Zelten und überall dort, wo ein Reißverschluss auf Stoff trifft – dies sind die Fehlerpunkte, die zu Retouren führen.
- Der Zugtest — Gurtbandbefestigungspunkte: Verankern Sie den Zeltkörper mit einer Hand und greifen Sie die Gurtbandschlaufe oder den Abspannpunkt mit der anderen. Üben Sie 15–20 kg Zugkraft aus, indem Sie Ihr Körpergewicht hineinlehnen – allmählich, nicht stoßartig. Beobachten Sie den Bartack-Bereich: Das Gurtband sollte halten, der Bartack sollte intakt bleiben, und der Grundstoff um den Bartack herum sollte nicht reißen oder sich verziehen. Wenn der Bartack wie ein perforierter Abrissstreifen durch den Grundstoff reißt, hat die Nadeldichte die Stofftoleranz überschritten. Dieses Zelt wird innerhalb der ersten drei Windnutzungen versagen.
-
Sichtprüfung fängt ein, was eine Fabrik hofft, dass Sie nicht danach suchen. Führen Sie die Naht unter hellem Licht. Verwenden Sie eine 5-fach-Lupe oder das Makroobjektiv Ihres Telefons. Suchen Sie nach ausgelassenen Stichen – ein einzelner ausgelassener Stich in einer Doppelsteppstichnaht führt unter Spannung zu einem Reißverschlussversagen. Prüfen Sie auf Krumpfung: Gekräuselter Stoff bedeutet, dass die Ober- und Unterfadenspannungen nicht ausgeglichen waren und diese Naht eine ungleichmäßige Lastverteilung aufweist. Lose Fadenenden länger als 3 mm zeigen an, dass die Schneidstation übereilt wurde. Bei einem 4-Personen-Zelt mit 18 laufenden Metern Strukturnähten zählen Sie, wie viele lose Enden Sie finden. Mehr als 3 pro Meter? Die Chargenqualitätstoleranz ist zu groß für den Einzelhandel.

Der Wassersäulentest an genähten Nähten – vor dem Nahtband – ist der einzige Test, der Fabriken mit ordnungsgemäßen Nadelplänen von allen anderen unterscheidet. Hier ist die Realität, die die meisten Käufer übersehen: Eine Naht kann von außen makellos aussehen und einen 30-Sekunden-Spritztest bestehen, aber nach 30 Minuten anhaltendem Regen katastrophal versagen. Der Übeltäter ist der Nadel-Loch-Durchmesser. Wenn eine Fabrik eine #18 oder #20 Nadel auf 70D Stoff verwendet, um die Produktion zu beschleunigen, sind die Perforationen zu groß, um das Nahtband vollständig zu versiegeln. Wasser zieht durch die Stichlöcher, sätt
-
- 1. Testaufbau: 2. Schneiden Sie ein 15 cm x 15 cm großes Panel zentriert auf einer genähten Naht aus der Probe – bevor Nahtband aufgetragen wird. Kleben Sie den Stoff mit der Nahtseite nach unten über die Öffnung eines Weithalsglases. Füllen Sie einen klaren Messzylinder mit mit blauer Lebensmittelfarbe gefärbtem Wasser. Gießen Sie langsam, um eine Wassersäule über der Naht zu erzeugen.
- 3. Bestanden/Nicht bestanden Kriterium: 4. Die Naht muss eine Wassersäulenhöhe von ≥1.300 mm für mindestens 30 Minuten halten, ohne dass Farbstoff durch die Stichlöcher dringt. Wenn vor 30 Minuten blaue Punkte auf der trockenen Seite erscheinen, ist die Nadelstärke für das Stoffgewicht falsch. Keine Menge Nahtband wird dies dauerhaft beheben – Sie werden beim ersten regnerischen Campingausflug Retouren sehen.
- 5. Die Ausrede der Fabrik, die Sie hören werden: ‘6. ’Das Nahtband wird es abdichten.“ Falsch. Nahtband haftet an der Stoffoberfläche, nicht in den Stichlöchern. Überdimensionierte Nadellöcher schaffen Kapillarkanäle, die das Band vollständig umgehen. Wenn eine Probe den Wassertest vor dem Bandversiegeln nicht besteht, lehnen Sie sie ab. Verhandeln Sie nicht – kein Lieferant ändert seinen Nadelplan während der Produktion, es sei denn, Sie machen es zur Bedingung der Musterfreigabe.
Was Sie Ihre Fabrik oder Ihren Beschaffungsvertreter fragen sollten
7. Überspringen Sie den Laborbericht, wenn ihm ein Foto der Naht unter Spannung fehlt – Rohdaten ohne Prozessnachweis sind wertlos.
8. Ich habe Spezifikationsblätter gesehen, die auf dem Papier perfekt aussahen, während das eigentliche Zelt in der ersten Nacht versagte. Die Lücke zwischen der Behauptung einer Fabrik und der Produktionshalle ist der Ort, an dem Ihr Geld verschwindet. Schließen Sie sie, indem Sie drei spezifische Lieferungen verlangen, bevor Sie die Anzahlung überweisen.
-
- 9. Nahtfestigkeitsbericht (10. ASTM D1683): 11. Fordern Sie den vollständigen Testbericht an, nicht nur die Zusammenfassung von Bestanden/Nicht bestanden. Der Bericht muss die maximale Kraft angeben, bevor das Nahtgleiten 6 mm überschreitet. Für eine Hauptstrukturnaht an einem Zelt über 2 kg lehnen Sie jedes Ergebnis unter 150 N ab. Der Name des Testlabors, das Datum und die Chargennummer müssen mit Ihrer Bestellung übereinstimmen. Wenn die Fabrik einen allgemeinen Bericht aus der letztjährigen Produktion sendet, behandeln Sie dies als Warnsignal – diese Charge gehört nicht Ihnen.
- 12. Checkliste für Produktionsfotos während der Fertigung: 13. Legen Sie eine Fotosequenz fest, die an den Zeitplan Ihrer Bestellung gebunden ist. Tag 1: Spule aus gebundenem Nylonfaden mit sichtbarem TEX 90 Etikett neben Ihrem Bestellblatt. Tag der Riegelnahtverstärkung: Nahaufnahme an Gurtbandbefestigungspunkten, die mindestens 28 Stiche unter einer Stichzahlenlehre zeigt. Tag des Nahtband-Auftragens: Weitwinkelaufnahme der Bandstation mit Temperaturanzeige an der Heißluftdüse – korrekte Haftung erfordert 350–400 °C an der Düse. Fotos müssen Zeitstempel haben und innerhalb von 24 Stunden nach jedem Kontrollpunkt per E-Mail gesendet werden. Kein Zeitstempel, kein Vertrauen. Stichanzahloder Maßstab. Tag der Nahtversiegelung: Totale der Versiegelungsstation mit Temperaturanzeige an der Heißluftdüse – korrekte Haftung erfordert 350–400 °C an der Düse. Fotos müssen einen Zeitstempel haben und innerhalb von 24 Stunden nach jedem Kontrollpunkt per E-Mail gesendet werden. Kein Zeitstempel, kein Vertrauen.
- Integration des Nahtaudits in ISO 9001: Gemäß Kelylands Protokoll für bezogene Fabriken, sind Nahtaudits keine nachträgliche Endkontrolle. Das Audit durchläuft drei Prüfstationen. Inline: Ein QC-Inspektor entnimmt mitten in der Schicht 3 zufällige Einheiten und misst die Stiche pro Zoll (SPI) mit einem physischen Zähler an der fertigen Naht – nicht am Maschinenrad. Final: 10% der verpackten Zelte werden einem Nahtfestigkeits-Zugtest mit einem tragbaren Dynamometer unterzogen. Vorversand: Ein AQL-2,5-Stichprobenplan löst eine vollständige Überprüfung der Bartack-Anzahl und der Fadenspezifikation anhand des genehmigten Goldmusters aus. Berichte von allen drei Prüfstationen landen in Ihrer E-Mail, bevor der Container versiegelt wird.
Der Unterschied zwischen einem Lieferanten, der nickt, und einem, der liefert, besteht darin, ob er diese Dokumente für Ihren spezifischen Kaufauftrag erstellen kann – nicht für den Auftrag eines Cousins von vor sechs Monaten. Setzen Sie diese Erwartung während der Musterfreigabe. Teilen Sie der Fabrik mit: keine Inline-Nahtaudit-Fotos, keine Restzahlung.
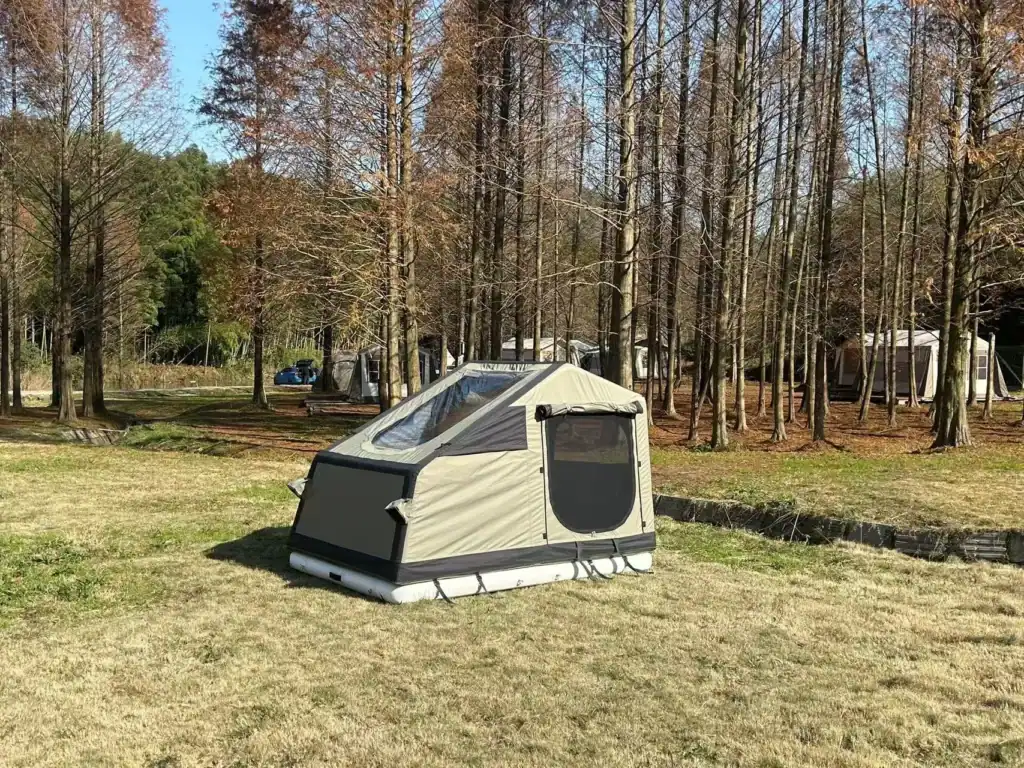

Vermeidung häufiger Fehlinterpretationen
Eine niedrige Stichzahl ist nicht immer ein Mangel – der Kontext entscheidet, ob es sich um eine konstruktive Entscheidung oder eine Kostenfrage handelt.
Ich habe erlebt, wie Käufer eine Lieferung wegen 6 SPI an einem Zeltkörper ablehnten, nur um zu erfahren, dass das von ihnen vor drei Monaten genehmigte Pflichtenheft genau das angab. Leichte Trekkingzelte – die Modelle unter 1,5 kg für Weitwanderer – verwenden routinemäßig 6 bis 7 SPI an nicht lasttragenden Bahnen. Der Stoff ist oft 20D oder 30D Ripstop-Nylon. 10 SPI in so dünnes Material zu stanzen, erzeugt eine Perforationslinie, die unter Spannung wie eine Briefmarke reißt. Die Ingenieure sparen nicht an der falschen Stelle; sie tauschen Stichdichte gegen Stoffintegrität. Die Frage, die Sie bei der Musterfreigabe stellen sollten, ist nicht: ‘Ist diese Zahl hoch genug?’ Sondern: ‘Zeigen Sie mir, wo der Lastpfad verläuft, und bestätigen Sie, dass diese Nähte 8 bis 10 SPI erreichen.’ Wenn Firstlinie, Stangenhülsen und Gurtbänder die Spezifikation erfüllen, tut das 6 SPI an einer Seitenbahn seinen Dienst.
Die wirkliche Gefahr besteht, wenn eine Fabrik 6 SPI an tragenden Nähten liefert und dies als ‘leichte Designentscheidung’ verteidigt. Das bricht zusammen, sobald Windlast einwirkt. Ein 4-Personen-Kuppelzelt mit 6 SPI am Hauptübergang von Boden zu Wand wird sich innerhalb einer Saison an der Naht selbst entzippen. Rückgabedaten zeigen, dass Nahtversagen etwa 70% der Zeltretouren im Online-Handel ausmacht. Dabei handelt es sich nicht um ultraleichte Unterkünfte, die versagen. Es sind Familien-Campingzelte, bei denen jemand in der Produktion den Faden gewechselt oder die Nadel vergrößert hat, ohne die Spezifikation zu aktualisieren.
Dekorative Nähte sind eine weitere Falle, die Erstkäufer hereinlegt. Steppnähte entlang einer Aufbewahrungstaschenklappe, dekorative Steppungen an einem Zeltkörper oder ein Zickzack-Saum an einer Gear-Loft – keine davon trägt Last. Zählen Sie die Stiche mit einer Lupe, und Sie könnten 5 bis 6 SPI sehen. Das ist akzeptabel, weil die Naht ästhetische, nicht strukturelle Aufgaben hat. Das Problem beginnt, wenn eine Fabrik dieselben Maschineneinstellungen für dekorative Linien und Haupttragnähte verwendet. Eine Bartacke an einem Gurtband-Befestigungspunkt sollte mindestens 28 Stiche haben, vorzugsweise 42 an hochbelasteten Punkten wie Stangenankern. Eine dekorative Bartacke an einer Taschenecke könnte 14 haben. Beide können auf einem Foto identisch aussehen. Sie müssen wissen, welche welche ist, bevor Sie das Vorserienmuster freigeben.
-
- Tragende Naht: Jede Naht, die zwei Bahnen verbindet, die Spannung ausgesetzt sind, wenn das Zelt aufgestellt ist – Firstlinien, Stangenhülsen, Boden-Wand-Übergänge, Abspannleinenanker und Gurtband-Befestigungspunkte. Mindestens 8–10 SPI mit gebundenem Nylon-TEX-90-Faden. Muss die Nahtverschiebungsprüfung nach ASTM D1683 bestehen und nach dem Abkleben einen Wassersäulenwert von mindestens 1.300 mm für 30 Minuten halten.
- Dekorative Naht: Dekorative Steppnähte, Taschenumrisse, Markenpaneele, Innen-Gear-Loft-Kanten. 5–7 SPI sind Standard. Der Faden kann leichter sein (TEX 40–60). Keine strukturelle Lastanforderung. Ein Versagen hier ist ein optisches Problem, kein Sicherheits- oder Rückgaberisiko. Lehnen Sie die Lieferung deswegen nicht ab – aber überprüfen Sie, ob sie mit dem freigegebenen Muster übereinstimmen.
- Grauzonen-Naht: Einige Befestigungspunkte sehen dekorativ aus, nehmen aber unerwartete Lasten auf – Reißverschlussschienen, Mesh-Panel-Kanten, innere Aufhängeösen. Ein Käufer könnte sie als nicht-tragend einstufen, bis ein Kunde an einem feststeckenden Reißverschluss zieht. Diese sollten mit mindestens 7–8 SPI spezifiziert und an Endpunkten mit Bartacken verstärkt werden. Führen Sie sie explizit im Toleranzabschnitt Ihrer Produktionsvereinbarung auf.
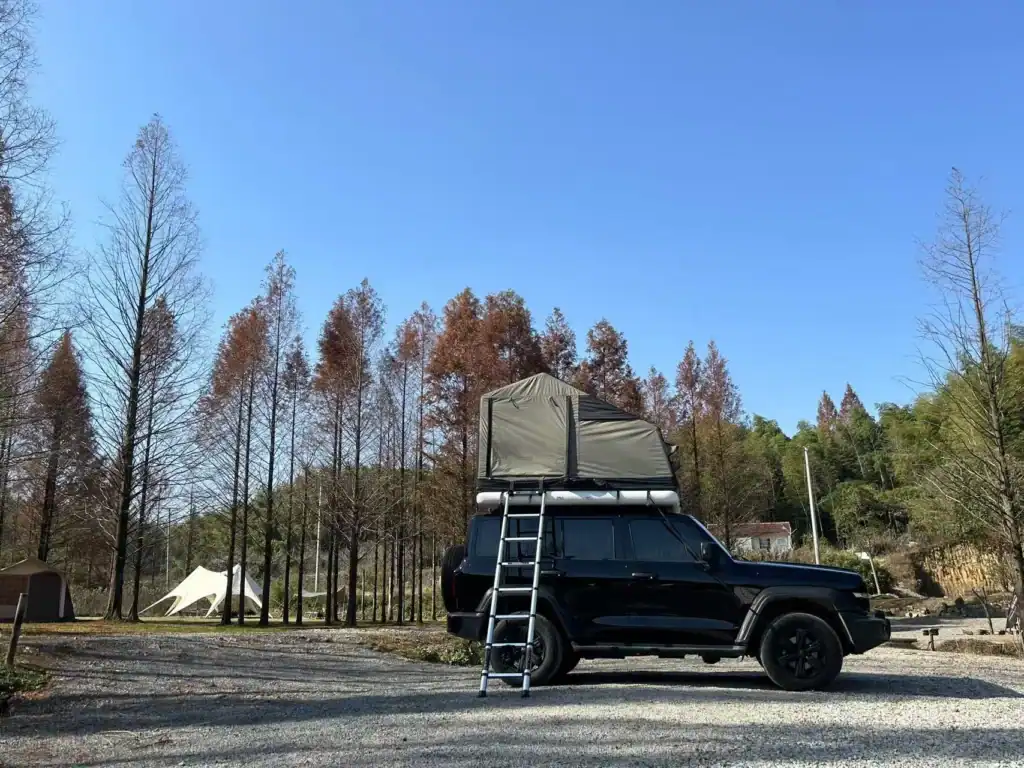
Hier ist ein Feldtest, der nichts kostet und Streitigkeiten vermeidet. Greifen Sie bei Ihrem nächsten Muster den Stoff auf beiden Seiten einer Naht und ziehen Sie gleichmäßig – kein ruckartiger Zug, nur zunehmende Spannung. Eine tragende Naht sollte kein Tageslicht durch die Stichlöcher zeigen oder die Stoffbahnen um mehr als 1 mm auseinanderdriften lassen. Eine dekorative Naht könnte leicht wellig werden oder sich dehnen, das ist in Ordnung. Wenn Sie den Unterschied nicht fühlen können, hat die Fabrik den Unterschied im Pflichtenheft nicht klar genug gemacht. Das ist das Gespräch, das Sie führen sollten, bevor die Bestellung in Produktion geht, nicht erst, wenn sie in einem Amazon-Lager landet.
Schlussfolgerung
Die Benchmarks sind klar: 8–10 SPI mit TEX-90-gebundenem Nylon an tragenden Hauptnähten, 42 Bartacken an Gurtband-Befestigungspunkten und ein Wassersäulentest nach dem Abkleben, der 1.300 mm für 30 Minuten hält. Die Kluft zwischen einer sauberen Charge und einer Rücklaufquote von 70% liegt zwischen Musterfreigabe und Massenproduktion – wenn eine Fabrik dieselbe Maschineneinstellung verwendet, aber eine größere Nadel einsetzt, wodurch die effektive Stichdichte am fertigen Produkt stillschweigend um 1–2 SPI sinkt. Messen Sie das erste Stück vom Band mit einem physischen Stichzähler, nicht mit dem Pflichtenheft. Diese einzige Disziplin verwandelt eine Beschaffungscheckliste in einen verteidigungsfähigen Qualitätstoleranzstandard, der Ihre Verkäuferkennzahlen lange nach der FOB-Übergabe schützt.
Überprüfen Sie den Campingzelt-Katalog, um zu sehen, wie diese stichgenauen Benchmarks in Produktionsaufträge integriert werden, beginnend mit 50-Einheiten-Testläufen, mit einem dreistufigen Audit, das von Inline-Kontrollen bis zur Vorversandkontrolle reicht.
Häufig gestellte Fragen
Was ist die ideale Stichzahl pro Zoll für eine Glockenzeltnaht?
Die Hauptnähte eines Leinwandglockenzelts sollten 8-10 Stiche pro Zoll aufweisen. Der schwere Stoff kann sich wellen, wenn der SPI zu hoch ist, daher sorgt dieser Bereich für eine ausgewogene Festigkeit und Nahtflachheit. Überprüfen Sie, ob Ihre Fabrik den SPI an die Leinwanddicke anpasst.
Wie kann ich die Nahtfestigkeit testen, ohne Proben an ein Labor zu schicken?
Führen Sie einen festen Handzugtest entlang der Naht durch; achten Sie auf Knackgeräusche oder Fadentrennung. Führen Sie anschließend einen einfachen Wassersäulentest an der genähten Naht vor dem Kleben durch, um Undichtigkeiten frühzeitig zu erkennen. Führen Sie diese Prüfungen an Vorserienmustern durch, bevor Sie die Freigabe erteilen.
Warum dringen bei manchen Zelten mit hohem SPI-Wert dennoch Wasser durch die Nähte?
Wasser dringt durch Nadelstiche ein, nicht zwischen den Stichen. Selbst dichte Nähte hinterlassen Perforationen, die Feuchtigkeit aufnehmen, wenn sie nicht mit Klebeband oder Nahtdichtmittel versiegelt werden. Fordern Sie stets eine Nahtabdichtung oder das Auftragen von Dichtmittel für wasserdichte Nähte an.
Was ist der Unterschied zwischen Steppstich und Kettenstich beim Zeltbau?
Ein Lockstich verwendet zwei ineinandergreifende Fäden und löst sich nicht auf, wenn ein Stich reißt, was ihn zum Standard für strukturelle Nähte macht. Der Kettenstich ist elastischer, lässt sich aber leicht herausziehen, wenn er beschädigt ist, also vermeiden Sie ihn. Geben Sie in Ihrer RFQ für alle lasttragenden Nähte Lockstich an.
Wann sollte ich die Fabrik bitten, zusätzliche Riegel zu setzen?
Fügen Sie zusätzliche Bartacks an allen Abspannpunkten, Stangenummantelungsecken und Gurthalterungen hinzu, wo Windstress konzentriert ist. Ein doppelter oder dreifacher Bartack bei Hochlastmodellen verhindert frühzeitiges Ausreißen besser als ein einzelner. Fotografieren Sie die Bartack-Platzierung während der Inline-Inspektion zur Bestätigung.

 English
  Español
  Deutsch
  Français
  Português do Brasil
  Русский
  العربية
  한국어
한국어  日本語
日本語