 跳到内容
跳到内容 
inflatable tent rain pitch sequence is the first checkpoint buyers should lock before they approve a supplier, budget, or production slot. Standing in a warehouse with a $50K private-label inflatable tent order, watching the pre-production sample fail its first rain simulation — that’s the kind of call no category manager wants to make. The fabric passed the hydrostatic head test on a swatch, but the assembled tent leaked at three floor seams and along the main zipper track. That gap between material spec and finished-product performance is exactly where the inflatable tent rain pitch sequence becomes a procurement issue, not just a camping skill.
Most sourcing guides stop at “pitch fly-first” without giving you factory-grade guardrails. The real fix has four parts: a canopy-first sequence that uses pre-curved air beams to self-support before the inner tent clips in, beam pressure held at 8-10 PSI so water sheds instead of pooling, guyline geometry locked at 45° angles with stakes driven at the same pitch, and QC specs that demand ISO 811 test reports on assembled tents — not just raw fabric certificates. Miss any one of those, and your retail customers will be calling returns within the first wet weekend.
Why Inflatable Tent Inners Get Wet
Rain ingress isn’t fabric failure.
Most buyers assume a wet inner tent means the canopy fabric failed. In practice, factory QC data shows the opposite. A 3000 mm PU-coated polyester sheet stops water. The real leaks come from three places buyers overlook.
The Three Water Paths
Unsealed floor seams are the most common defect in low-cost inflatable tent production. Stitching punctures the waterproof layer, and without tape, every needle hole becomes a capillary. Second, zipper flaps that are too short or missing entirely let wind-driven rain walk up the coil. Third, slack guylines allow the canopy to sag, creating low spots where water pools and then seeps through the fabric at a pressure point.
-
- Floor seams: Untaped stitching creates hundreds of micro-leaks. A 20 cm bathtub floor with taped seams eliminates standing water ingress.
- Zipper flaps: Storm flaps must cover the entire zipper track and extend at least 5 cm past each end. Without them, a 45 km/h wind blows rain sideways through the teeth.
- Guyline tension: Loose lines let the canopy deform. Water pools in the sag, and the hydrostatic head of the fabric is overcome by the weight of standing water. Use 3 mm reflective guylines rated to 18 kN and stake at 45°.
Why the Test Sheet Matters
A fabric swatch test only proves the raw material. It tells you nothing about the finished tent’s seams, zippers, or geometry. That is why every private-label specification should demand an ISO 811 water-column test on the assembled product, not just on a cloth sample. Kelyland Outdoors includes this in their QC process: taped seams, 20 cm bathtub floors, storm flaps, and a final ISO 811 verification before shipment. Their partner factories are ISO 9001:2015 certified, and pre-shipment inspections confirm the rain specs before the container leaves.
Canopy-First Pitch: The Only Dry Sequence
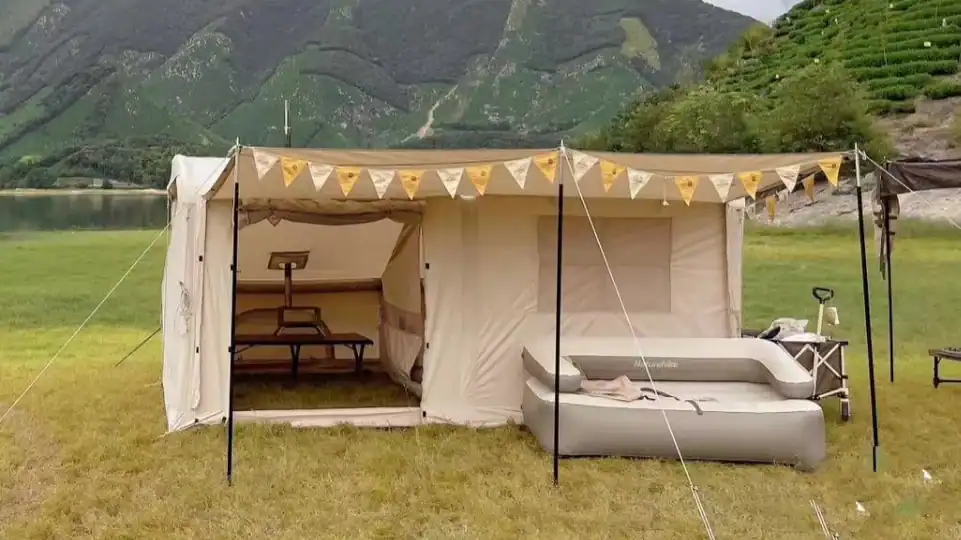
Pre-curved air beams let the canopy self-support before the inner tent is clipped — no wet mesh sponge.
The single biggest physical difference between inflatable tents and pole tents in rain is the pre-curved air beam. A pole tent requires the inner body to stand first so the fly can drape over it. That sequence exposes the mesh and fabric to rain for minutes. An inflatable tent does not need that crutch.
The Pre-Curved Beam Advantage
Pre-curved beams are molded with a permanent arch shape. When you inflate them, they rise into position without needing an inner tent to hold them upright. That means you can lay out just the outer canopy on a footprint, stake the corners, and inflate the main beams to 8-10 PSI. The canopy becomes a roof before any inner fabric is touched.
Compare that to a standard dome pole tent: you thread poles through sleeves or clips on the inner, raise the whole assembly, then throw the fly over it. If it is raining, every second of that process lets water drip onto the inner floor and mesh walls. With an inflatable, you clip the inner after the rain is blocked.
Inflation Order and Pressure
Stake all four corners of the canopy before pumping. This keeps the base geometry fixed so beams rise evenly. Then inflate each beam to 8-10 PSI — this is not optional. At 5-6 PSI a beam is soft enough to sag under its own weight, creating low spots where water pools.

Guyline Geometry and Stake Angles
45° stakes and 3 mm guylines rated ≥18 kN keep inflatable tents locked in wet soil.
Rigging That Holds in Wet Soil
Straight-down stakes are the most common setup error in wet ground. Drive a stake vertically into saturated soil and a lateral gust pulls it out like a loose tooth. The fix is a 45° angle — drive the stake at 45° away from the tent body. This locks the shaft against the upper soil layer, which has more compaction than the loose surface. Paired with a 45° guyline angle from the canopy attachment point, the load vector splits evenly across the stake shaft instead of pulling straight up.
Guyline material matters as much as geometry. Standard 1.5 mm utility cord stretches under load, lets the fly sag, and water pools in the depression. The production spec for private-label inflatable tents should call for 3 mm reflective guyline with a breaking strain of at least 18 kN. Reflective webbing also lets end users see trip hazards at night — one less liability for your retail buyer.
Door and Zipper Discipline
Zipper flaps are the second-biggest water entry point after floor seams. In wind-driven rain, an unsealed coil zipper on the door acts like a capillary tube — water walks up the teeth and drips inside. Storm flaps (a fabric cover that snaps over the zipper track) block this path. Every inflatable tent spec from Kelyland’s factory network includes storm flaps as standard on door zippers.
Orientation discipline: place the door downwind before inflation. A door facing into wind gets hammered by rain pressure; even with storm flaps, some moisture can force through if gusts exceed 30 km/h. Downwind placement drops that risk to near zero. Tension all guylines immediately after inflation so the canopy stays drum-tight — any slack creates a low spot where water collects and adds weight that deforms beam geometry.
Factory Specs to Demand for Rain
A 5000 mm HH fly with taped seams cuts wet-weather returns by an order of magnitude.
Private-label buyers should require taped seams, a bathtub floor of at least 20 cm, storm flaps over zippers, and a hydrostatic head of 5000 mm on the fly. Chinese tent factories can verify this with an ISO 811 water-column test. Ask for the test report before mass production.
The Procurement Checklist
-
- Pression hydrostatique : 5000 mm minimum on fly fabric (ISO 811 test). 3000 mm passes basic rain; 5000 mm is the spec for multi-night and rental use.
- Sol en cuve : ≥20 cm height, fully taped seams. Water pools outside the floor seam, not inside.
- Ruban de jointure : All structural seams on fly and floor must be factory-taped. Untapped stitching is a guaranteed leak path.
- Storm flaps: ≥10 cm overlap covering the full zipper track. A flap that ends short of the zipper base allows water entry at the bottom stop.
- Guyline spec: 3 mm reflective line, ≥18 kN breaking strain. Factory-installed guyline anchors must match this rating.
- Beam pressure rating: ≥8 PSI operating pressure. The valve system must hold pressure without slow bleed-down over 12 hours.
Conclusion
Rain performance in inflatable tents is a factory-spec problem before it’s a pitching problem. The four fixes — canopy-first sequence, 8-10 PSI beam pressure, 45° rigging geometry, and ISO 811-verified hydrostatic head specs — turn a potential return category into a defensible, margin-protecting line.
-
- Pitch canopy-first to use pre-curved beams as an umbrella.
- Inflate air beams to 8-10 PSI for a taut water-shedding shell.
- Demand ISO 811 test reports on finished tents, not fabric swatches.
For your next private-label order, build these requirements into the stade d'approbation des échantillons. Ask your supplier for the ISO 811 water-column test report alongside the first prototype and verify taped seams on the bathtub floor before tooling starts. Compare Kelyland’s inflatable tent sourcing options — where MOQs start at 50-100 pieces and QC documentation is standard — to see how these specs translate into production-ready pricing.
Questions fréquemment posées
Can you pitch an inflatable tent in the rain?
Yes, if you keep the outer canopy between the rain and the inner tent during setup. Use a canopy-first pitch sequence so the fly goes up before the inner body is exposed. Pitch canopy-first to keep the inner dry.
How do you keep the inside of a tent dry while setting up in rain?
Lay a footprint, pitch the canopy first, and orient the door downwind. This sequence blocks rain entry before you clip in the inner tent. Use a footprint and downwind door orientation.
Do inflatable tents leak in heavy rain?
Only when seams are untaped, zippers lack storm flaps, or guylines are loose. The fabric itself is waterproof; failure points are always at edges and openings. Check seam tape, zipper flaps, and guyline tension before blaming fabric.
What hydrostatic head is good for heavy rain?
3000 mm minimum; 5000 mm recommended for sustained rain. A higher rating reduces QC rejections and wet-weather returns on private-label orders. Specify 5000 mm for retail-grade weather protection.

 English
  Español
  Deutsch
  Français
  Português do Brasil
  Русский
  العربية
  한국어
한국어  日本語
日本語