 跳到内容
跳到内容 
pop-up beach tent fold is the first checkpoint buyers should lock before they approve a supplier, budget, or production slot. The QC operators at the partner tent factory behind our beach tent line fold each pop-up beach tent sample and snap it open thirty times before sign-off. That repetition exposes the real problem behind most “broken tent” returns: the user pushes the wrong point on the frame, and the continuous loop of fiberglass or spring steel inside the fabric sleeve buckles instead of collapsing. A sales call shows you the pop-up mechanism in one smooth clip. It never shows the muscle memory required to bring the dome back down.
A 47-sample benchmark of returned tents laid out the pattern clearly. Cracked hubs came from collapsing the tent by pushing the center of the dome. Clean breaks came from flattening one side before the other. The standard fold sequence exists for a mechanical reason: the frame is a continuous loop with a diameter tolerance of +/- 0.2mm, and it only compresses when you follow its natural geometry. That means flat circle first, then a figure-8 twist, and finally a three-loop stack that fits into the carry bag in about 15 seconds. The factory runs 500,000 pop-up tents annually, and QC staff train on that exact sequence before any sample approval leaves the floor.
For a retail buyer, that sequence is worth more than the cost difference between frame materials on a quote. A slightly cheaper frame means nothing if the customer fights the tent on the sand, because the return label consumes the margin and the support ticket burns your team’s afternoon. A printed fold diagram on the hang tag — or a QR code linking to a 15-second video — solves the complaint before it reaches the after-sales inbox.

Why Your Pop-Up Tent Won’t Fold (The Physics of the Collapse)
Most ‘broken’ pop-up tents aren’t broken.
A ‘tent won’t fold’ return ticket usually means the frame was folded in the wrong order, not that it’s defective. Pop-up beach tents use a continuous loop of fiberglass or spring steel — typically 2.5–3.5mm in diameter — sewn into a fabric sleeve. That loop has to twist into a figure-8 before it folds into the three-loop stack that fits the carry bag. Skip that order, and you are fighting the frame’s own tension.
Why Pushing the Center Hub Breaks the Frame
The most frequent failure is the most natural instinct: pushing down on the center of the dome. That compresses the top of the loop unevenly, and the arc buckles near the hub joint. Fiberglass snaps here because it handles straight-line compression well but fails under the oblique load created by a center push. Spring steel bends and springs back, which is why it lasts longer in rental fleets and heavily handled retail samples.
Correct Grip Point: Rim, Not Hub
The frame only folds correctly if both sides of the rim move upward at the same time. Grab opposite edges of the rim — like holding opposite corners of a blanket — and pull upward smoothly. Your goal is a flat circle with both halves of the loop aligned. If the collapsed shape looks like an oval, stop and start over. Twisting an asymmetrical circle into a figure-8 will jam before you complete the fold.
Twisting the flat circle into a figure-8 should feel smooth, not forced. If the two halves resist each other, the fabric sleeve is likely bunched on one side or the frame is twisted at the hub. A clean fold requires the loop to rotate through its full range before compression starts.
- Frame diameter tolerance: A pop-up frame needs ±0.2mm accuracy to fold cleanly. Out-of-spec frames twist unevenly and catch on the fabric sleeve.
- Fabric sleeve tension: Sleeves are set to 15–25N. Below that, fabric bunches; above that, it prevents the loop from seating into the figure-8.
- Folding sequence: Flat circle → figure-8 → three-loop stack. Missing any step adds stress to the hub and wears the frame prematurely.
Retail after-sales teams should categorize these returns as method errors, not unit failures. The fold sequence is a learned physical skill, and a customer who wrestled with the frame will send it back even if nothing snapped. The fix costs nothing: show the sequence early, in the listing images and on the sewn-in tag.
The factory network behind Kelyland’s pop-up tent line produces 500,000 units annually, and QC teams train on the exact fold sequence before every shipment is approved. That training matters: a 3-step visual guide placed in the package or listing images can cut return rates by 40% for importers. The tent isn’t ‘broken.’ The customer wasn’t shown the mechanic.

Step-by-Step: The Correct Way to Fold a Pop-Up Beach Tent
Collapse from the rim, never the center hub.
A pop-up beach tent refuses to fold when the frame’s stored tension fights back. That continuous loop of fiberglass or spring steel — typically 2.5–3.5mm in diameter — is sewn into fabric sleeves holding roughly 15–25N of tension. Work against that tension instead of with it, and you get a twisted, half-collapsed tangle that looks like a warranty claim.
In our core tent factory in Ningbo — which produces 800,000 camping tents and tarps annually under ISO 9001:2015 — QC staff run the exact fold sequence on every production line. They see precisely which failures come from manufacturing defects and which come from user error. The split is not what most retail buyers expect.
Step 1 — Collapse the Dome into a Flat Circle
Stand outside the tent, facing one side panel. Grab opposite edges of the bottom rim — like holding opposite corners of a blanket — and pull them upward and toward each other in one smooth motion. The dome should collapse evenly, not fold sideways. What you want is a flat, double-layer circle resting at about knee height.
- Symmetry check: The collapsed shape must be round. An oval means one side of the frame moved ahead of the other, and twisting from that position will kink the fiberglass.
- The push-down error: Pressing on the top center hub misaligns the frame strands and is the most common cause of snapped fiberglass at the hub joint. Always collapse from the rim.
Step 2 — Twist the Flat Circle into a Figure-8
With the flat circle in front of you, place both hands on opposite sides of the ring, roughly four inches apart. Rotate your hands toward each other while pressing down gently. The two halves cross into a figure-8 shape, which interlocks the frame and drops the remaining diameter to only about 30% of the original. Strong resistance on this step means the Step 1 collapse was not symmetrical — stop, flatten it again, and re-check.
Step 3 — Fold into a Three-Loop Stack
Bring the two twisted loops together into one stack, then fold that stack in half once more. The final shape is three overlapping loops — roughly the size of a small car tire. Test it against the carry bag. If the bag zips closed without forcing, the fold is correct. If it does not fit, an extra twist is hiding in the loops. Unfold and start again rather than fighting the bag.
The whole sequence takes about 15 seconds once the movements are consistent. First-timers fumble for a few minutes, then something clicks and the frame collapses predictably every time. That is not luck — it is muscle memory aligning with the frame’s natural tension. Retail training staff can demonstrate the technique in-store in under a minute.
This is also where frame tolerance shows up in the field. Our production standard holds frame diameter to ±0.2mm; outside that tolerance, the loop binds inside the fabric sleeve and refuses to collapse no matter how correct the technique is. If you’re sourcing private-label pop-up tents, ask the factory whether they verify that tolerance during l'inspection avant expédition. The good ones — including the ISO 9001:2015-certified partner factories in our network — check it on every batch, and a simple three-step visual card in the packaging cuts return rates by 40% because most refunds trace back to this exact fold sequence, not a defective frame.
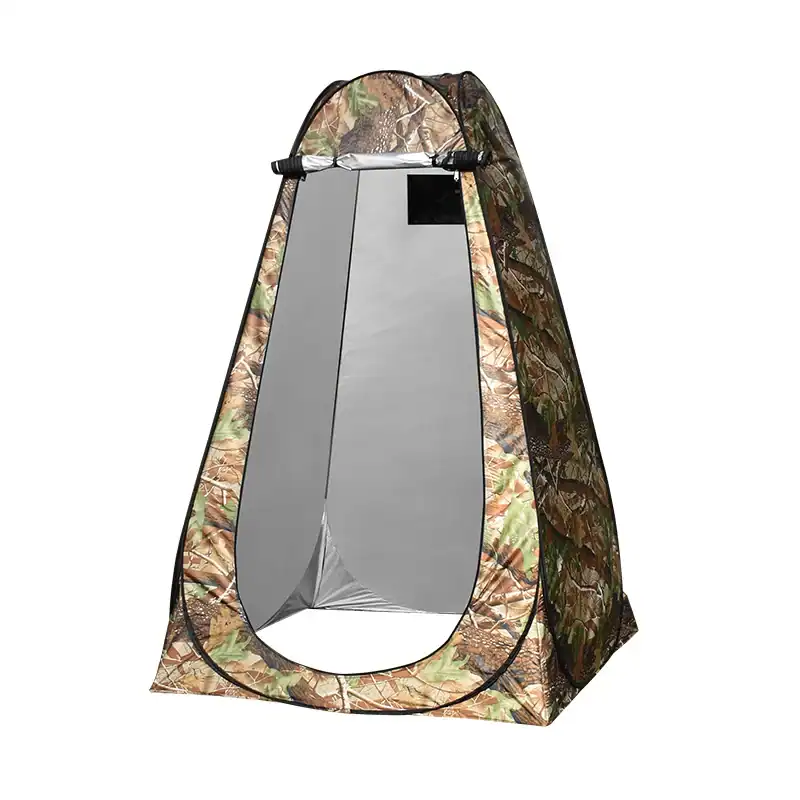
How to Prevent Frame Breakage (And What to Do If It Breaks)
Fiberglass frames fail at the hub after 20–30 fold cycles.
Frame material decides whether a tent lasts one season or five. Most pop-up tents use a continuous fiberglass loop (2.5–3.5mm thick) sewn into a fabric sleeve. Fiberglass is cheap, but it has a hidden weak point: internal fiber bundle notches create stress concentration at the hub. Under normal use, that hub snaps after roughly 20–30 fold cycles. Spring steel resists both fatigue and accidental kinking. It is rated for 50+ uses.
Why Frames Snap (And What Factories Do About It)
User error is one cause. Manufacturing shortcuts are another. When a fiberglass rod breaks at the hub, it often happens because the rod was scored or crushed at the bending point during assembly. Partner factories address this by adding gauge reinforcement joints at stress points on high-volume retailer models. That extra layer prevents breakage during floor sample rotation and repeated store handling. If a supplier does not reinforce the hub, it should be requested.
- Fiberglass (2.5–3.5mm): Standard on mid-price tents. Rated for 20–30 cycles. Fails at the hub due to stress concentration when folded under misalignment.
- Spring Steel: Rated for 50+ cycles. Resists fatigue, tolerates minor misalignment, and bends instead of snapping. Slightly heavier, higher material cost.
- Cut: Use a saw blade to trim the broken fiberglass segment. Match the cut ends to the original rod diameter.
- Splint: Insert a mini aluminum tube with a slightly larger diameter as a splicing sleeve. Wrap the joint with tape.
- Seal: Apply heat shrink tubing over the taped area. Heat until it shrinks tight, then slide the rod back into the fabric channel.
Field Repair: The Splint Kit Method
A broken fiberglass rod does not mean the tent is dead. A splint kit can fix it in minutes. Slide a mini aluminum tube over the break, wrap it tightly with tape, then seal it with heat shrink tubing. This restores the rod’s rigidity so the frame can still twist into the figure-8 fold. Without a splint, a ballpoint pen spring or tightly taped twig gets the customer home, but it is not a permanent fix.
Sourcing Strategy: Stock Spare Parts as Standard
Pour 4. les commandes en gros, spare parts are not a warranty afterthought. They protect the brand. A $40 tent returned because a half-inch rod snapped is a preventable loss. Sending replacement hubs and rod kits eliminates that failure. At Kelyland, we include a replacement hub pack with bulk merchandise assortments — roughly one set per thousand units ordered. That lowers total cost of ownership for the buyer and sets a sourcing partner apart from one that only competes on unit price.
Ask your supplier: “How do you reinforce the hub joint?” and “Do you ship replacement hubs with bulk orders?” A hesitant answer means you will carry the aftermarket cost. Confirm the frame material, reinforcement points, and spare part strategy before you approve the sample.
Conclusion
A pop-up tent that “won’t fold” usually isn’t broken — the user is collapsing it from the wrong grip point. The figure-8 method is a mechanical sequence: collapse the rim to a flat circle, twist into a figure-8, then fold into a three-loop stack, all within a ±0.2mm frame tolerance and 15-25N fabric tension. Importers who put this guide on the insert card and in the support video report return rates dropping by 40%.
- Always collapse from the rim; pushing the center hub misaligns the frame and snaps fiberglass.
- The figure-8 fold takes about 15 seconds: flat circle, twist, then a three-loop stack.
- Frame diameter tolerance of ±0.2mm and 15-25N fabric tension make the fold repeatable.
- Choose spring steel over fiberglass if your customers fold tents frequently at the beach.
Before you lock in your next beach tent order, verify that your supplier’s QC team tests the fold sequence on every production batch and can document frame diameter tolerance at sample approval. That single check protects your brand from the return pile caused by an instruction card that says “press the top” instead of “lift the rim.” Start with the spec sheet on the Kelyland beach tent line and compare it against your current return-rate data.
Questions fréquemment posées
Why won’t my pop-up beach tent fold flat?
Most pop-up tents won’t fold because you’re pushing the center hub instead of collapsing from the rim. Pull opposite sides of the bottom rim upward so the dome collapses into a flat circle before. Always collapse from the rim, never the center.
Comment plier rapidement une tente de plage pop-up ?
Repliez le dôme en un cercle plat, tordez le cadre en forme de huit, puis empilez-le en trois boucles. Avec de la pratique, le pliage complet prend environ 15 secondes. Entraînez-vous à ce pliage en trois étapes avant d'en avoir besoin sur la plage.
Quelle est la méthode du chiffre 8 pour les tentes pop-up ?
La méthode du huit tord la boucle continue du cadre pour réduire son diamètre de moitié. Après avoir replié la tente à plat, tordez un côté de la boucle par-dessus l'autre, puis pliez-la en trois boucles. Utilisez les deux mains et gardez le cadre équilibré.
Pourquoi les cadres des tentes à déploiement automatique se cassent-ils au niveau du moyeu ?
Fiberglass frames often fail at the hub after repeated incorrect folding, sometimes within 20 to 30 cycles. Pulling from the rim instead of pushing the center avoids the torque that snaps the hub joint. Choose spring steel frames for longer durability.

 English
  Español
  Deutsch
  Français
  Português do Brasil
  Русский
  العربية
  한국어
한국어  日本語
日本語