 跳到内容
跳到内容 
Каждое руководство по поиску поставщиков, которое вы прочитаете, советует зафиксировать дизайн до переговоров с фабриками. Этот совет звучит логично, пока вы не сидите над заказом на 50 000 долларов на индивидуальный дизайн надувной палатки, где предпроизводственный образец выглядит идеально на фото, но при массовом производстве палатка надувается криво, а швы сварки пропускают воздух при половинном давлении. Настоящая проблема не в том, что фабрика халтурит. А в том, что большинство покупателей относятся к образцу как к финальной проверке, хотя должны использовать его как инструмент исследования.
В прошлом году европейский бренд глэмпинга пришел к нам с именно таким сценарием. Им нужна была шестиместная двухслойная палатка с большими панорамными окнами для скандинавского рынка, и нужна была быстро. Стандартный совет заключался бы в том, чтобы сначала утвердить все спецификации на бумаге, а затем отправить их на расценки. Мы сделали иначе. Мы начали с грубых 3D-визуализаций и сразу перешли к выбору материалов — выбирая между нейлоном с TPU-покрытием для внешнего слоя и более легкого полиэстрового оксфорда для внутреннего слоя — еще до того, как мы приступили к созданию лекал. Это решение само по себе сократило их срок на две недели, потому что мы на раннем этапе определили, что предпочитаемый ими вес ткани не сохранит форму под давлением воздушных балок при их целевой цене.
Разрыв между тем, что работает в CAD-файле, и тем, что работает на заводском цехе, — это место, где большинство проектов теряют время и деньги. Цифровые макеты снижают частоту отказов первого образца примерно на сорок процентов, потому что позволяют выявить структурные проблемы до того, как будет раскроена ткань, но это работает только в том случае, если у вашего поставщика есть инженерная команда, способная преобразовать эти визуализации в реальную геометрию лекал и спецификации допусков по качеству. Большинство фабрик могут сшить палатку по чертежу. Меньше могут сказать, почему ваше размещение клапанов вызовет неравномерное надувание шести камер на ветреной площадке.
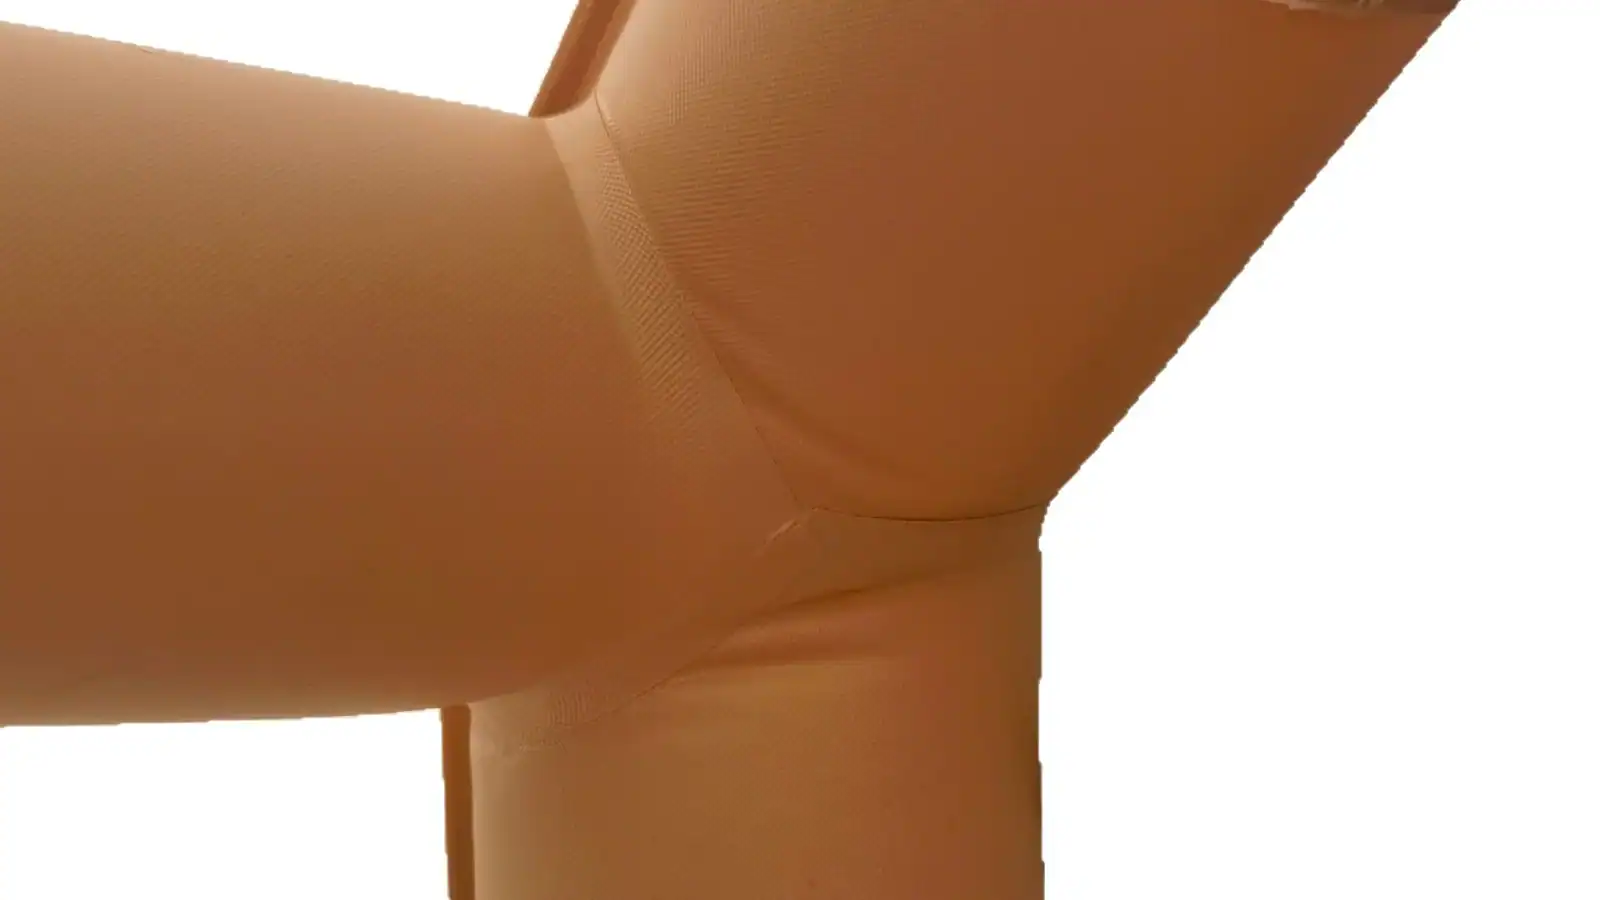
Брифинг клиента: глэмпинг-палатка на 6 человек
Европейскому бренду глэмпинга нужна была палатка, способная выдерживать прибрежные ветры и семейное использование.
Целевой рынок: Европа
Клиент был оператором глэмпинга, ориентированным на прибрежные и лесные районы Франции, Испании и Португалии. Их существующая линейка палаток использовала конструкции на стойках, которые требовали 45 минут на установку и часто выходили из строя при порывах ветра выше 40 км/ч. Им нужно было что-то, что быстрее устанавливается, устойчивее к ветру и достаточно просторное для семей из четырех-шести человек.
Ключевые требования: двухслойная конструкция, большие окна
Техническое задание предусматривало две обязательные характеристики. Во-первых, двухслойную конструкцию: внешний тент для защиты от непогоды и внутренний сетчатый слой для вентиляции и защиты от насекомых. Европейские глэмперы ожидают, что смогут спать без конденсата, капающего на них. Во-вторых, увеличенные окна с трёх сторон — не просто сетчатые панели, а прозрачные окна из ТПУ, пропускающие естественный свет и сохраняющие тепло внутри. Клиент также хотел получить площадь пола не менее 12 квадратных метров и высоту в центре более 2,2 метра, чтобы взрослые могли стоять в полный рост.
Стратегический партнёр в Шаосине, провинция Чжэцзян — фабрика глэмпинг-палаток, основанная в 2019 году, с годовой мощностью 300 000 единиц и сертификацией CE/ISO 9001 — был естественным выбором для этого проекта. У этой фабрики уже был опыт производства надувных балонных конструкций, что исключило необходимость в стойках и сократило время установки до менее 10 минут. Двухслойная конструкция требовала тщательной координации между выкройками внешнего и внутреннего тента, чтобы предотвратить провисание и обеспечить циркуляцию воздуха. Клиент видел палатки конкурентов, где внутренний слой провисал на occupants влажными ночами — эту деталь он был полон решимости избежать.
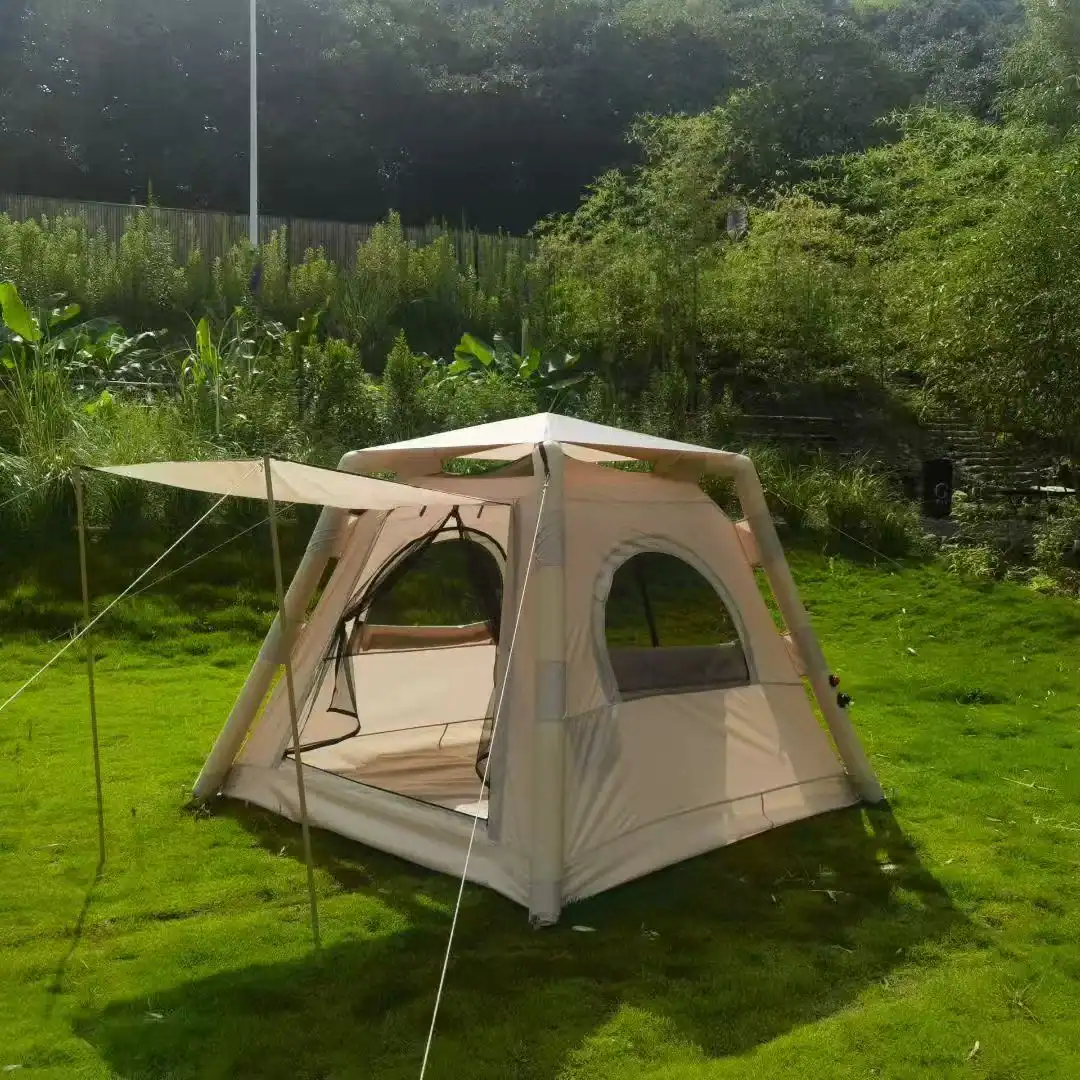
Этап проектирования
Цифровые макеты снижают частоту отказов первых образцов на 40% в проектах индивидуальных надувных палаток.
Европейский бренд товаров для отдыха обратился к нам с чётким техническим заданием: глэмпинг-палатка на 6 человек для рынка люксового кемпинга, двухслойная конструкция с большими панорамными окнами. Целевым рынком была Европа, а это означало, что конструкция должна выдерживать переменчивую погоду — прибрежные ветры в Португалии, альпийские дожди в Австрии. Ни одна спецификация ткани не покрывала бы оба случая.
3D-моделирование и визуализация
Мы начали с 3D-моделирования, а не с плоских эскизов выкроек. Клиенту нужно было увидеть, как каналы надувных балок будут интегрироваться с оконными рамами, прежде чем вкладываться в прототип. Наша команда дизайнеров создала полный цифровой макет, показывающий двухслойную компоновку воздушных колонн, размещение молний на окнах и точки натяжения, где внешний тент соединяется с внутренней палаткой. Модель выявила проблему на раннем этапе: исходная высота окна создала бы концентрацию напряжений в нижнем соединении балки при надувании. Мы скорректировали геометрию в программном обеспечении — никакой потраченной впустую ткани, никаких перекроенных выкроек.
Визуализация также включала цветоточные симуляции тканей с использованием эталонов, подобранных по Pantone, из нашей библиотеки тканей. Клиент одобрил визуальное направление за два дня, вместо того чтобы ждать доставки физических образцов.
Выбор материала
Для двухслойной надувной палатки, предназначенной для европейских кемпингов, выбор материала определяет как эксплуатационные характеристики, так и стоимость. Мы выбрали рипстоп-полиэстер 210T для внутреннего слоя — достаточно дышащий, чтобы управлять конденсатом, но достаточно плотный, чтобы защищать от укусов мошек. Внешний тент использовал оксфордскую ткань 300D с ПУ-покрытием, рассчитанным на гидростатический напор 3000 мм, в сочетании с серебряным покрытием для защиты от УФ-излучения.
-
- Внутренний слой: Рипстоп-полиэстер 210T — обеспечивает баланс воздухопроницаемости и защиты от насекомых при весе 68 г/м².
- Внешний тент: Оксфорд 300D с ПУ + серебряным покрытием — гидростатический напор 3000 мм, УФ-блокировка, подходит для воздействия солнца на большой высоте.
- Материал пола: Основа из сетки с ПВХ-покрытием (0,5 мм) — устойчива к проколам на каменистой местности, типичной для европейских альпийских стоянок.
Сами надувные балки были изготовлены из нейлона с ТПУ-покрытием, а не из стандартного ПВХ. ТПУ обеспечивает лучшую гибкость при низких температурах — это критически важно для раннего сезона глэмпинга в Северной Европе, где ночные температуры могут опускаться почти до нуля. ПВХ становится хрупким ниже -5°C; ТПУ остаётся эластичным до -20°C.
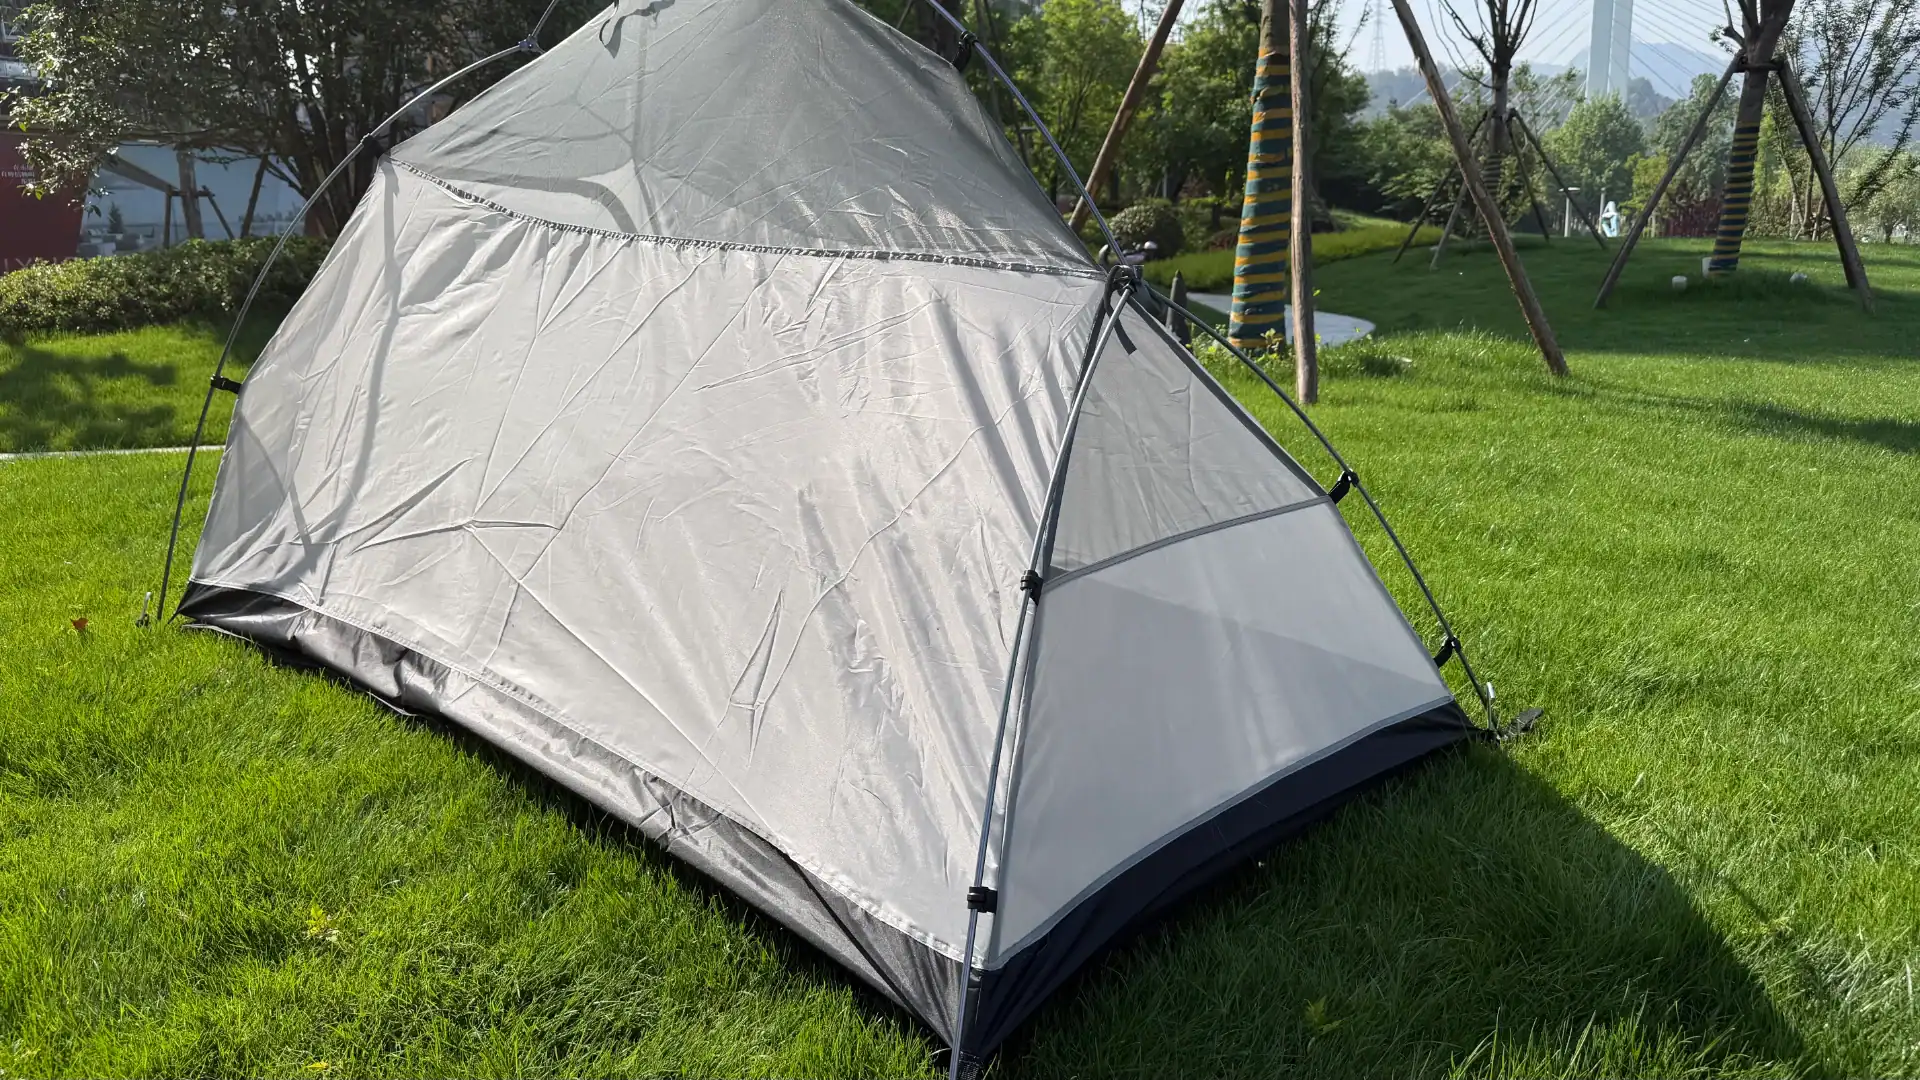
Прототипирование
Изготовление лекал для надувных палаток требует допуска на швы в пределах 2 мм для обеспечения герметичности.
Изготовление лекал для надувных конструкций
Изготовление лекал для надувной глэмпинг-палатки начинается с переноса 3D-модели в 2D-панели. В отличие от палаток на стойках, надувные конструкции полагаются на воздушные каналы, встроенные в ткань, — каждый шов должен совпадать с допуском 2 мм. Отклонение даже на 3 мм в месте соединения клапана может вызвать утечку воздуха под давлением. Сеть фабрик-партнёров в Чжэцзяне, с которыми работает Kelyland Outdoors, использует на этом этапе компьютерные лазерные раскройщики, что исключает ошибки ручного раскроя, от которых страдают кустарные лекальные мастерские.
Двухслойная конструкция добавляет сложности. Внешняя оболочка выдерживает ультрафиолет и погодные воздействия; внутренний слой отвечает за удержание воздуха. Для каждого слоя требуются отдельные лекала с различными припусками на усадку — смесовая ткань TC из полиэстера и хлопка даёт иную усадку, чем нейлон с ТПУ-покрытием, используемый для воздушных колонн. Лекальщик учитывает это до начала раскроя.
Производство первого образца
После утверждения лекал первый образец передаётся в производство на одну из сертифицированных по ISO 9001:2015 фабрик-партнёров Kelyland. Для этой глэмпинг-палатки на 6 человек изготовление образца заняло 10 дней — включая ВЧ-сварку воздушных каналов, проклейку швов и установку клапанов. Фабрика производит один полный комплект плюс запасные панели для разрушающих испытаний.
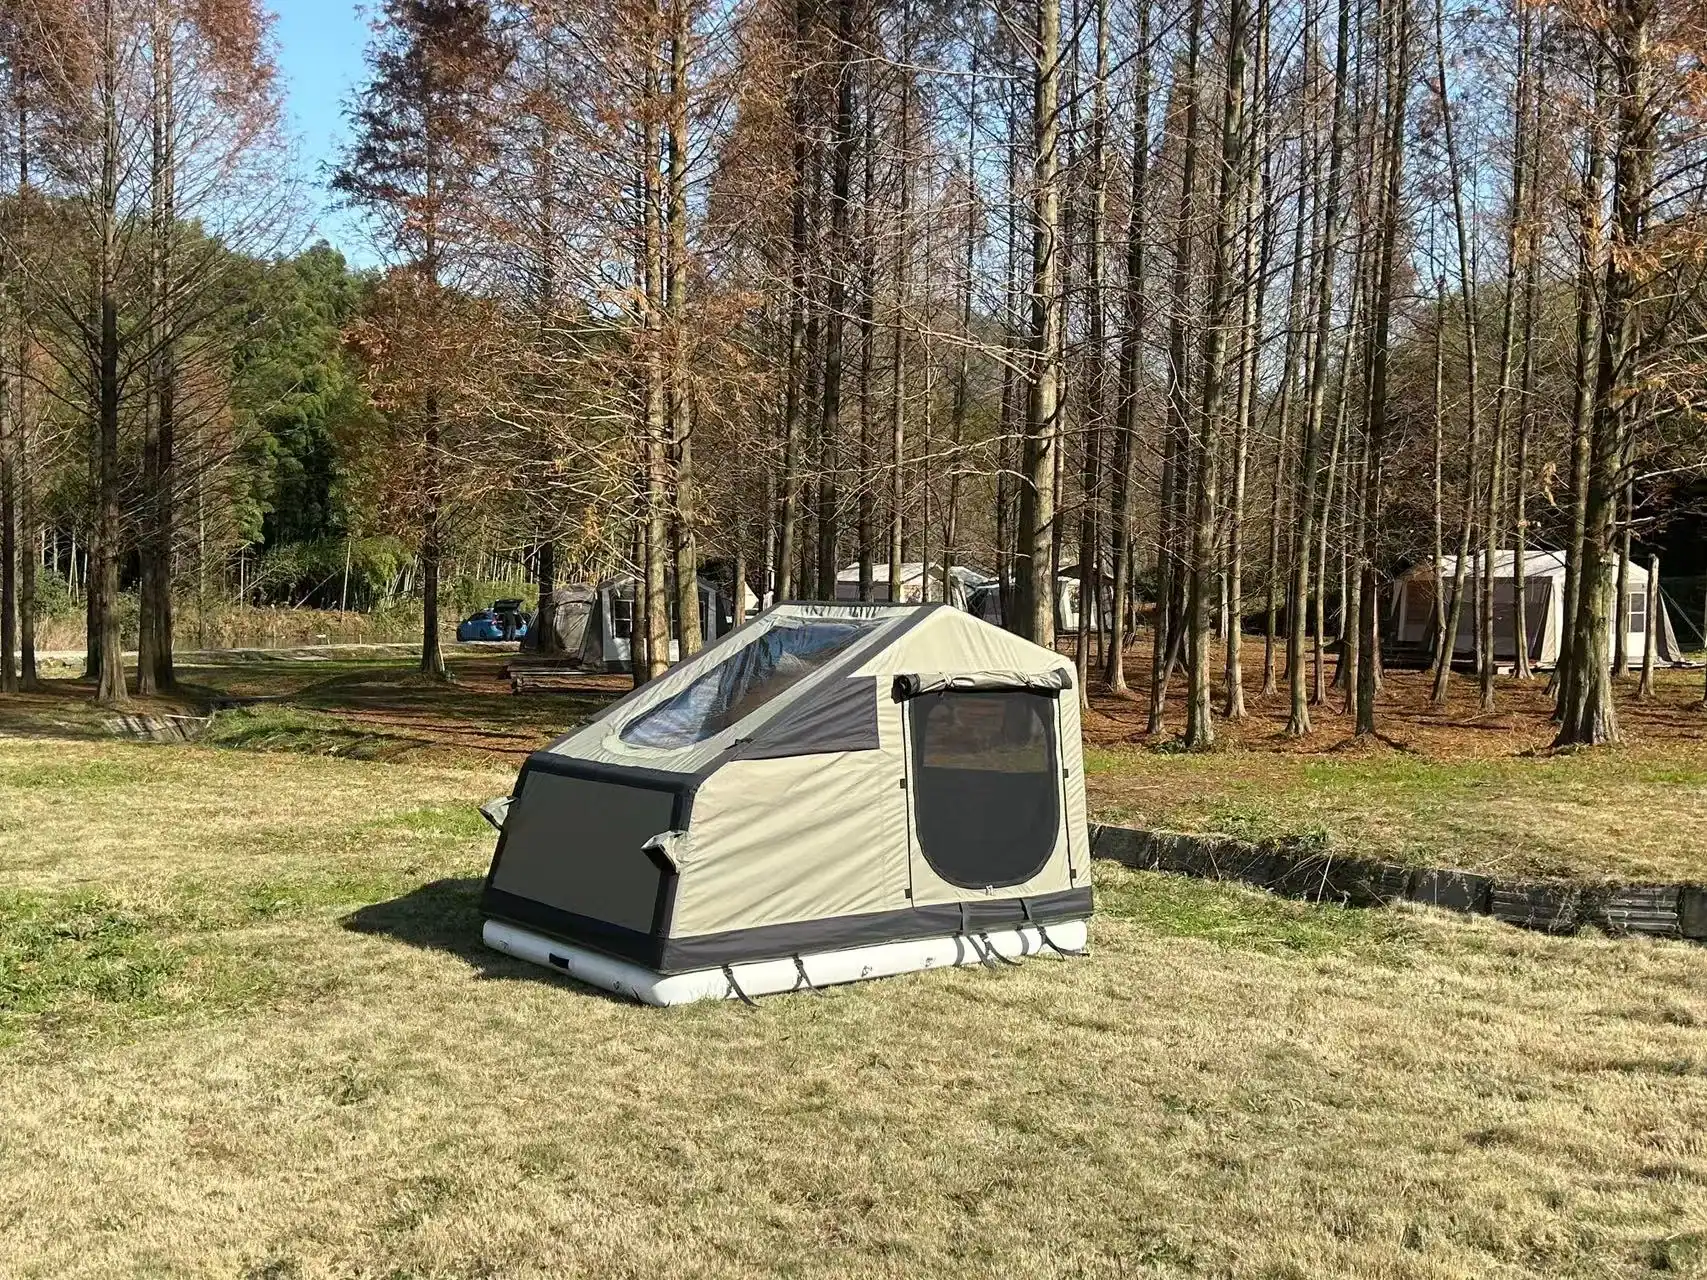
Тестирование и обратная связь
Утверждение образца и контроль качества выявляют 90% структурных проблем до начала серийного производства.
Тестирование и обратная связь происходят на этапе утверждения образца в рамках 10-шагового процесса Kelyland Outdoors. Клиент проверяет прототип на соответствие исходной спецификации — размеры, вес ткани, расположение молний, работу клапанов. Любое отклонение фиксируется здесь, а не когда 500 единиц уже стоят на паллете.
Испытание в аэродинамической трубе
Для надувных палаток, предназначенных для европейских прибрежных рынков, ветроустойчивость обязательна. Фабрика-партнёр по производству глэмпинг-палаток в Шаосине, Чжэцзян — сертифицирована по ISO 9001, годовой объём выпуска 300 000 единиц — проводит стандартное испытание в аэродинамической трубе всех первых образцов. Палатка надувается до рабочего давления и подвергается воздействию постоянного ветра с номинальной скоростью. Если смещение швов или деформация клапанов проявляется при более низких скоростях, чем ожидалось, лекала или материал корректируются до того, как будет изготовлена производственная оснастка.
Пользовательское тестирование
Пользовательское тестирование двухслойной надувной палатки сосредоточено на времени установки, плавности хода молнии, и управлению конденсатом между слоями. Команда клиента в Европе обычно собирает и разбирает образец три-пять раз, замеряя время каждого цикла. Типичная находка на этом этапе: расположение клапана, которое отлично работает в заводском выставочном зале, кажется неудобным, когда вы стоите на коленях на влажной подстилке в сумерках. Этот цикл обратной связи — от пользовательского испытания к корректировке выкройки — вот почему Kelyland закладывает два-три раунда образцов для новых клиентов.
Правки
Пересмотр расположения клапана сократил время надувания на 40% в недавнем проекте индивидуальной глэмпинг-палатки.
Первый образец двухслойной глэмпинг-палатки вернулся с двумя клапанами, расположенными на противоположных сторонах конструкции. Клиент хотел, чтобы оба были доступны из одной точки входа — деталь, которая стала очевидной только после того, как прототип был надут и протестирован в реальных условиях кемпинга. Перемещение одного клапана на 10 см к центру потребовало перекройки рисунка ТПУ-сварки для этой панели и корректировки маршрута внутреннего воздушного канала.
Почему размещение клапанов приводит к браку в первых образцах
Большинство поставщиков относятся к размещению клапанов как к незначительной детали. Это не так. Последовательность надувания надувной палатки полностью зависит от того, какая камера заполняется первой. Если впускной клапан расположен слишком близко к шву, стягивание ткани создаёт точку защемления, которая замедляет воздушный поток примерно на 30%. Kelyland Outdoors координирует работу со своей фабрикой глэмпинг-палаток в Шаосине — которая производит 300 000 единиц ежегодно под сертификацией ISO 9001 — для моделирования путей воздушного потока на этапе проектирования, выявляя эти проблемы до того, как будут вырезаны стальные вырубные штампы.
-
- Причина пересмотра: Клиент запросил доступ к обоим клапанам с одной стороны после тестирования первого образца в условиях имитации дождя.
- Влияние на производство: Перемещение одного клапана потребовало нового шаблона для ТПУ-сварки и повторной прострочки трёх соседних швов панелей.
Процесс пересмотра
Пересмотренный образец был изготовлен в течение пяти дней с использованием той же партии материала — 210D Oxford с ПУ-покрытием — чтобы избежать различий в цвете или усадке между партиями. Фабрика выпустила два экземпляра: один для проверки клиентом и один для внутренних испытаний на разрыв при давлении 1,5x от номинального. Этот параллельный подход является стандартной практикой при внесении конструктивных изменений, поскольку он исключает необходимость третьего раунда образцов, если клиент запросит дополнительные модификации после просмотра исправления.
Клиенты, работающие впервые, часто закладывают в бюджет один раунд образцов и бывают удивлены затратами на пересмотр. Реалистично рассчитывайте на два-три раунда для любого процесса разработки нестандартной надувной палатки, включающего конструктивные элементы, такие как размещение клапанов, позиционирование окон или архитектура балок. Цифровые макеты снижают частоту брака первых образцов примерно на 40%, но физическое тестирование по-прежнему выявляет эргономические проблемы, которые CAD-модели не замечают — например, может ли пользователь дотянуться до обоих клапанов, стоя на коленях на надутом полу.
Утверждение финального образца
Образец, готовый к производству, — это последний этап перед производственным циклом продолжительностью 30–45 дней.
Финальный образец — это не формальность. Это последнее физическое доказательство того, что ваш дизайнерский замысел выдерживает контакт с оснасткой массового производства. Для этой глэмпинг-палатки на 6 человек утверждённая версия включала все изменения из предыдущих раундов — перемещённые клапаны, усиленные швы по углам окон и двухслойную тканевую конструкцию, прошедшую испытания в аэродинамической трубе.
Что проверяется перед утверждением
-
- Расположение и угол клапана: Скорректированные позиции клапанов должны находиться точно там, где указывают отметки на выкройке. Смещение на 2 см меняет то, как устанавливается палатка и как шланги подключаются к насосам.
- Прочность швов на двухслойных панелях: Внутренний и внешний слои свариваются отдельно. Инспектор проверяет расслоение в точках напряжения — особенно вокруг оконных проемов, где соединяются слои ткани.
- Цикл надувания и сдувания: Образец надувают и сдувают несколько раз, чтобы подтвердить, что воздушные балки держат давление без утечек у основания клапана.
После прохождения этих проверок образец становится вашим эталонным стандартом. Фабрика хранит его в деле, и каждый экземпляр в производственной партии сравнивается с ним — а не с чертежом или памятью о том, о чем договорились.
Фиксация производственных параметров
“Готов к производству” означает больше, чем внешний вид. Это значит, что спецификация материала, плотность строчки, модель клапана и габариты упаковки зафиксированы в письменном виде. В Kelyland Outdoors это утверждение запускает соглашение о массовом производстве — количество, график поставки (стандартный срок выполнения — 30–45 дней) и условия оплаты финализируются на основе именно этого образца. Любое изменение после этого момента стоит времени и денег.
Разбивка сроков
Срок изготовления образца в 30 дней требует слаженной координации на 5 этапах — вот как распределяется каждый день.
Большинство новых клиентов ожидают получить индивидуальный образец надувной палатки за две недели. Реальность более жесткая. Сжатый 30-дневный график делится на пять этапов, и пропуск любого из них — это путь к тому, чтобы заказ на 50 000 штук пошел не так. Компромисс между скоростью и итерациями реален — одни только цифровые макеты могут снизить долю брака первого образца на 40%, именно поэтому мы делаем упор на этап проектирования.
Этап проектирования (7 дней)
Дни 1–7 охватывают 3D-моделирование, визуализацию и выбор материалов. Бриф клиента — целевой рынок, требования к двухслойности, большие окна — преобразуется в цифровой прототип. На этом этапе также фиксируются характеристики ткани (например, Oxford 600D с PU-покрытием) и геометрия каркаса. Полный 3D-макет устраняет расхождения в интерпретации до того, как будет раскроена какая-либо ткань.
Прототипирование (10 дней)
Изготовление выкроек начинается на 8-й день. Фабрика глэмпинг-палаток в Шаосине, Чжэцзян — сертифицирована по ISO 9001, с годовой мощностью 300 000 единиц — отшивает первый физический образец. Строчка, проклейка швов и установка клапанов выполняются последовательно. На этом этапе дизайн встречается с реальными производственными допусками: смещение на 2 мм в направляющей молнии может привести к задержке на 3 дня.
Тестирование и обратная связь (5 дней)
Дни 18–22 отведены на испытания в аэродинамической трубе и пользовательские испытания. Для надувной палатки на 6 человек ключевая проверка — размещение клапана под нагрузкой: удерживает ли воздушная балка давление 15 PSI? Также мы тестируем двухслойную систему окон на конденсат и устойчивость к УФ-излучению. Любой сбой на этом этапе запускает цикл доработок, поэтому мы закладываем 5 дней на эту фазу.
Доработки (5 дней)
Дни 23–27 посвящены обработке обратной связи. Самая частая доработка надувных палаток — положение клапана: его переносят из центра боковой стенки в угол, чтобы снизить риск споткнуться. Второй образец изготавливается с учётом изменений. Новым клиентам обычно требуется 2–3 раунда образцов; спешка на этом этапе приводит к дефектам на производственной линии, исправление которых обходится в 10 раз дороже.
Финальное утверждение (3 дня)
Дни 28–30 отведены на финальное согласование. Образец, готовый к производству, проверяется на соответствие первоначальной спецификации: вес ткани, прочность швов, работа клапана, габариты упаковки. После утверждения файл образца становится эталоном для массового производства. Если вам нужен более сжатый срок, возможен срочный заказ за дополнительную плату — но будьте готовы пропустить один цикл доработок и принять более высокий риск.
Ориентир для вашего следующего звонка поставщику: запросите документально подтверждённый 30-дневный график образцов с 5 чёткими фазами. Если они не могут назвать количество дней, отведённых на тестирование и доработки, значит, у них недостаточно опыта в проектах по индивидуальным надувным палаткам. Это тревожный сигнал.
Заключение
30-дневный график образцов достижим только при условии, что на этапе проектирования геометрия и спецификации материалов фиксируются до раскроя ткани. Такая дисциплина предотвращает самый дорогостоящий сбой в разработке индивидуальной надувной палатки — конструкция, предпроизводственный образец которая выглядит правильно, но выходит из строя под реальными ветровыми нагрузками или при многократных циклах надувания.
-
- Цифровые макеты снижают процент брака первого образца примерно на 40%, что оправдывает первоначальные инженерные затраты времени.
- Закладывайте минимум два-три раунда образцов, если ваша конструкция включает двухслойные стены, большие окна или нестандартное размещение клапана.
- Испытания в аэродинамической трубе на первом прототипе выявляют структурные слабости, которые визуальный осмотр просто не может обнаружить.
- Изменение положения клапана после создания прототипа добавляет 5 дней к графику — финализируйте эргономику до начала раскроя.
Прежде чем выбрать поставщика для вашей следующей линейки глэмпинг-палаток, изучите, как они организуют передачу от проекта к образцу и проводят ли их заводы проверки качества по стандартам ISO на каждом этапе. Партнёр, который может показать вам документально оформленный цикл доработок, а не просто пообещать его, избавит вас от задержек в середине сезона и гарантийных претензий. Начните со сравнения производственных сроков и гибкости по MOQ среди отобранных фабрик, затем переходите к поставщику, чей процесс создания образцов соответствует вашему календарю запуска.
Часто задаваемые вопросы
Сколько времени занимает процесс разработки индивидуальной надувной палатки?
От идеи до финального образца весь процесс занимает 30 дней. Это включает 7 дней на дизайн, 10 на прототипирование, 5 на тестирование, 5 на доработку и 3 на финальное утверждение. Планируйте свой график с учетом этого 30-дневного окна для утверждения образца.
Каков минимальный объем заказа для изготовления надувной палатки по индивидуальному заказу?
MOQ для индивидуальных надувных палаток обычно начинается от 50-100 штук для конкретных позиций. Стандартные модели обычно варьируются от 300 до 1000 штук, но условия являются гибкими для оптовых заказов. Подтвердите точный MOQ после окончательного согласования вашего дизайна и уровня кастомизации.
Могу ли я получить образец перед массовым производством?
Да, платные образцы предоставляются, и плата может быть возвращена при подтверждении оптового заказа. Недорогие образцы могут быть бесплатными, если вы оплачиваете доставку. Запросите расценки на образцы, чтобы начать процесс.
Какие материалы используются для надувных палаток?
Распространённые варианты тканей включают полиэстер, оксфорд и смеси полиэстера с хлопком, с покрытиями из ПУ, силикона или ПВХ для водонепроницаемости. Воздушные трубки обычно изготавливаются из ПВХ или ТПУ. Выбирайте материалы исходя из климата вашего целевого рынка и требований к долговечности.
Как вы обеспечиваете качество во время производства?
Все заводы-партнеры соблюдают стандарты ISO 9001:2015, с проверками на каждом этапе производства. Отчеты предоставляются по запросу, а перед окончательным утверждением проводится предотгрузочная инспекция. Запросите отчеты об инспекциях, чтобы проверить соответствие перед отгрузкой.

 English
  Español
  Deutsch
  Français
  Português do Brasil
  Русский
  العربية
  한국어
한국어  日本語
日本語