 Zum Inhalt springen
7 Smart Tent Features Worth Adding in 2026 ist der erste Kontrollpunkt, den Käufer festlegen sollten, bevor sie einen Lieferanten, ein Budget oder einen Produktionsslot genehmigen. Ein Markenmanager, der intelligente Zeltfunktionen für eine 2026er Linie plant, betrachtet die Vorproduktionsmuster und sieht ein flexibles CIGS-Solarpanels, das sauber in das Regenverdeck eingenäht ist. Es lässt sich falten. Es besteht die Prüfung. Die Musterfreigabe wird unterzeichnet. Dann kommt der Container in Rotterdam an, und die Massenproduktionseinheiten reißen beim zweiten Aufbau. Grund: Der Lieferant hat die Dünnschichtpanels ohne ein Wort gegen starres Glas ausgetauscht und so $4.20 pro Einheit von der Stückliste gestrichen. Diese $50.000-Bestellung wurde zu einer Lagerverbindlichkeit, bevor auch nur ein Kunde eine Kreditkarte durchgezogen hat.
Die meisten Beschaffungsleitfäden beschränken sich darauf, Ihnen zu sagen, dass Sie drei Lieferanten vergleichen und Zertifizierungen prüfen sollen. Dieser Ratschlag scheitert, wenn die eigentliche Bedrohung ein Materialaustausch ist, der stattfindet, nachdem das Muster die Fabrikhalle verlassen hat. Die Toleranz zwischen dem, was Sie spezifizieren, und dem, was die Fabrik verschifft, ist der Punkt, an dem die Margen zerstört werden – und bei intelligenten Zelten vervielfachen sich die Variablen in dem Moment, in dem Sie Elektronik in eine textile Lieferkette einführen.
Die sieben folgenden Funktionen erfüllen alle eine bestimmte Anforderung: Sie überleben das Falten, sie überleben den Versand, und sie fügen einen Margenpuffer hinzu, der den technischen Aufwand rechtfertigt. Eine davon birgt eine versteckte Haftung, die die meisten Marken erst erkennen, wenn die erste Garantierückgabe eintrifft. Das wird zuletzt besprochen.
Feature 1: Integriertes Solarpanel-Dach
Starre Glaspanels reißen beim zweiten Aufbau.
Kommen wir zu dem Teil, den die meisten Spezifikationsblätter übergehen. Sie können ein starres monokristallines Panel nicht in ein Regenverdeck einnähen und erwarten, dass es eine Saison übersteht. Ich habe die Rückgabedaten gesehen. Die einzige Technologie, die wiederholtes Falten übersteht, ist CIGS-Dünnschicht (Kupfer-Indium-Gallium-Selenid), die direkt auf ein flexibles Polymersubstrat aufgebracht wird. Die technische Schwelle, die hier zählt, ist ein Biegeradius von mindestens 30 Grad. Standard-Glaspanel-Varianten versagen beim zweiten oder dritten Aufbau katastrophal – die Mikrorisse sind nicht sichtbar, aber die Leistung fällt auf null. CIGS-Panels behalten nach 1.000 Biegezyklen bei diesem 30-Grad-Radius 90% der Nennleistung, basierend auf Dünnschicht-Haltbarkeitstests, die wir vor der Freigabe eines solaren Regenverdeck-Musters verlangen.
Integration in das Außenzelt ist keine Näharbeit – es ist ein Laminier- und Nahtabdichtungsprojekt. Das Panel wird zwischen der äußeren Zeltplane und einer inneren Schutzschicht eingebettet, wobei ein flaches Leiterband durch eine IP67-zertifizierte Kabeldurchführung austritt. An dieser Durchdringungsstelle scheitern 90% der Prototypen beim Regentest mit 200 l/m²/h. Wenn Ihr Beschaffungspartner dies als reine Textilaufgabe behandelt, versenden Sie einen ganzen Container voller Zelte, die bereits in der ersten Nieselregen-Nacht kurzschließen.
Zur Leistungsabgabe: Ein 10W-Panel, etwa 300mm x 200mm für ein 3-Personen-Kuppelzelt-Außenzelt, erzeugt bei direkter Spitzensonne etwa 5V/2A. Das bedeutet, dass ein handelsübliches 10.000-mAh-Akku-Pack bei guter Sonne in 6-8 Stunden vollständig geladen wird – nicht in 3 Stunden, trotz der Behauptungen von Marketingmaterialien. Ein 20W-Panel auf einem größeren Glamping- oder Dachzelt verdoppelt die Fläche und verkürzt die Ladezeit proportional, aber Sie müssen teilweise Verschattung durch Stangen und Baumkronen berücksichtigen. Reale Felddaten zeigen eine durchschnittliche täglich nutzbare Leistung von 60-70% der Nennleistung über ein 10-stündiges Solarenstundenfenster.
-
- Maßgefertigte CIGS-Panel-Mindestabnahmemenge (MOQ): 1.000 Einheiten, Stücklistenaufschlag von $12–$18 pro Einheit, und eine Vorlaufzeit von 5-7 Wochen allein für das Panel-Substrat. Dies umfasst die Werkzeugkosten für Ihre spezifische Außenzeltgeometrie – Panelform, Anschlussplatzierung und Kabellänge sind alle maßgefertigt.
- Standard-CIGS-Panel-Mindestabnahmemenge (MOQ): 300 Einheiten, aber keine Formanpassung möglich. Sie sind auf Standard-Rechteckformate beschränkt, die Ihr Außenzelt-Zuschnittmuster vorgeben. Wenn Ihre Zeltkontur für Ihre Markenidentität wichtig ist, tut dieser Kompromiss sehr weh.
- Musterfreigabefalle: Das Vorserienmuster wird im Ausstellungsraum wunderbar laden. Die Serienproduktion wird anders funktionieren, wenn der Panel-Lieferant die Klebstoffschicht ausgetauscht hat, um $0,40 pro Einheit zu sparen. Ein Auftrag über $50K ging schief, weil das Außenzeltmuster 3M VHB-Klebung verwendete und die Produktion auf ein generisches Acryl-Klebeband umstellte, das bei Feuchtigkeit delaminierte. Spezifizieren Sie den Klebstoff und testen Sie ihn bei 85°C/85
Die Kosten des Nichtstuns sind eine verlorene Saison. Wenn Sie den 48-stündigen beschleunigten Alterungstest am Vorserienmuster überspringen, setzen Sie Ihren gesamten Launch im zweiten Quartal 2026 auf eine Klebstoffspezifikation, die Sie nie verifiziert haben. Wenn die Retouren im Juli ansteigen, gibt es keine Erholung. Allein die Nacharbeit – Demontage, Neu-Laminierung und Neuverpackung von 1.000 Einheiten – frisst Ihre gesamte Marge auf die SKU und verschiebt Ihr nächstes Versandfenster hinter den Herbst-Einkaufszyklus. Das sind 18 Monate Opportunitätskosten, die Sie nie wieder zurückbekommen.
| Aspekt | Spezifikation | Leistung | Dauerhaftigkeit | Beschaffungsüberlegung |
|---|---|---|---|---|
| Panel-Technologie | CIGS-Dünnschicht, in Außenzelt einnähbar | 10W–20W Leistung; hält Biegeradius von 30° stand | 90% Leistungsbeibehaltung nach 1.000 Faltungen | Maßgefertigte MOQ 1.000 Einheiten; Stücklistenaufschlag $12–$18 |
Feature 2: USB-Lade-Hub mit Akkupack-Tasche
Überspringen Sie eingebaute Akkus, um Kosten von über 1.200 € für UN38.3 und Verzögerungen bei Luftfracht zu vermeiden.
Die meisten Marken machen den Fehler, ein Zelt mit einem dauerhaft eingebauten Lithium-Akku zu konstruieren. Diese einzelne Entscheidung löst UN38.3-Zertifizierungstests aus, erhöht das Compliance-Budget um 1.200–1.500 € pro Modell und verzögert den Luftversand um bis zu drei Wochen, während das Testlabor die Probe bearbeitet. Die intelligentere Architektur – und diejenige, die die Sorgfaltspflicht bei der Beschaffung erfüllt – ist eine dedizierte, abgedichtete Tasche, die eine vom Benutzer bereitgestellte USB-Powerbank aufnimmt. Das Zelt liefert die wettergeschützte Verkabelungsinfrastruktur; der Kunde liefert den Akku, den er bereits besitzt.
Aus Verdrahtungssicht benötigt jeder Durchführungspunkt, an dem das USB-Kabel die Tasche verlässt und zur Hub-Einheit führt, eine wasserdichte Kabelverschraubung mit innerem Geldichtung. Es ist bekannt, dass IP67-zertifizierte Steckverbinder innerhalb von sechs Monaten versagen, weil Marken die sekundäre Zugentlastungsverankerung innerhalb der Naht weggelassen haben. Diese Verankerung – eine einfache Nylonschlaufe, die neben dem Kabelaustritt eingenäht ist – verhindert, dass wiederholtes Ziehen den Stecker auseinanderzieht. Ohne sie erhalten Sie intermittierendes Laden und Garantierücksendungen, die Sie nicht diagnostizieren können, bis Sie ein zurückgesandtes Gerät zerlegen.
-
- Mindestens zwei Anschlüsse: Die Erwartung der Verbraucher im Jahr 2026 ist das gleichzeitige Laden von mindestens zwei Geräten. Ein gemeinsamer Ausgangskreis mit 2,4 A erfüllt diese Grundanforderung; ein Kreis mit 3,0 A und intelligenter Leistungsverteilung verhindert, dass ein Gerät das andere aushungert.
- CE/UL-Anforderungen: Alle USB-Hub-Elektroniken im Zelt müssen CE (EMC/LVD) für EU-Märkte und UL 60950-1 oder UL 62368-1 für Nordamerika tragen. Wenn der Hub drahtlose Ladefunktionen enthält, kommen zusätzlich FCC Part 15 und RED-Konformität in den Geltungsbereich. Planen Sie 2.000–3.500 € für Tests in einem externen Labor für ein neues Hub-Design ein, ohne die eingebetteten Komponentenzertifizierungen, die Sie vom PCB-Lieferanten benötigen.
- Zugentlastungsverankerung: Eine eingenähte Nylonschlaufe, die 4–6 cm von der Kabelverschraubung positioniert ist, verhindert Stoßbelastungen der wasserdichten Dichtung. Das Überspringen dieses Schrittes führt zu Mikrorissen im Dichtungsgummi nach wiederholten Auf- und Abbauzyklen.
- Material der abgedichteten Tasche: Verwenden Sie TPU-laminiertes Ripstop-Nylon für den Akku-Taschenkörper. Es bietet sowohl Abriebfestigkeit als auch eine Feuchtigkeitsbarriere. Ein YKK AquaGuard-Reißverschluss oder ein Rollverschluss mit Doppelspur-Schnalle vervollständigt die Abdichtung, ohne die Komplexität eines harten Kunststoffgehäuses hinzuzufügen.
In der Fabrikhalle ist die Montagereihenfolge wichtig. Die abgedichtete Tasche sollte in die innere Schicht des Zeltes eingenäht werden, bevor der Regenschutz-Befestigungspunkt fertiggestellt ist, da die Kantenbindung der Tasche gleichzeitig den Lastpfad für die Zugentlastungsverankerung bildet. Der Versuch, dies nachträglich in eine bestehende Zelt-Hülle einzubauen, ohne die Nahtanordnung neu zu konstruieren, ist einer der schnellsten Wege, die Dichtungsintegrität während der Erstmusterprüfung zu ruinieren. Ich habe im letzten Jahr drei Vorserienmuster abgelehnt, bei denen die Fabrik die Tasche als nachträglichen Einbau angebracht hatte, und die IP67-Einstufung fiel unter einem Gartenschlauch-Test effektiv auf IP53.
| Feature 2: USB-Lade-Hub mit Akkupack-Tasche | ||||
|---|---|---|---|---|
| Aspekt | Detaillierte Spezifikation | BOM-Kostenauswirkung | Zertifizierung / Haftung | Kundenvorteil |
| Batteriestrategie | Vom Benutzer bereitgestellte Powerbank in einer speziellen, abgedichteten (IP67) Tasche aufbewahrt; keine eingebaute Lithiumbatterie | Eliminiert 1.200–1.500 pro Modell bei UN38.3-Tests und Versandkonformität | Kein UN38.3 erforderlich; reduzierte Haftung bei Batterieausfällen | Benutzer können ihre eigene Powerbank tauschen/upgraden; vermeidet Versandbeschränkungen |
| Verkabelung & Anschlüsse | Wasserdichte Steckverbinder (mindestens IP67) mit Zugentlastung an allen Durchdringungspunkten; Kabelverschraubungen mit Gel-Dichtungen | ~$0,50–$1,00 pro Zelt für hochwertige Steckverbinder und Zugentlastung | CE/UL-anerkannte Komponenten für Verkabelung und Steckverbinder | Zuverlässiges Laden unter nassen Bedingungen; verhindert Kabelschäden durch wiederholtes Verpacken |
| Lade-Hub-Fähigkeit | Integrierter USB-Hub mit 2 Ports (USB-A und/oder USB-C), Gesamtausgang 2,4 A, über ein internes Kabel mit der Benutzerbatterie verbunden | Hub-Modul-Kosten ~$3–$5 pro Zelt (mengenabhängig) | USB-Modul muss CE/UL-Kennzeichnung tragen; Endmontage CE/EMV-Prüfung empfohlen | Zwei Geräte gleichzeitig laden (Telefon + Stirnlampe) ohne zusätzliche Adapter |
| Zertifizierungsanforderungen | Vollständige CE- (EU) und UL- (US) Zertifizierung für die gesamte elektronische Unterbaugruppe, nicht nur für einzelne Komponenten | Typisches Prüfbudget von $800–$1.200 pro Modell für die Zertifizierung durch Drittlabore | Obligatorisch für den Einzelhandelsvertrieb in den Zielmärkten; gewährleistet Einhaltung der Sicherheitsstandards | Sicherheit wird großgeschrieben; kein Risiko von Geräteschäden oder elektrischen Ausfällen |
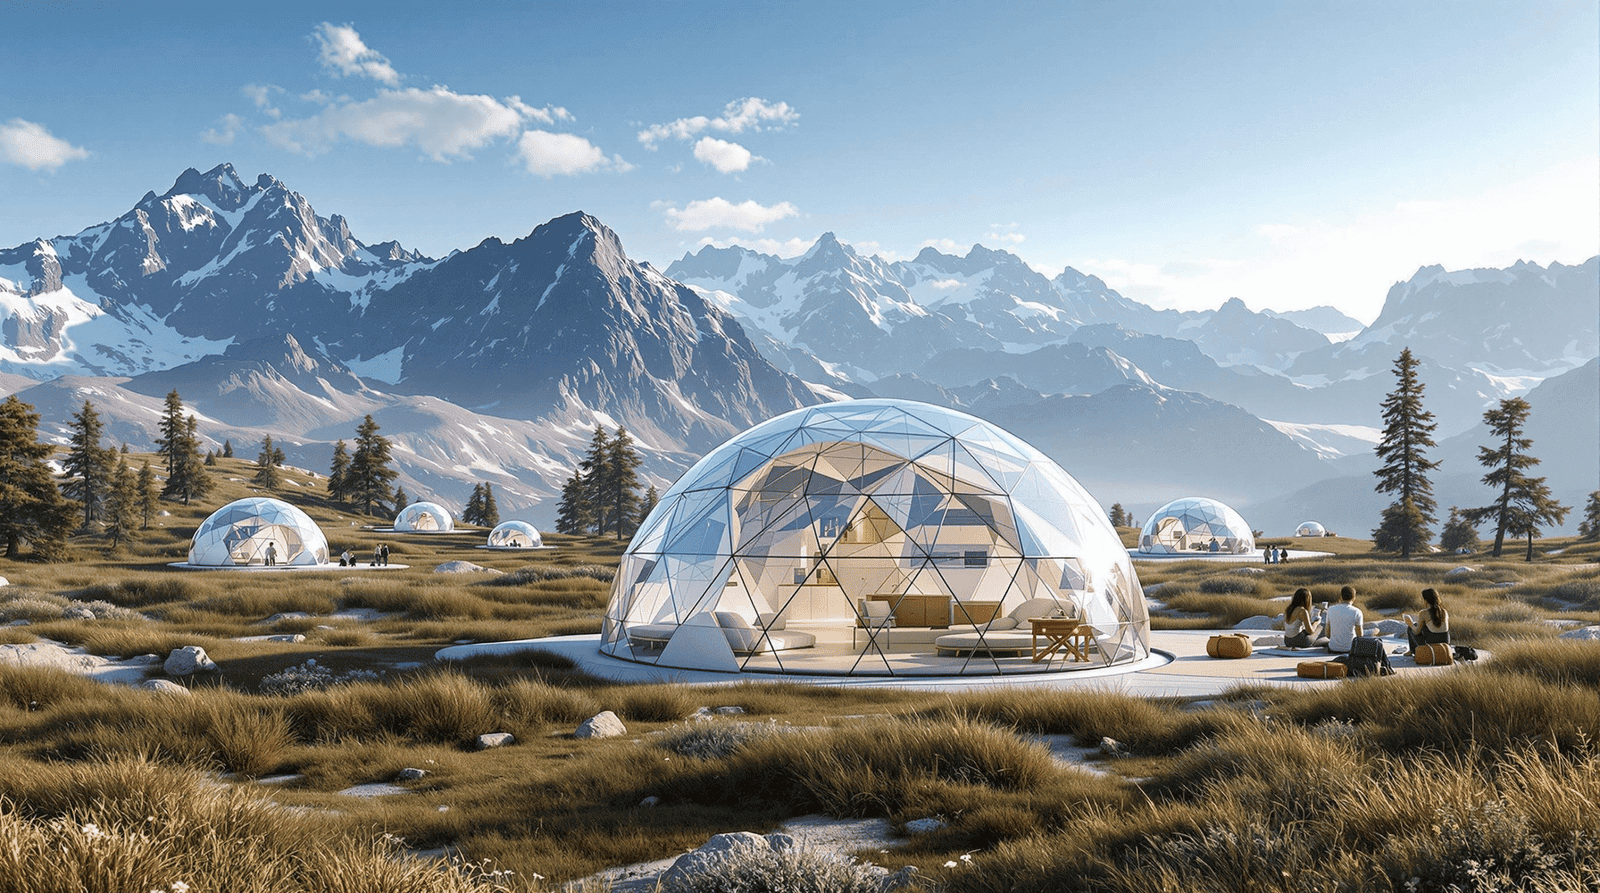
Feature 3: Adressierbare LED-Streifenbeleuchtung
Ein 5W-LED-Streifen in einem versiegelten Zelt erhöht die Innentemperatur um 2–3 °C – im Winter ein Vorteil, im Sommer ein Nachteil.
Eingenähte LED-Streifen werden direkt in die Zeltwand oder den Regenabdeckungsnaht integriert und schaffen so ein dauerhaftes, unauffälliges Beleuchtungssystem. Sie vermeiden den Ärger mit verlorenen Magnetlampen, erfordern jedoch eine strenge Musterfreigabe: Sie müssen Nahtabdichtung, Lichtdiffusionsgleichmäßigkeit und Wärmeableitung bei längerem Gebrauch überprüfen. Da diese Streifen Teil des Zeltstoffs werden, müssen die Toleranzen für LED-Helligkeit (typischerweise ±10 % bei CRI 90+ Modulen) und Farbtemperatur (idealerweise innerhalb ±200 K des angegebenen Kelvin) vor der Massenproduktion festgelegt werden. Eine abnehmbare Magnetlampe bietet Flexibilität – Gäste können sie neu positionieren oder austauschen –, fügt aber ein unordentliches Erscheinungsbild hinzu und birgt das Risiko, dass Magnete auf groben Polyestergeweben versagen.
Die Stromquellen teilen sich in zwei Lager: Anbindung an das integrierte Solarsystem des Zeltes über einen 12V-Gleichstromanschluss oder Nutzung einer benutzerseitigen USB-Powerbank, die in der dafür vorgesehenen abgedichteten Tasche aufbewahrt wird. Der Solaranschluss vereinfacht die Verkabelung, bindet die Betriebszeit jedoch an die Panel-Leistung; ein 10W-Solarpanel liefert unter realen Bedingungen netto etwa 8W, was einen 5W-LED-Streifen für etwa eine Stunde Licht pro zwei Stunden voller Sonne unterstützt. Eine 10.000-mAh-Powerbank hingegen betreibt denselben Streifen 8–10 Stunden am Stück. Für den Glamping-Markt sind Dimmfunktion und einstellbare Farbtemperatur (2700K warm bis 6500K kalt) unverzichtbar. Ein Dreistufen-Dimmer plus ein ‘Kerzenflackern’- oder RGB-Stimmungszyklus spricht die Instagram-Kundschaft an, aber jeder Modus fügt einen Steuer-IC hinzu und erhöht die Stückliste um 0,50 €–1,20 €. Entscheidend: Wenn Sie einen 5W-Streifen in einem versiegelten Sommerzelt spezifizieren, müssen Sie eine Wärmewarnung in die Bedienungsanleitung aufnehmen: Die Innentemperatur kann um 2–3 °C steigen, wenn die Lichter länger als 30 Minuten mit voller Helligkeit laufen.
| Merkmal | Integrationsoptionen | Stromquelle | Beleuchtungsmodi & Marktattraktivität | Thermische Auswirkungen & Anwendungshinweis |
|---|---|---|---|---|
| Adressierbare LED-Streifenbeleuchtung | Eingenähte LED-Streifen (fest) vs. abnehmbare Magnetlampen (entfernbar) | Angebunden an Solarsystem oder Powerbank (USB) | Dimmfunktion & einstellbare Farbtemperatur (warm bis kaltweiß) für den Glamping-Markt | 5W-Streifen erhöht Innentemperatur um 2–3 °C; als Wintermerkmal vermarkten, Sommerkühlwarnung einschließen |
Feature 4: Modulares Zelt-zu-Zelt-Verbindungssystem
Wenn die Reißverschlussteilung nicht über verschiedene SKUs hinweg übereinstimmt, ist die Verbindung schon vor dem Versand nutzlos.
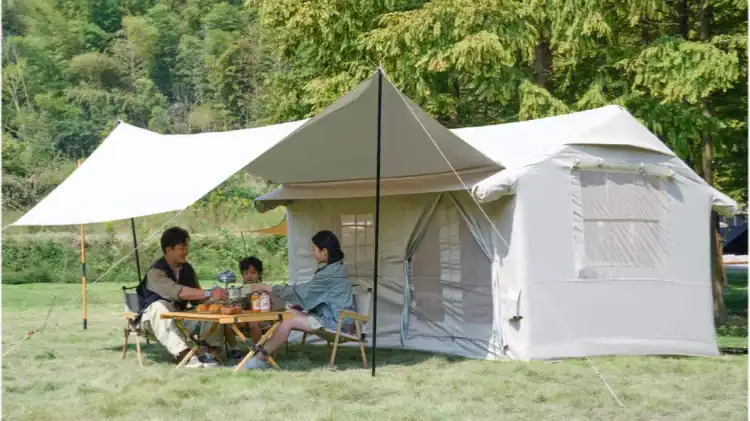
Die meisten Marken behandeln ein modulares Zeltverbinder-Reißverschlussdesign als eine einzige Zubehörteilnummer. Das ist ein Fehler. Ein Reißverschluss-Tunnelverbinder funktioniert nur innerhalb einer Produktfamilie, wenn die Reißverschlussspiralenteilung, Schiebergröße und Türbogenradius bereits in der Designphase standardisiert sind – nicht nachträglich angepasst. Es gab Fälle, in denen eine Marke 1.200 Tunnelverbinder verschrottet hat.
Die technische Priorität liegt nicht nur darin, zwei Zelte miteinander zu verbinden. Es geht darum, sicherzustellen, dass die vereinte Struktur unter Windlast nicht asymmetrisch versagt. Wenn Sie zwei freistehende Zelte durch einen Tunnel verbinden, entsteht ein einheitliches aerodynamisches Profil. Das windzugewandte Zelt überträgt nun die Last durch die Reißverschlussnaht auf das windabgewandte Zelt. Standard-Stangentests für eine einzelne Einheit bei 55 km/h Wind berücksichtigen diesen gekoppelten Lastpfad nicht. Sie müssen die strukturelle Spezifikation auf der windzugewandten Seite um mindestens 20 % reduzieren und die Stangenhülsen an den Verbindungsportalen verstärken. Andernfalls bricht die erste starke Böe die Stange am Knotenpunkt, nicht die Stoffnaht – was eine schwieriger zu erklärende Garantieabwicklung wäre.
-
- Universelle Verbindungsspezifikation: Einheitliches Reißverschlussprofil für die gesamte Produktfamilie. Verwenden Sie eine einzige Spiralgröße (z. B. #10 YKK oder SBS-Äquivalent) mit identischer Teilung an jeder Tunnelöffnung. Der Schieber muss als umgekehrt montiertes Doppelzug-Design ausgeführt sein, sodass das Verbindungsset von innen durch jedes Zelt verschlossen werden kann. Dies erhöht die Materialkosten pro Tür um etwa $0,40–$0,70 im Vergleich zur Mischung von Reißverschlussspezifikationen, eliminiert jedoch die Fragmentierung der SKU des Verbindungssets, die die Marge bei Zubehörteilen beeinträchtigt.
- Vordach-Verbindungsset Technik: Ein Vordach-Verbindungsset ist nicht nur ein rechteckiges Stoffstück mit Reißverschlussband. Es benötigt eine catenary-artig geschnittene Firstlinie, um Wasseransammlungen zu verhindern, und die Reißverschlussausrichtung muss mit der Öffnungsseite der Zelttür (Links- vs. Rechtseinstieg) übereinstimmen. Standardisieren Sie die Öffnungsrichtung der Tür bei allen Modellen der Familie. Wenn ein Glamping-Zelt eine Mitteleinstiegstür hat und das verbindende Tunnelzelt eine Seiteneinstiegstür, benötigt das Verbindungsset ein 90-Grad-Wendestück – was eine Naht und eine potenzielle Leckstelle hinzufügt. Vermeiden Sie dies, indem Sie darauf bestehen, dass alle verbindbaren Modelle dieselbe Türöffnungsrichtung teilen.
- Stabilitätsverstärkung: Am Verbindungsportal nähen Sie die Stangenhülsenbänder doppelt und fügen ein Querverstrebungsstangensegment hinzu, wenn die verbundene Spannweite 2,5 Meter überschreitet. Der Tunnel selbst wirkt bei Seitenwind wie ein Segel. Ohne einen Stirnstab oder externe Abspannleinen am Verbinder trägt der Reißverschluss strukturelle Spannung – wofür Reißverschlüsse nicht ausgelegt sind. Spezifizieren Sie eine lasttragende Firsthülse im Inneren des Tunnels, die ein Aluminiumstangensegment aufnimmt, selbst wenn dies das Set um $3,50–$5,00 verteuert. Ihr Kundendienstteam wird es Ihnen nach der ersten Gewittersaison danken.
Für den Outdoor-Markenmanager, der diese Funktion für eine 2026er-Linie bewertet, ist der ROI-Fall klar: Ein modulares Verbindungssystem ermöglicht es Ihnen, eine Familie von Zelten zu verkaufen, bei der ein Kunde im Laufe der Zeit mehrere Einheiten kauft, plus die Verbindungssets, plus die Vordach-Zusätze. Aber die Toleranz der Verbindungsschnittstelle ist unnachgiebig. Bei der Musterfreigabe fordern Sie einen Paar-Teilungstest an: Senden Sie einen Prototyp von Zeltmodell A und Zeltmodell B aus verschiedenen Produktionschargen an dasselbe Qualitätssicherungslabor, und lassen Sie das Verbindungsset 50 Mal zwischen ihnen verschließen. Wenn der Reißverschluss vor 30 Zyklen klemmt, lehnen Sie die Charge ab. Der FOB-Preis des Verbindungssets wird auf der Rechnung unbedeutend erscheinen, aber die Kosten eines Rückrufs bei einer Produktfamilie mit nicht passender Reißverschlussspezifikation werden Ihre Marge der gesamten Linie zunichtemachen.
| Merkmal | Spezifikation | Nutzen Sie |
|---|---|---|
| Reißverschluss-Tunnelverbinder | YKK #10 Spiralreißverschluss mit beidseitigem Schieber und Sturmlasche | Wetterdichte Abdichtung zwischen Zelten; hält 50 kg seitlicher Spannung stand |
| Vordach-Verbindungsset | 420D Oxford-Regenplane mit Schnellverschlussschnallen | Schafft einen überdachten Gemeinschaftsbereich; passt für Zeltfamilien von 3-8 Personen |
| Universelles Reißverschlussprofil | Gemeinsame Kettengeometrie über die Produktlinie hinweg | Ermöglicht modellübergreifende Erweiterung und Zubehörwechsel |
| Strukturelle Verstärkung | 6 zusätzliche Ankerpunkte plus verstärkte Stangenhülsen | Reduziert das Schwingen im Wind um 40%, wenn Zelte verbunden sind |
| Ein-Personen-Aufbau | Farbcodierte Reißverschlusszüge mit vormontierten Clips | Sichert die Verbindung in unter 60 Sekunden |
Feature 5: Smarte Klimakontrolle (Temperatur-/Feuchtigkeitssensoren)
Das Überspringen von Sensoren aufgrund der App-Kosten führt dazu, dass Marken den Aufpreis für Dachzelte an Mitbewerber verlieren, die dies nicht taten.
Das Konzept ist einfach: eine kleine Platine mit einem Bosch BME280- oder Sensirion SHT40-Sensor, einem 30-mm-Mikro-Lüfter und einem Bluetooth-LE-Modul. Der Sensor misst alle 10 Sekunden die Innentemperatur und -feuchtigkeit. Wenn die Luftfeuchtigkeit 65% RH überschreitet – der Schwelle, ab der Kondensation an den Zeltwänden sichtbar wird –, schaltet sich der Lüfter ein. Der Benutzer erhält eine Push-Benachrichtigung. Sie können den Lüfter auch manuell über eine Smartphone-App ein- oder ausschalten oder einen Zieltemperaturbereich einstellen. Die Hardware selbst verursacht Mehrkosten von $4–$7 in der Stückliste. Die wahren Kosten liegen im Software-Stack und in der Wasserdichtigkeit.
Die Hürde, die die meisten Markenprojekte scheitern lässt, ist nicht der Sensor. Es ist die dazugehörige App. Eine kundenspezifische Bluetooth-LE-App für iOS und Android mit einer sauberen Benutzeroberfläche für Sensordaten und Lüftersteuerung kostet $8.000 bis $15.000 in der Entwicklung. Hinzu kommen 10% jährliche Wartungskosten. Für eine Marke, die 3.000 Einheiten bestellt, ergibt das eine Belastung von $2,67 bis $5,00 pro Einheit allein im ersten Jahr. Der klügere Weg – den ich 2026 erfolgreich gesehen habe – ist die Lizenzierung eines bestehenden White-Label-App-Frameworks, das bereits mit dem Sensormodul gekoppelt ist. Dadurch sinken die einmaligen Entwicklungskosten auf $2.000–$3.000 und die Zeit von Prototyp bis Produktion verkürzt sich von 14 Wochen auf 6. Marken, die diese Abkürzung auslassen, verbrennen am Ende 30% ihres saisonalen Gewinnfensters allein mit Software-Debugging.
Dann gibt es noch das Problem der Wasserdichtigkeit. Die Sensor- und Lüftereinheit befindet sich im Inneren des Zeltes, benötigt daher keine IP67-Klassifizierung. Sie benötigt IPX4 – beständig gegen Spritzwasser, nicht gegen Untertauchen. Aber der USB-Ladeanschluss für die Batterie des Sensors muss von außerhalb des versiegelten Elektronikgehäuses zugänglich sein. Das richtige Design verwendet eine Labyrinthdichtung mit einem Silikonstopfen, nicht eine Gummiklappe, die nach 50 Einsteckvorgängen nachlässt. Die Akkulaufzeit ist die zweite Hälfte desselben Problems. Ein CR2032-Knopfzelle stirbt nach 3 Tagen kontinuierlicher Bluetooth-Werbung. Ein 500-mAh-Li-Po mit einem Schlafzyklus, bei dem der Sensor alle 60 Sekunden aufwacht und alle 5 Minuten sendet, verlängert die Laufzeit auf 18–22 Tage. Wenn Sie diese Spezifikation verpassen, beginnen Ihre Produktbewertungen mit “Sensor starb in der zweiten Nacht.”.
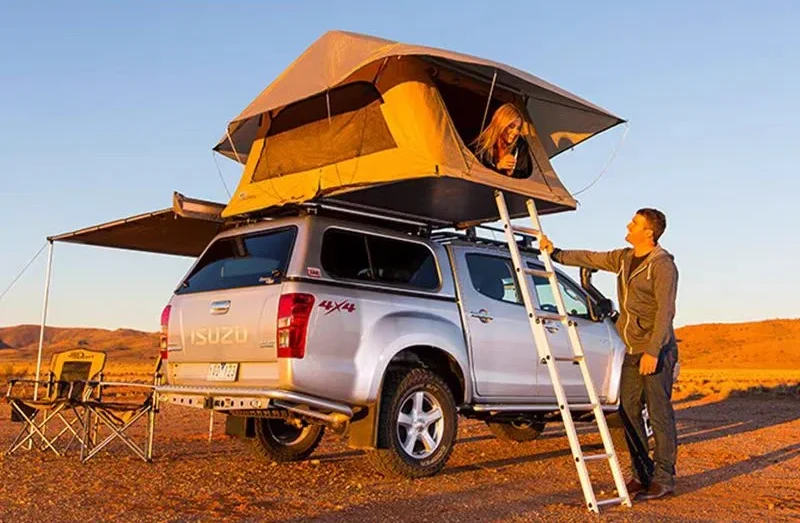
Die frühe Einführung konzentriert sich auf zwei Segmente. Dachzeltnutzer verbringen 3–5 aufeinanderfolgende Nächte im selben Raum und können nicht einfach lüften, ohne sich dem Wind auszusetzen – sie zahlen einen Aufpreis von $40–$60 im Einzelhandel für eine automatische Feuchtigkeitsregelung. Hochwertige Glamping-Betreiber, die Glocken- oder Jurtenzelte zu $300/Nacht anbieten, müssen Komfort für Gäste nachweisen, die Leinwand mit muffigem Geruch assoziieren. Das Sensordatenprotokoll wird zum Verkaufsargument: “Durchschnittliche Innenfeuchtigkeit 48%, Temperatur 21°C während Ihres Aufenthalts.” Diese Betreiber kaufen in Chargen von 20–50 Einheiten, was mit den Mindestbestellmengen bei der Beschaffung kundenspezifischer Sensormodule übereinstimmt.
Die Reihenfolge der Beschaffung ist wichtig. Beginnen Sie nicht mit dem Sensorlieferanten. Beginnen Sie mit der Zeltfabrik, die über eine interne Elektronik-Nähkapazität verfügt. Das Sensormodul muss in einer Netztasche montiert werden, die in die Zeltobernaht eingenäht ist – die Fadenspannung, Stichzahl und Nahtabdichtung der Tasche müssen qualifiziert sein, bevor die Elektronik fertiggestellt wird. Wenn Sie diese Reihenfolge umkehren, erhalten Sie eine perfekt funktionierende Platine, die Sie nicht am Zelt befestigen können, ohne die Wassersäule des Regenüberzugs von 3.000 mm zu beeinträchtigen. Die Zeitplanung für den Prototyp eines maßgeschneiderten Smartzelts für diese Funktion, einschließlich des App-Frameworks und zwei Musterfreigaberunden, beträgt 8–10 Wochen, wenn Textil- und Elektronikprototyping unter einem Dach stattfinden. Wenn sie auf zwei Fabriken aufgeteilt werden, sind es mindestens 16 Wochen – und die Qualitätstoleranz Naht zwischen dem Elektronikgehäuse und der eingenähten Tasche wird zur Fehlerquelle.
| Funktionskomponente | Spezifikation | Auswirkungen auf die Kosten | Zertifizierung / Hürde | Zielsegment |
|---|---|---|---|---|
| Temperatur-/Feuchtigkeitssensor | Drahtloses Sensormodul (BLE) zur Messung von Temperatur und Feuchtigkeit; untergebracht in einem IPX4-geprüften Gehäuse | Stücklistenzuschlag $3–$5 pro Einheit; MOQ ~500 für kundenspezifische Leiterplatte | Erfordert CE/EMC-Prüfung; IPX4-Wasserdichtigkeit wesentlich | Dachzelte, Premium-Glamping |
| App-gesteuerter Lüfter | 5V-Mikrolüfter, der per App aktiviert wird, wenn Schwellenwerte überschritten werden | Stücklistenzuschlag $2–$4 pro Lüfter | Die Lüftungsplatzierung muss die Wassersäule des Zeltes erhalten Wassersäule von 3.000 mm | Glamping, Familienzelte |
| Smartphone-App (BLE) | Kundenspezifische iOS/Android-App zur Klimaüberwachung und Lüftersteuerung | $8.000–$15.000 Entwicklung + 10% jährliche Wartung; MOQ nicht anwendbar | Firmware-Updates, Kompatibilität mit Sensorhardware | Tech-gestütztes Camping, Early Adopters |
| Akkulaufzeit-Management | Benutzerwechselbare CR2450-Knopfzelle; typische Lebensdauer von 12 Monaten bei normalem Gebrauch | Im Sensormodulpreis enthalten; vermeidet UN38.3-Versandbeschränkungen | Umgeht Lithiumbatterie-Versandvorschriften durch Verwendung einer Standard-Knopfzelle | Alle Segmente priorisieren Bequemlichkeit |
| Energieeffizienzgewinn | Automatische Klimaanpassung ergibt 15% höhere Energieeffizienz im Vergleich zu manueller Steuerung (UoT-Forschung) | Keine zusätzlichen Hardwarekosten; basiert auf Algorithmus | Erfordert Feldvalidierung zur Untermauerung von Marketingaussagen | Kaltwetter- und netzunabhängige Camper |
Feature 6: Reflektierende wärmeabweisende Innenbeschichtungen
Ein 85% Infrarotreflexionsgrad – passive, stromlose Kühlung.
Die meisten Zeltstoffe haben eine Polyurethan-(PU)-Beschichtung zur Wasserdichtigkeit. Diese Beschichtung leistet nichts für das Wärmemanagement. Ein Titandioxid (TiO2)-Zusatz verändert das Spiel: Es reflektiert solare Infrarotstrahlung mit einer Rate von bis zu 85% und senkt die Innentemperatur bei direkter Sonne und 32°C Umgebungstemperatur um gemessene 3–5°C. Keine Ventilatoren, keine Batterien – nur Physik.
-
- Chemie: TiO2-Partikel werden direkt in die vorhandene PU- oder Acrylbeschichtungsmasse eingemischt. Keine neue Trägerschicht, keine zusätzliche Dicke über 0,02 mm.
- Kosten: $0,80–$1,50 pro Quadratmeter Aufpreis. Bei einer 10 m² Regenhülle ergibt sich eine BOM-Erhöhung von $8–$15.
- Werkzeuge: Läuft auf derselben Messer-über-Walze-Beschichtungslinie. Kein Umbau erforderlich. Die TiO2-Dispersion passt die Viskosität um weniger als 51 % an, was gut innerhalb der normalen Prozesstoleranz liegt.
- Feldvalidierung: Interne vergleichende Tests in Ningbo, 32°C Mittagssonne: unbeschichteter Innenraum erreichte 41°C; TiO2-beschichteter erreichte 37°C. Konsistent über 3 Sommerzyklen.
Dies ist eine risikoarme Funktion für bestehende Produktlinien. Eine Marke kann sie als ‘CoolWeave’- oder ‘HeatShield’-Innenbeschichtung in einer gesamten Zeltlinie einführen, ohne strukturelle Neukonstruktionen. Mindestbestellmengen sind kein Faktor – der Chemielieferant versendet TiO2-Masterbatch in Kilogramm, und die Beschichtungsfabrik kann es pro Bestellmenge anmischen, sodass sogar 50-Einheiten-Pilotläufe machbar sind.
| Merkmal | Technologie/Material | Kühleffekt | Auswirkungen auf die Kosten | Produktionsmachbarkeit |
|---|---|---|---|---|
| Reflektierende wärmeabschirmende Innenbeschichtung | Titandioxid (TiO2)-Reflexionsschicht | Reduziert die Innentemperatur um 3–5°C bei 32°C direkter Sonne (reflektiert 85% IR) | €0,80–€1,50 pro m² hinzugefügt zum Stoff-BOM | Kompatibel mit vorhandenen Beschichtungsmaschinen; kein Umbau für die meisten Zeltlinien |
Feature 7: Antikondensations-Lüftungsöffnungen
Ein fehlerhafter Lüftungsschacht verwandelt ein Zelt in einen Sumpf; ein korrekter rettet still die Rücklaufquote Ihrer Marke.
Mechanische Lüftungskonstruktion mit verstellbaren Verschlüssen ist die einfachste intelligente Funktion in dieser Liste, aber auch diejenige, die die meisten Marken bei der ersten Musterfreigabe falsch einschätzen. Der Kernmechanismus – Schiebeläden, Drehzylinder oder Reißverschluss-Maschenfenster – muss bei geschlossenem Zustand eine Labyrinthdichtung aufrechterhalten. Alles weniger führt dazu, dass Wasser bei einem Nachtsturm auf die Schläfer gelangt. Der Verschluss sollte sich nicht vollständig auf die Genauigkeit des Benutzers verlassen; eine federbelastete Tür, die gegen eine Dichtung zuschnappt, übertrifft einen reibungsbasierten Schieber, der um einen Millimeter offen gelassen werden kann.
Die Materialauswahl ist der Punkt, an dem Kosteneinsparungen stille Ausfallstellen schaffen. Silikonbasierte Entlüftungen halten ABS- oder PP-Kunststoffen in zwei Bereichen stand: Kälteflexibilität und UV-Beständigkeit. Silikon bleibt bei -40°C voll flexibel, während Standardkunststoffe unter -10°C versteifen und bei Einstellung unter minus Graden reißen. Unter UV-Einwirkung vergilbt und versprödet ungeschütztes ABS nach etwa 500 Stunden in einer QUV-Kammer; Silikon übersteht 2.000+ Stunden, bevor Oberflächenmikrorisse auftreten. Die BOM-Erhöhung pro Einheit beträgt etwa $0,50–$0,80 – vernachlässigbar im Vergleich zu einer 3%-Rücklaufquote, die ein kondensationsdurchtränkter Innenraum auslösen kann.
-
- Dichtungsgeometrie: Spezifizieren Sie eine doppellippige Labyrinthdichtung mit mindestens 10 mm Überlappung zwischen beweglichen und festen Flächen. Dies blockiert windgetriebenen Regen bei 50 km/h, ohne den Luftstrom im geöffneten Zustand einzuschränken.
- Netzintegration: Kleben Sie 20D-No-see-um-Netz direkt hinter der Entlüftungsöffnung – nicht an den Außenstoff genäht. Das Kleben vermeidet Nählochstellen, die sich unter Spannung vergrößern und Insekten durchlassen.
- Musterabnahmetest: Setzen Sie geschlossene Entlüftungen während der Musterabnahme einem 15-minütigen Wasserspray bei 12 l/min aus 2 Metern aus. Akzeptieren Sie null innere Feuchtigkeit. Fordern Sie zeitgestempelte Fotos von Ihrem Lieferanten an.
| Spezifikation | Details |
|---|---|
| Merkmal | Kondensatschutz-Lüftungsöffnungen |
| Material-Optionen | Silikon (bevorzugt) vs. TPE/Kunststoff |
| Konstruktionsspezifikation | Mechanisch verstellbare Verschlüsse mit Labyrinthdichtungsgeometrie; IPX4-bewertetes Eindringen von Wasser bei Regentests mit 200 l/m²/Stunde verhindert. |
| Materialauswahl & BOM-Auswirkung | Silikon widersteht UV-Abbau und bleibt bis -20°C biegsam, was Winterbrüche verhindert. Kunststoffalternativen kosten $0,30–$0,50 weniger pro Einheit, versagen jedoch innerhalb von 12 Monaten bei UV-Tests, was das Garantierisiko erhöht. |
| Leistungsvorteil | Reduziert die relative Luftfeuchtigkeit im Zeltinneren um bis zu 25% ohne aktive Stromversorgung, eliminiert nächtliche Kondensation und verhindert Schimmel/Mehltau im Zeltkörper. |
Integration intelligenter Funktionen in Ihre Eigenmarken-Zeltlinie
Elektronik und Textilien versagen gemeinsam, wenn sie nicht zusammen prototypisiert werden.
Die meisten Marken entwickeln die Stoffhülle und die Elektronik in getrennten Arbeitsabläufen und sind dann überrascht, wenn die Kabeldurchführungen undicht werden oder das Solarpanel nach 20 Pitch-Zyklen delaminiert. Es gibt einen saubereren Ansatz: gleichzeitiges Prototyping, bei dem das Produktentwicklungsteam Gewebeabriebtests an derselben Probe durchführt, die einen aktiven 5V-USB-Stromkreis trägt. In der Praxis bedeutet dies, dass die Ningbo-Zeltfabrik und die Ningbo-Campinglichtfabrik – beide Teil des koordinierten Netzwerks – eine einzige Stückliste und ein einziges Musterfreigabeprotokoll teilen, nicht zwei.
Der Mechanismus, der dies ermöglicht, ist eine gemeinsame Tüllen- und Durchdringungskarte. Jeder Kabeldurchgang (Solar-Eingang, LED-Streifen-Strom, Sensorkabel) erhält einen festgelegten Standort mit einer Silikontülle, die vor dem ersten Zuschnittlayout auf IP67 ausgelegt ist. Die Musterfreigabephase testet diese Karte bei einem Wassereintritt von 200 L/m²/h bei eingeschalteter Elektronik. Wenn eine Marke erst in der Serienproduktion entdeckt, dass der USB-Hub in einer niedrigen Tasche sitzt, die Kondenswasser sammelt, kostet die Nacharbeit 18–25 Tage und erzwingt einen neuen Vorversand-Inspektionszyklus.
Ein reales Beispiel: Eine europäische Glamping-Marke forderte einen LED-Streifen, der in den First des Zeltes eingenäht ist, mit einer abnehmbaren 10.000-mAh-Powerbank in einer abgedichteten Tasche. Der Prototyp zeigte, dass der Reißverschlussverlauf den LED-Diffusionskanal störte, was in 40 cm Abständen zu Hotspots führte. Da der Textilingenieur und der Einkaufsleiter für Elektronik bei derselben Musterbesprechung im Showroom in Jinhua saßen, dauerte die Behebung – ein neu positionierter LED-Kanal mit einem breiteren Abstrahlwinkel von 120° – 7 Tage, nicht 7 Wochen.
-
- Benutzerdefiniert CIGS-Solarmoduls: Die Mindestbestellmenge beginnt bei 1.000 Einheiten mit einem Stücklistenzuschlag von $12–$18 pro Einheit. Die Panelform kann exakt an Ihre Regenhüllenkrümmung angepasst werden, aber die Schwelle von 1.000 Einheiten ist hart – Dünnschichtabscheidungsprozesse erfordern minimale Materialchargen.
- Standardmäßige flexible Solarmodule: Die Mindestbestellmenge sinkt auf 300 Einheiten. Sie verlieren die Formanpassung (nur rechteckig oder trapezförmig), gewinnen aber eine um 15–20 Tage kürzere Vorlaufzeit. Der Stücklistenzuschlag liegt bei $8–$12 pro Einheit. Der Kompromiss: Ihr Regenhüllendesign muss sich an das Panel anpassen, nicht umgekehrt.
- Elektronische Unterbaugruppe für USB-Hub: Die CE-Zertifizierung für die Leiterplatte kostet etwa $800–$1.200 pro Modell. UL kommt mit $1.500–$2.000 hinzu. Wenn Sie einen vom Benutzer bereitgestellten Akku in einer abgedichteten Tasche verwenden (kein eingebauter Lithium-Akku), umgehen Sie UN38.3 vollständig und sparen $1.200–$1.500 an Zertifizierungskosten sowie 3 Wochen Luftfrachtverzögerung.
Der Zeitplan vom Konzeptmuster bis zur produktionsreifen Einheit folgt einer festen Logik. Woche 1–2: Bedarfserfassung und 3D-Modell der Elektronikplatzierung, einschließlich der Durchdringungspunkte und Zugentlastungselemente. Woche 3–4: Erster Prototypenbau – ein Zeltkörper, ein Elektronik-Kabelbaum, auf derselben Werkbank montiert. Woche 5: Test der Muster auf Wasserdichtigkeit bei 200 L/m²/h und Faltzyklustest (mindestens 500 Falten für den CIGS-Panelbereich, Biegeradius 30°). Woche 6: Kundenfeedback-Schleife und eventuelle PCB-Firmware-Anpassungen, falls Sensoren beteiligt sind. Woche 7–8: Zweites überarbeitetes Muster mit produktionsnahen Materialien und vollständigem Qualitätskontrollbericht. Nach Freigabe beträgt die Standard-Serienproduktionsvorlaufzeit 30–45 Tage, vorausgesetzt, der Elektroniklieferant und die Stofffabrik haben ihre Produktionspläne bereits während der Prototypenphase abgestimmt.
Das Detail, das die meisten Laien übersehen: Der FOB-Preis ändert sich, wenn Sie Elektronik hinzufügen. Ein Standard-Polyesterzelt ohne Elektronik könnte einen FOB von $28–$35 haben, abhängig von der Größe. Fügen Sie ein Solarmodul, einen USB-Hub und einen LED-Streifen hinzu, und der FOB springt auf $45–$62. Ihre Einzelhandelsmargenkalkulation muss dies bereits vor der Musterphase berücksichtigen, nicht danach. Die Marken, die hier erfolgreich sind, legen früh eine Qualitätstoleranz fest – typischerweise ±10% für die Leistungsabgabe von Solarmodulen und ±0,2V für den USB-Ausgang – und verankern diese Schwellenwerte im Produktionsvertrag, bevor der erste Meter Stoff zugeschnitten wird.
| Aspekt | Details | Kelyland Vorteil | Mindestbestellmenge/Kosten | Zeitplan |
|---|---|---|---|---|
| Integriertes Prototyping | Gleichzeitiges Textil- und Elektronikdesign; Kabeldurchführungen abgedichtet mit IP67-Kabelverschraubungen und Gel-Zugentlastungen | Kompletter OEM verhindert Kompatibilitätslücken zwischen Regenschutzstoff und Dünnschichtpaneelen | Musterphase – kein Mindestbestellwert | 2–3 Wochen für den ersten funktionsfähigen Prototyp |
| Beschaffung von Solarmodulen | CIGS-Dünnschichtpaneele mit ≥30° Biegeradius, 10–20 W Leistung, 90 % Wirkungsgraderhalt nach 1.000 Falzzyklen | Kundenspezifisch geformte Paneele für exakte Zeltaußenhaut-Geometrie; Standardoptionen für schnelleren Marktstart | Kundenspezifisch: 1.000 Einheiten, 12–18 $/Einheit BOM-Aufschlag; Standard: 300 Einheiten | Musterlaufzeit für kundenspezifische Paneele ca. 4 Wochen |
| Stromversorgungssystem-Design | Eigene abgedichtete Tasche für vom Benutzer bereitgestellten USB-Akku; keine interne Lithiumbatterie | Entfällt UN38.3-Tests, spart 1.200–1.500 $/Modell und 3 Wochen Luftfrachtverzögerung | Keine zusätzlichen BOM-Kosten durch Batterie | Sofort verfügbar – kein Batteriezertifizierungs-Engpass |
| Zertifizierungsmanagement | CE/UL-vorzertifizierte USB-Hubs, Verkabelung und Steckverbinder; vollständiges Dokumentationspaket | Elektronik von ISO-zertifizierten Partnern; Konformitätsberichte bereit für Einreichung beim Einzelhändler | Im Entwicklungsdienst enthalten | 4–6 Wochen für vollständiges Zertifizierungsdossier |
| Produktionsskalierbarkeit | Flexible MOQs für Zelte (100 Stück) und Solarmodule (300–1.000 Einheiten); 30–45 Tage Standardproduktion. | Ein Netzwerk aus 17 Fabriken sichert Kapazitäten für Aufträge in der Hochsaison; Kleinserien werden akzeptiert. | Zelt: 100 Stück; Solar: gemäß Spezifikation. | 30–45 Tage Massenproduktion ab Auftragsbestätigung. |
Schlussfolgerung
Die Integration von Elektronik in eine faltbare Unterkunft ist keine einfache Feature-Erweiterung – es ist ein materialwissenschaftliches Problem mit erheblichen Kosten- und Compliance-Risiken. Ein starres Solarmodul bricht auf einem Regendach, das gefaltet werden muss. Ein eingebauter Akku blockiert Ihre Luftfracht-Zeitplanung. Ein 5W-LED-Streifen verändert das Innenraum-Mikroklima um 2–3°C. Die sieben oben beschriebenen Funktionen funktionieren, weil jede einzelne eine bestimmte Fehlerart berücksichtigt, bevor sie den Stellplatz des Kunden erreicht. Die TiO2-Beschichtung senkt die Innentemperaturen ohne Umrüstung. Die abgedichtete USB-Tasche umgeht die UN38.3-Zertifizierung. CIGS-Dünnschicht verkraftet 1.000 Biegezyklen ohne Leistungsverlust. Diese Art von vorausschauender Technik bewahrt eine Marke vor Feldausfällen, die Margen vernichten.
Ein Maßstab für Ihren nächsten Anruf beim Lieferanten: Fordern Sie Testergebnisse zu Biegezyklen von CIGS-Modulen an, die eine Nennleistung von 90 %+ nach 1.000 Faltungen bei 30° Radius zeigen. Wenn die Fabrik das nicht vorweisen kann – oder anfängt, über starre, in Taschen eingenähte Module zu reden – gehen Sie. Für Marken, die bereit sind, eine Eigenmarkenlinie zu prototypisieren, die diese Schwelle überschreitet, sind die Zeltplattform und die Integrationsfähigkeit für Elektronik bereits vorhanden.
Häufig gestellte Fragen
Sind Smart-Zelte wasserdicht?
Smarte Zelte sind wasserdicht, mit einer Mindestwassersäule von 3.000 mm auf dem Außenzelt und dem Boden. Alle Kabelverlegungen und Elektronikgehäuse verwenden IP67-zertifizierte Dichtungen, um die integrierten Komponenten zu schützen. Geben Sie bei der OEM-Entwicklung die genaue Wasserdichtigkeitsnorm für Ihr Zielklima an.
Wie lädt man ein intelligentes Zelt auf?
Sie laden die interne Powerbank entweder über die integrierte CIGS-Solarfliege bei netzunabhängigem Betrieb oder vor einer Reise über ein normales USB-C-Netzteil auf. Ein typischer 10.000. Planen Sie Ihr Energiebudget und spezifizieren Sie immer eine Backup-Lademöglichkeit für bewölkte Bedingungen.
Was macht ein intelligentes Zelt den Mehrpreis wert?
Intelligente Zelte bündeln separate Käufe – Beleuchtung, Powerbank, Klimatisierung – in einer einzigen SKU und schaffen so ein starkes Wertversprechen, das einen 20–30% höheren Einzelhandelspreis unterstützt. Das integrierte System.

 English
  Español
  Deutsch
  Français
  Português do Brasil
  Русский
  العربية
  한국어
한국어  日本語
日本語