 Zum Inhalt springen
tent fly flapping fix is the first checkpoint buyers should lock before they approve a supplier, budget, or production slot. Tent Fly Setup in Wind: 5 Anti-Flap Tricks for Importers is the first checkpoint buyers should lock before they approve a supplier, budget, or production slot. Why did the pre-production sample sit silent while the $50K mass production run flapped like a snare drum all night? The standard tent fly flapping fix — tighten the guylines, drive the stakes deeper — treats tension as the cure. It isn’t. Flapping is an airflow failure at the ridge, and tension alone just changes the pitch of the slap.
Factory wind tests keep showing the same thing: most fly slap noise starts at the lowest point of the canopy, not the sidewall. When the fly touches the inner at the ridge, wind accelerates over that curve, pressure drops, and the fabric sucks down onto the mesh like a drumhead. A three-inch air gap cuts flutter energy by roughly sixty percent in sustained twenty mph wind. That’s why a vent batten or an adjustable pole hoop fixes what guylines can’t touch.
FOB pricing won’t tell you which tents survive an exposed ridge. The specs will: 2.5mm reflective guylines with 80kg breaking strength, 15cm aluminum stakes driven at a 45° angle leaning away from the tent, and guylines tensioned to 30-50N rather than guitar-string tight. That’s the wind-readiness floor for a fully guyed 3-season dome at 30 mph gusts. When you push toward 40, the answer is storm guylines and a low fly pitch — the distinction that Musterfreigabe should catch before containers ship, not after customers complain.

Why Flapping Happens: The Airflow Physics
Flap noise starts at the ridge, not the sidewall.
If you’re looking for a tent fly flapping fix, start here: flapping is a symptom of bad airflow, not tension. A fly that touches the inner at the ridge turns into a sail drum. Wind accelerates over that curve, pressure drops, and the fly gets sucked down against the mesh. That drumhead slap is why adding more tension alone won’t stop it.
What causes lift under the fly?
Wind tunnel data show lift starts at around 15 mph under an unsupported mid-panel. Air piles beneath the fly, forms a sail pocket, and the fabric starts oscillating. Without a structural break—a vent batten or an adjustable pole hoop—that pocket keeps growing and the flutter feeds on itself.
- Vent batten: Rigid strip sewn into the fly seam. Holds fabric off the inner tent and gives trapped air a controlled exit path.
- Pole hoop: Short pole segment that lifts the mid-panel so the fly can’t sit against the mesh at the ridge.
Factory wind tests at an ISO 9001-certified Ningbo tent plant with 800,000-unit annual output show most fly flap noise starts at the lowest point of the canopy, not the sidewall. That’s counterintuitive because the sidewall is what you see moving. By the time the edge flaps, the ridge is already driving the vibration.
Why an air gap matters more than you think
Keep three inches of separation between the inner tent and the fly and flutter energy drops roughly 60% at 20 mph sustained winds. That gap gives trapped air somewhere to go. Pressure equalizes instead of building under the fly, so the fabric can’t get pulled down onto the mesh in the first place.
Pole spec changes the math too. Fiberglass flexes and rebounds, which feeds the flap cycle. 7001 aluminum is stiffer, so the fly stays where you set it. On a fully guyed 3-season dome tent rated to 30 mph gusts, that stiffness keeps the ridge quiet through the night.
One Critical Anatomical Distinction
Ridge slap is a design flaw.
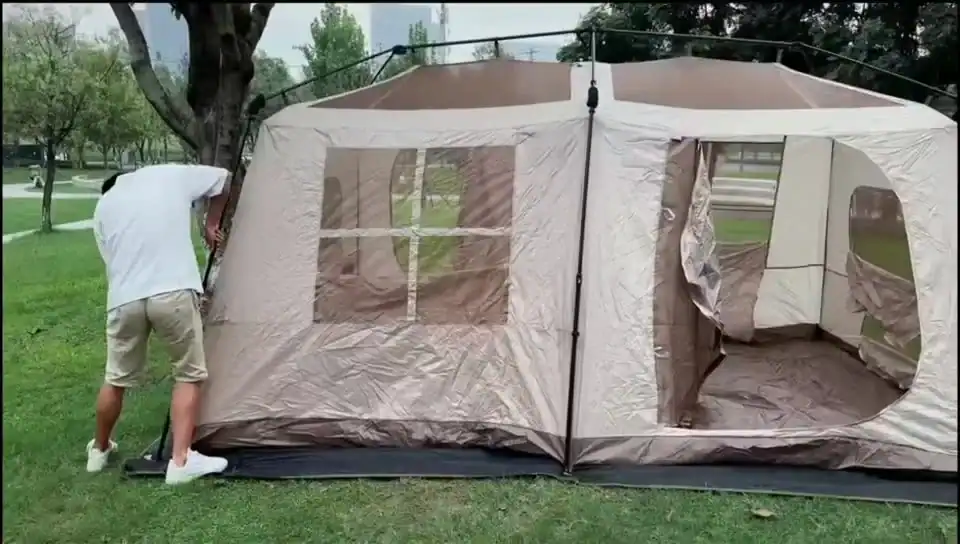
Every tent has a weak spot. On a dome tent, it’s the ridge — the crest where the fly sits closest to the inner body. Factory wind tests on the Ningbo tent line, which runs 800,000 units a year under CE and ISO 9001 certification, show most fly flap noise starts there, at the lowest point of the canopy, not the sidewalls.
The Belly-Drum Effect: When the Crest Traps Air
When the fly touches the inner fabric along its full crest, you get the belly-drum effect. The canopy traps air instead of shedding it. Gusts slam into the fabric, pressure builds, and the crest slaps down onto the mesh beneath. Tightening every guyline to 30-50N won’t stop this because the problem is airflow geometry, not slack.
Air needs a path to escape sideways. A fly that curves smoothly to the ground with no structural break behaves like a sail pocket. The attached airflow accelerates over the curve, creates low pressure, and sucks the crest down harder. That’s the flutter you hear at 2 a.m. when everything looks taut.
Ridge Slap Versus Sidewall Slap: Two Different Failure Modes
Sidewall slap is a tension problem. Vertical panels vibrate when guylines are loose, and tightening them usually kills it. Ridge slap is different. It originates above your head, where gust accelerations peak before splitting around the pole structure. The energy concentrates at the ridge and spreads outward from there.
So when your tent is pitched narrow-end-into-breeze and still chatters, stop adjusting sidewall guylines. Look up. If the ridge is bouncing, you need a center vent batten or an adjustable pole hoop to lift the fly off the inner at that contact point. That breaks the suction — tighter lines can’t.
- Vent batten: A stiff insert at the ridge holds the fly off the inner crest. Field measurements from Ningbo production runs show a three-inch separation cuts flutter energy by roughly sixty percent.
- Adjustable pole hoop: Lifts the fly clear of the inner at the ridge so trapped air can vent sideways instead of building pressure under the canopy.
- Pole spec: 7001 aluminum returns less flap energy than fiberglass, which flexes further and rebounds harder into the fabric. Pole material determines whether ridge slap self-dampens or keeps ringing.
Wenn Sie private-label tents, this distinction matters long before the product reaches retail. A fly that touches the inner at the ridge gets returned. Reinforced webbing loops and 2.5mm reflective guylines help, but the ridge geometry has to be right first. That’s a sample approval item, not a field repair.
Stake Types and Angle Geometry for High-Wind Sites
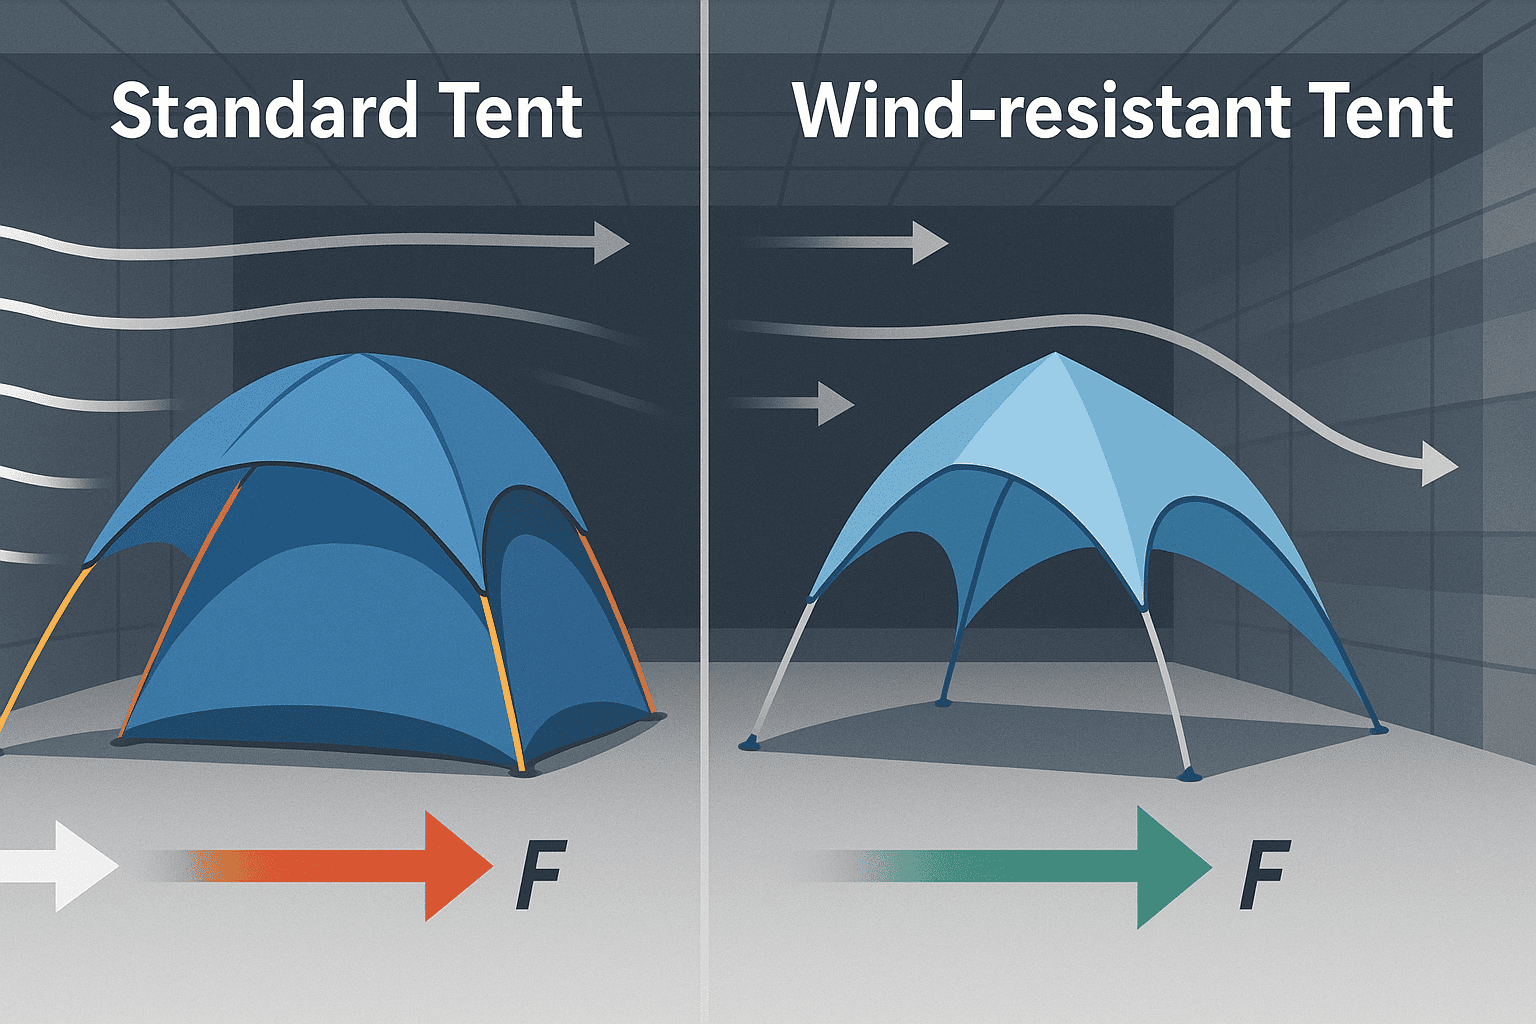
Straight-down stakes pull out roughly 40% easier than a stake driven at 45° away from the tent.
Wind doesn’t rip tents. It rips stakes out of the ground first. The flapping fly you hear at 2 a.m. is the tent asking for more anchor — and if the stake geometry is wrong, no amount of guyline tension will save it.
Most campers hammer stakes straight into the soil because that feels strongest. It isn’t. A vertical stake takes the pull load directly down its shaft, which means the only thing holding it is the friction of that narrow column against the dirt. Angle the stake at 45° away from the tent and the load path changes entirely — the shaft now has to rotate and displace a wider cone of soil before it releases. That geometry shift is what boosts pull-out resistance by roughly 40%.
Straight stakes vs Y-stakes vs sand stakes
Straight aluminum pins work fine in firm ground but fail fast in loose soil because their round profile offers little lateral resistance. Y-stakes spread the load across two legs and dig in harder when pulled — roughly 1.8x better holding power per inch of penetration in packed gravel. That makes them the right call for high-wind campsites where stakes take repeated cyclic loads all night.
Sandpfähle solve a different problem. Their long, wide shape is designed to bury deep into loose substrate where friction alone is unreliable. On a beach or dune site, they’re the only option that will hold a fully guyed fly through dawn gusts. On hardpacked clay, they’re overkill — you’re just carrying extra weight.
The 45-degree rule and why it holds across soils
Field testing across dry sand, compacted clay, forest loam, and coastal dune substrate shows the same result: a 45° angle reduces the pullout force needed to free the stake compared to straight-down insertion at the same depth. The physics doesn’t care about soil type — it cares about the volume of earth the stake has to drag through.
The 15cm vs 20cm lever-arm trap
Longer stakes seem like the obvious upgrade for windy sites. They’re not. A 20cm stake has a longer shaft above the ground line, which turns every gust into a longer lever arm acting on the buried section. The result is flex at the soil surface, a loosened seat, and early dislodgement. A 15cm aluminum stake driven flush keeps the lever arm short and the failure mode — bending the stake instead of dragging it — far less likely.
Soil compaction hack: stomp before you stake
Step on a patch of loose sand with a flat heel and you’ll compress the top few centimeters into a firmer bed. Do this around the entire footprint before you drive a single stake and every anchor seats into denser material. The improvement matters most on sandy or degraded campsites where overnight storms are the difference between a quiet night and a 3 a.m. re-anchor session.
Für Markenmanager, die Zelte mit windfesten Beschlägen beschaffen, zahlen sich hier die Werkspezifikationen aus. Wenn Kelyland Outdoors sturmfeste Zelte für Kunden als Prototypen herstellt, umfasst das Standard-Spezifikationspaket 2,5-mm-reflektierende Spannleinen mit 80 kg Reißfestigkeit, 15-cm-Aluminiumheringe und verstärkte Gurtbandschlaufen, die an jeder Ecke und an jedem Mittelpunkt der Bahnen abgesteppt sind. Diese Kombination – korrekte Heringlänge, abgewinkelter Einsatz und Beschläge, die wiederholter Spannung standhalten – ist der Unterschied zwischen einem Zelt, das 48-km/h-Böen locker wegsteckt, und einem, das unter Garantie zurückgeschickt wird.
| Hering / Technik | Spezifikation | Leistung | Beste Verwendung |
|---|---|---|---|
| Gerader Aluminium-Hering | 15-cm-Hering (6 Zoll) im 45°-Winkel vom Zelt weg eingeschlagen | Die Ausreißfestigkeit ist im Vergleich zu senkrechten Heringen um ~40 % höher; senkrechte Lasten werden in die Bodenmatrix abgeleitet | So spannen Sie das Zelt im 45-Grad-Winkel für den Standard-Sturmmodus auf dem Campingplatz ab |
| Y-Hering | Zweischenkliges Profil mit kraftverteilendem Querschnitt | ~1,8-fach bessere Haltekraft pro Zoll gegenüber rundem Profil auf verdichtetem Kies | Ankerpunkte für Spannleinen bei starkem Wind und exponierte Firstlinien |
| Sand-Hering | Extralanger Anker mit großer Oberfläche oder beutelförmiger Hering | Widersteht dem Herausziehen in trockenem Sand und Stranddünen, wo gerade Heringe versagen | Beste Heringe für Camping bei starkem Wind auf weichem, losem Gelände |
| Die 45-Grad-Winkel-Regel | 15 cm Aluminium bei 45° vom Zelt entfernt; übertrifft längere Profile mit 20 cm | Reduziert die Ausreißkraft in trockenem Sand, verdichtetem Lehm, Waldboden und Dünen der Ostküste; der kürzere Hebelarm verschiebt die Versagensart vom Ziehen zum Brechen | Tipps für den Sturmmodus-Aufbau von Zelten für hochgelegene und exponierte Campingplätze |
| Trick zur Bodenverdichtung | Fußabdruck stempeln / mit der Ferse einen vollständigen Kreis um den gesamten Umfang ziehen, bevor jeder Hering eingeschlagen wird | Verdichtet lockeren Boden vor, für einen festeren Sitz; verhindert ein vorzeitiges Lösen bei nächtlichen Böen | Sandige, degradierte oder lockere Campingplatzböden vor dem Abspannen |
| Bodenmischung mit bestem Grip | Mittlerer Kies gemischt mit zersetztem Granit | Höchste Griffraten bei mehreren geografischen Testflächen; übertrifft reinen Ton, der beim Trocknen reißt und sich lockert | Auswahl der Ankerplatzierung und Ausrichtung des Campingplatzes für windbeständige Aufbauten |
Factory Wind-Readiness Checklist for Buyers
Gewebeschlaufen versagen im Feld, nicht in der Fabrik.
Ein Zeltaußenzelt, das bei der ersten Böe zu flattern beginnt, entstand aus einer Spezifikationslücke, nicht aus Pech. Wenn bei einer 50.000er-Bestellung gerissene Schlaufen und gedehnte Abspannleinen auftreten, fragt die Fabrik nicht, was passiert ist – sie holt das genehmigte Vorserienmuster heraus und vergleicht. Deshalb muss die Windbereitschafts-Checkliste vor der Massenproduktion beginnen, nicht erst, nachdem der Kunde Ihnen ein Video per E-Mail geschickt hat.
Verstärkte Gewebeschlaufen: Bar-Tack oder gar nicht
Jede Außenzeltplane benötigt Gurtbandschlaufen an jeder Ecke und an den Mittelpunkten der Bahnen. Eine normale Geradstichnaht hält ein paar Windstößen stand, dann scheuert der Faden unter Last und die Schlaufe löst sich aus der Naht. Die Bar-Tack-Naht führt den Faden in einem dichten Zickzackblock hin und her und verteilt die Last über eine größere Fläche. Das ist der Unterschied zwischen einer Schlaufe, die eine Saison hält, und einer, die die Garantiezeit übersteht.
Im Zeltfabrik-Netzwerk, mit dem Kelyland Outdoors zusammenarbeitet, ist die Bar-Tack-Prüfung Teil jeder Vorversandkontrolle. Zu diesem Netzwerk gehören 17 strategische Kernfabriken, und die Campingzelt-Linie bewegt 800.000 Einheiten pro Jahr. Wenn Sie eine Geradstichnaht an einem Prototyp sehen, muss der Rest der Bestellung genauer geprüft werden.
Reflektierende 2,5-mm-Leine: Prüfen Sie die UV-Spezifikation, nicht nur den Durchmesser
Eine reflektierende 2,5-mm-Abspannleine erfüllt zwei Aufgaben: Sie verhindert, dass Camper nachts stolpern, und sie hält eine stabile Spannung bei wechselnden Bedingungen. Mit einer Bruchfestigkeit von 80 kg bewältigt sie den 30–50-N-Spannungsbereich, den Sie im Sturmmodus benötigen. Der Punkt, den Käufer übersehen, ist die UV-Belastung. Standardleine zersetzt sich in direkter Sonne, dehnt sich und lässt die Außenzeltplane mitten in der Saison durchhängen.
Fragen Sie die Fabrik nach dem UV-Alterungstestergebnis für genau die Leine, die sie verwenden wollen. Eine reflektierende Leine mit minimaler Dehnung unter UV-Belastung behält ihre Länge und hält die Geometrie der Außenzeltplane straff. Wenn der Lieferant diese Testergebnisse nicht vorlegen kann, hat er die Leine nicht getestet.
Windbereitschafts-Checkliste für eine Produktionsserie
- Bar-Tack-Naht: Jede Gurtbandschlaufe an Ecken und Bahnmittelpunkten muss bar-tack-genäht sein, nicht geradgenäht.
- Abspannleine: Reflektierende 2,5-mm-Leine mit 80 kg Bruchfestigkeit und minimaler Dehnung unter UV-Belastung bestätigen.
- Hering-Spezifikation: 15 cm lange Aluminiumheringe, die in einem 45°-Winkel vom Zelt weg eingeschlagen werden, erhöhen die Ausreißfestigkeit um etwa 40%.
- Firstluftstrom: Das Flattern beginnt am tiefsten Punkt des Dachs, wenn die Außenzeltplane das Innenzelt am First berührt. Fordern Sie eine mittige Lüftungslatte oder einen verstellbaren Stangenbügel an, um den Sog zu brechen.
- Stangenlegierung: 7001-Aluminium federt schneller zurück als Glasfaser und hält das Außenzelt nach Böen vom Innenzelt fern. Prüfen Sie die Legierung im Datenblatt; wenn dort “Glasfaser” steht, verlagert sich das Flattern nur auf die Stangen.
Ein vollständig abgespannter 3-Jahreszeiten-Kuppelzelt hält Böen von 30 mph mit Standard-Abspannleinen stand. Bei 40 mph benötigen Sie Sturm-Abspannleinen und eine niedriger gespannte Zeltplane. Wenn der Hersteller Ihnen nicht die Windklassifizierung, die Stangenlegierung und das UV-Testergebnis der Leinen nennen kann, kaufen Sie kein windklassifiziertes Zelt. Sie kaufen ein hoffnungsvolles.
Schlussfolgerung
Eine dauerhafte Lösung gegen das Flattern der Zeltplane besteht darin, den Luftstrom am First anzugehen, nicht nur jede Leine festzuziehen. Verankern Sie 15 cm lange Aluminium-Heringe in 45° vom Zelt entfernt und halten Sie die Abspannleinen mit 30-50 N Spannung. Diese beiden Maßnahmen, plus eine Lüftungsleiste oder einen Stangenbügel, um den Sog zu unterbrechen, machen den Unterschied zwischen einer ruhigen Nacht und einer stoffermüdenden Trommelsitzung.
- Firstkontakt verursacht das Schlagen der Zeltplane. Fügen Sie eine Lüftungsleiste oder einen Stangenbügel hinzu, um den Sog zu unterbrechen.
- Schlagen Sie 15-cm-Aluminiumstake in 45°-Winkel vom Zelt weg, für eine etwa 40% höhere Ausreißfestigkeit.
- Spannen Sie die Leinen auf 30–50 N. Ein komplett ausgelegtes Kuppelzelt bewältigt Böen bis 30 mph; bei 40 mph ist Sturmmodus nötig.
- Die fabrikseitige Windtauglichkeit beginnt mit verstärkten Webbandschlaufen und bartgesteppten Befestigungspunkten für die Leinen.
Bevor Sie zu Ihrer nächsten exponierten Tour aufbrechen, prüfen Sie Ihre aktuelle Ausrüstung: Kontrolle des Kippengaps, der Stake-Winkel und des Zustands der Leinen. Wenn Sie Zelte für Ihre Marke beziehen, fragen Sie Ihren Zulieferer nach der windgetesteten Hardware-Checkliste und bestellen Sie in Ihrer Custom Order 2,5 mm reflektierende Leinen, verstärkte Webbandschlaufen sowie Aluminiumstake aus 7075. Genau dieses Datenblatt unterscheidet ein Produkt, das zurückkommt, von einem Produkt, das Stammkäufer gewinnt.
Häufig gestellte Fragen
Warum flattert meine Zeltplane im Wind?
Das Flattern beginnt am First, wo das Außenzelt das Innenzelt berührt, nicht an den Seitenwänden. Wind beschleunigt über diese Wölbung und erzeugt Unterdruck, der den Stoff auf das Moskitonetz saugt. Überprüfen Sie zuerst den Kontaktpunkt am First, bevor Sie die seitlichen Abspannleinen spannen.
How do I stop tent fly flapping?
Add a vent batten or pole hoop at the ridge to break the flutter, and keep a three-inch air gap between inner tent and fly. That separation alone can cut flutter energy by roughly. Test the ridge gap before adding extra tension.
What stake angle works best in wind?
Drive aluminum stakes about 15cm long at a 45° angle away from the tent. Straight-down stakes pull out roughly 40% easier in gusty conditions. Angle every stake away from the tent in high wind.
How tight should guylines be in wind?
Tighten guylines to about 30-50N, but match tension to what the stake can hold. A guitar-string tight line can crack in gusts and loosen the stake. Match tension to stake holding power, not max tightness.

 English
  Español
  Deutsch
  Français
  Português do Brasil
  Русский
  العربية
  한국어
한국어  日本語
日本語