 Ir al contenido
The $50,000 order didn’t go down on a ship; it died at sample approval, and the inflatable tent defects behind it were nowhere on the packing list. The muestra de preproducción passed every quick glance, yet the mass production run came through with slow air beam leaks and valve flaps that stuck after a few uses.
That gap is usually a quality tolerance problem, not a supplier loyalty problem. A sample approval is only a promise about that single tent, so when the order moves to a 300-piece production run, the factory needs the same test parameters written into the spec — pressure-retention time, leak-rate limits, coating weight, and valve cycle counts. FOB pricing rarely rewards a factory for adding those checks, which is why they get skipped unless the buyer makes them contract conditions.
The good news: these inflatable tent defects are catchable before the container leaves the yard. A pre-shipment inspection that includes a 12-hour pressure-retention test and a 30-cycle valve test adds two or three days to the schedule, and it costs far less than a return claim or a failed dealer demo. Build that checklist first, and the factory knows exactly what will be measured.

Air Beam Seam Leaks
A 12-hour pressure-retention test catches slow seam leaks that standard visual inspection will miss.
Air beam seam leaks are the most common hidden defect in inflatable tents. They pass a visual check and even a 5-minute inflation test, then show up after the tent sits inflated overnight at a campsite. By then, the container has shipped and you’re managing a claim process that runs 60 days or longer.
How to test beams at full pressure
Don’t settle for a visual seam inspection. Specify a pressure-retention test on every sample and a statistically valid portion of production cartons. Inflate each beam to its rated working pressure, record the starting pressure, and hold it for 12 hours. Any drop beyond the agreed tolerance signals a leak you need to trace before shipment.
After the 12-hour hold, spray the seams and weld lines with a soapy water solution. Pinhole leaks show up as consistent bubbling at specific points. Mark each leak, require photos, and make the factory re-test after repair.
What causes pinhole leaks in high-frequency welding
High-frequency welding seals PVC/TPU air beams by generating heat inside the material under pressure. Pinhole leaks trace back to three root causes: contamination on the weld surface, inconsistent material thickness, or trapped debris between the layers.
-
- Contamination: Dust, release-agent residue, or oils from handling prevent the PVC/TPU layers from fusing completely. The result is a tiny gap that opens wider under repeated inflation cycles.
- Inconsistent thickness: PVC film that varies beyond the 0.4mm-0.6mm spec creates weak zones in the weld. Dielectric heating doesn’t penetrate evenly, leaving unfused sections along the seam.
- Trapped debris: Thread clippings, fabric particles, or moisture can vaporize during welding, forming micro-voids that appear as pinholes under pressure.
Kelyland Outdoors coordinates inflatable tent production through its network of 17 core strategic factories and over 200 manufacturing partners, including an ISO 9001:2015 certified air mattress plant in Xiangyang, Hubei, that produces 2.5 million units annually. Standard inspections at every production stage are part of the process — but visual QC won’t catch a slow seam leak. Specify the 12-hour hold and an AQL of 2.5 on critical defects with a third-party inspector. That adds 2-4 days and avoids a 60-day claim process after the container lands.
Valve Core Failures
A valve that passes a visual check can still fail by the 30th inflation cycle.
The valve is the smallest component in an inflatable tent, but it carries the full working pressure of the air beam. When it fails, the tent deflates in the middle of the night and the buyer ends up processing a claim. Most supply chain managers inspect fabric and stitching; too few put the valve through a real cycle test before container loading.
Why Cheap Valves Break After a Few Uses
In Chinese inflatable tents, the most common valve defect is a one-way flap that gets stuck by PVC residue left over from high-frequency welding. The flap seals fine on the first inflation, but the residue hardens, the flap stops seating flush, and the beam loses pressure slowly. Low-cost valve inserts make the problem worse because the sealing disk lacks the rigidity to hold its shape over time.
How to Test Valve Air Retention
Do not rely on a visual inspection. Inflate the beam to full working pressure and let the tent sit for 12 hours. A slow valve leak will show up as a measurable pressure drop. Then run 30 full inflation and deflation cycles on the same valve. That test catches the PVC-residue failure mode that a standard AQL visual check misses.
-
- Valve air retention test: Inflate to full working pressure, record the starting pressure, and recheck after 12 hours. Any drop indicates a valve or seam leak.
- 30-cycle test: Inflate and fully deflate the same valve 30 times. The flap must reseat cleanly every time with no sticking and no audible leak.
- Soap-solution check: Apply a soapy water mix around the valve base while pressurized. Bubbles reveal air escaping past the flap or the welded valve collar.
Kelyland Outdoors works with ISO 9001:2015 partner factories and can make inspection reports available on request. The report only helps if the valve test is written into the pre-shipment inspection checklist. Add it to your custom QC checklist for glamping tents before the factory starts production, not after the container lands.
Fabric Coating Delamination
Coating delamination is not cosmetic.
Coating delamination starts as a visual defect. It ends as a waterproofing failure. When the film separates from the polyester base, water moves straight through the weave — and on an inflatable tent, the pressurized beams flex during every setup, so the crease lines where the fabric folds are the first places the coating cracks.
Visual Signs at Inspection
Peeling along seam tape is the advanced stage. Catch it earlier. Hold the panel under raking light and look for a wrinkled surface texture or tiny bubbles that appear once the tent reaches full pressure. Those bubbles are air trapped between the film and the base cloth, which means the bond has already started to release.
-
- Peeling: Film lifts along seams or fold lines; the white coating layer becomes clearly visible at the edges.
- Bubbling: Small air pockets that expand under inflation pressure — a direct sign that adhesive bond strength is gone.
- Wrinkling: Fixed creases in the flysheet that never relax when stretched, indicating the coating has lost elasticity.
How Coating Weight Affects Waterproofing
Coating weight controls the hydrostatic head — the water pressure the fabric resists before leaking. A light coating keeps cost and packed weight down, but it flex-cracks at the beam seams after repeated inflation. Set an explicit quality tolerance for coating weight and adhesion in the spec sheet. The air beam fabric needs a heavier coating than the flysheet because it bends under pressure on every use. Leave this out of the quality agreement, and the factory supplies the cheapest layer that passes a static lab test.
Coating chemistry matters as much as weight. Kelyland’s partner factories apply PU, silicone, PVC, black, and silver coatings across their tent lines — black coating for UV block, PU for cost efficiency, silicone for cold-weather flexibility. Those partner factories hold ISO 9001:2015 and inspect at every production stage, but the buyer still has to fix the coating spec into the quality agreement. Skip that step, and delaminated flysheets on a glamping tent order turn into a 60-day claim process.
Weak Stitching at Stress Points
Anchor loops carry the full beam load.
Weak stitching is the only defect on this list that usually passes a flat-pack inspection. The anchor loops holding your air beams in tension look fine on a table. Inflate the tent to working pressure, and those same stitches take the full load of the frame. A bar tack that holds at bench level can pull straight through the webbing during a field setup.
Anchor loop reinforcement
The loops connecting the air beams to the floor and guylines need layered reinforcement. Inspect the production unit, not just the pre-production sample, for bar tacks on both sides of the loop. Kelyland’s tent partner in Ningbo—an ISO 9001:2015 certified factory—subjects anchor areas to mid-production QC checks for stitch coverage and webbing pull resistance, following the company’s 10-step inspection process.
-
-
- Check: Verify bar tacks are placed at both ends of the anchor webbing, and confirm the stitch pattern matches the reinforcement drawing in your tech pack.
- Riesgo: Two loose stitches at an anchor loop translate into a wall tear after a night of wind. The field replacement cost quickly exceeds the line item you saved by skipping the pull test.
-
Thread tension and needle holes
A needle hole is a tiny puncture in the beam sleeve’s coating. On a canvas tarp, it’s harmless. On an inflatable tent with a TPU- or PVC-coated Oxford sleeve, that same hole is a potential micro-leak path. Over-tensioned thread makes it worse: it cuts into the coating, and after repeated fold cycles, the edge frays.
-
- Especificación: Require seam allowance and stitch density to match your approved sample. Confirm thread tension during the in-line inspection, not at final packing.
- Evidence: Ask the inspector to inflate the beam, run soapy water along the stitch line, and photograph any bubble formation before shipment approval.
This defect rarely surfaces at sample approval. Add a seam-pull check to your AQL sampling for inflatable tents, and request photos from the supplier’s in-line QC report for every production lot. Pressure-retention testing plus a stitch-line inspection closes the gap that visual-only checks leave open.
Misaligned or Low-Quality Printing
A Pantone chip on paper isn’t the same as printed ink on coated tent fabric.
Printing defects on inflatable tents rarely stop the tent from inflating, which is why they slip past a standard AQL visual check. But a logo that looks correct in the factory’s bright showroom can look dull, oversaturated, or plainly wrong when the buyer opens the carton in their own warehouse. The gap sits between what the spec sheet promised and what the ink actually did on a coated fabric surface.
Color Mismatch from Pantone References
Color mismatch usually starts with a digital proof. A Pantone reference viewed on a phone screen is not the same as ink printed onto PU-coated or PVC-laminated polyester. Coatings alter how ink absorbs and reflects light, so the same silk-screen ink can shift hue depending on whether it sits on black-coated, silver-coated, or plain fabric. Approve a physical print sample on the actual tent fabric, and specify that the factory must match it under standard daylight conditions, not an indoor LED display.
-
- Proof type: Require a printed swatch on the exact coated fabric used for production, not a digital rendering or paper proof.
- Color check: Hold the swatch against the Pantone reference under D65 daylight simulation. Accept minor variation only if the brand sign-off covers it.
Kelyland’s production process includes a formal sample approval stage before mass production, and partner factories use Pantone-matched fabric dyeing plus silk-screen, digital, and thermal transfer printing. That setup catches color drift early, but only if the buyer actually signs off on the physical sample and keeps a reference copy for the final inspection.
Ink Adhesion and Washing Resistance
A logo can match color perfectly and still fail after the tent is folded, packed, inflated, and wiped down. Ink formulated for standard woven polyester tends to crack or peel when applied to a coated substrate that flexes under air pressure. Screen-printed areas on inflatable tent beams take repeated bending stress; if the ink can’t flex with the fabric, it delaminates within a few uses. This is a material-compatibility problem, not a workmanship issue, and it won’t show up in a one-hour inspection.
Set an ink adhesion check in your inflatable tent quality inspection checklist. A simple tape-pull test on an inconspicuous printed area reveals weak bonding in seconds. For washing resistance, follow the care-label instructions and rub the print after laundering. If ink lifts, flakes, or fades, reject the batch before shipment. The cost of reprinting after containers arrive is far higher than catching it at the factory.
Missing or Incomplete Accessories
Accessory shortages rarely show up in a standard AQL visual inspection because the inspector checks the tent, not the carton contents. That’s how a 15-person inflatable glamping tent ships with half the required pegs. The main unit passes every check, then fails on the first windy night at a customer site.
Peg Count, Repair Kits, and Carry Bags
The spec sheet for an inflatable tent lists a peg count that matches the guy-line points and anchor loops for the wind rating. When the carton comes up short, the buyer finds out weeks later through a customer complaint, not during inspection. Make the packing list part of the inspection criteria — verify that every anchor loop has a corresponding peg before the carton closes.
A puncture repair kit is not a bonus. On an inflatable tent, a single beam puncture turns the product into a tarp. Confirm each carton contains the patch material, adhesive, and valve wrench. A carry bag that’s a few centimeters too short will split at the seam on the first repack.
Instruction Manual Compliance
Instruction manuals are a compliance issue, not a reading aid. EU regulations require product instructions in the language of the destination country. Many Chinese suppliers ship English-only manuals that don’t match the actual valve layout — a customer who can’t figure out which valve inflates which beam returns the tent. Confirm the manual’s language and that the diagrams show the real valve configuration before shipment.
At the Ningbo tent factory in Kelyland’s core network — CE, BSCI, and ISO 9001 certified — the packaging design phase.
Incorrect Packing Dimensions and Weights
The carton is part of the product.
Packing dimensions and gross weight sit at the bottom of most QC checklists. That’s a mistake. For inflatable tents, the packed size directly determines freight class, container loadability, and the number of units you can fit per 40HQ. Get it wrong by a few centimeters and your landed cost per unit shifts — sometimes enough to wipe out your margin.
Why packed size matters for freight quotes
Ocean freight is billed on chargeable weight — the larger of actual weight or volumetric weight. For an inflatable tent that compresses into a heavy-duty PVC/TPU stuff sack, the volume-to-weight ratio sits awkwardly. A supplier who under-reports packed length by 5 cm can make a pallet configuration fail at the warehouse, forcing unexpected LCL consolidation costs or a second truck for a load that should have fit on one skid.
Supply chain managers often discover this only when the freight invoice arrives. That’s the worst time. The container has already sailed, the forwarder has already applied the dimension-based adjustment, and the supplier is already pointing at the approved sample photo. The factory’s inspection report said everything matched — but it didn’t list the carton dimensions on the report.
How to confirm box dimensions before shipment
Ask for three things before the bulk order goes into production: a carton spec sheet with length, width, height, and gross weight per master carton; a photo of the carton on a calibrated scale with the weight reading visible; and a packed carton measurement done at the final compression, not at first packing. Inflatable tents relax after vacuum packing — a carton that starts at 68 cm can stretch to 71 cm once the beams settle.
Kelyland Outdoors includes packing specifications in the inspección previa al envío step of its 10-step production control process. The factory network’s ISO 9001-certified suppliers document carton dimensions at the final pack stage, and the inspection team compares those numbers against the packing list and the freight booking confirmation. If you are sourcing through a third-party inspection company, put carton measurements on the same AQL 2.5 sampling plan as the tent’s critical defects — and request photo evidence of the tape measure across the carton’s length and width.
A final note: specify that the packed dimensions must be measured after the vacuum-sealed tent has been inside the carton for at least 24 hours. A tent packed the morning of inspection will not yet show the full relaxation of the fabric and the shift of internal packaging. The carton that fits the freight quote on Tuesday may exceed it by Thursday. That’s the difference between a load that ships clean and one that triggers a dimension surcharge at destination.
| Parameter | Common Defect | Por qué es importante | Método de verificación |
|---|---|---|---|
| Dimensiones de la caja (Largo × Ancho × Alto) | Boxes measure 2-5 cm larger than the approved packing spec | Container loading plan becomes inaccurate and freight quotes based on CBM must be revised | Measure every 5th carton with a calibrated tape; compare against the signed spec sheet and packing list |
| Gross Weight per Carton | Weight differs by more than 3% from the declared shipping weight | Unexpected carrier surcharges, customs discrepancies, and potential safety violations | Weigh cartons on a certified floor scale; spot-check at least 10% of cartons before palletizing |
| Weight of Accessory Content | Pegs, repair kits, and stakes are not included in the declared unit weight | Dimensional-weight billing surprises and inaccurate landed cost calculations | Confirm the full accessory list with the supplier and add it to the approved unit weight |
| Carton Count per Master Pack | Count varies from the packing list (shortage or overage) | Customs declaration mismatch, warehouse receiving delays, and claim disputes | Perform a full carton count during pre-shipment inspection and document with photos |
| Palletized Height After Wrapping | Stretch wrapping compresses or shifts boxes, altering final pallet dimensions | Pallet cannot fit through the container door or fails carrier height limits | Measure pallet height, width, and depth after wrapping; compare to the container opening |
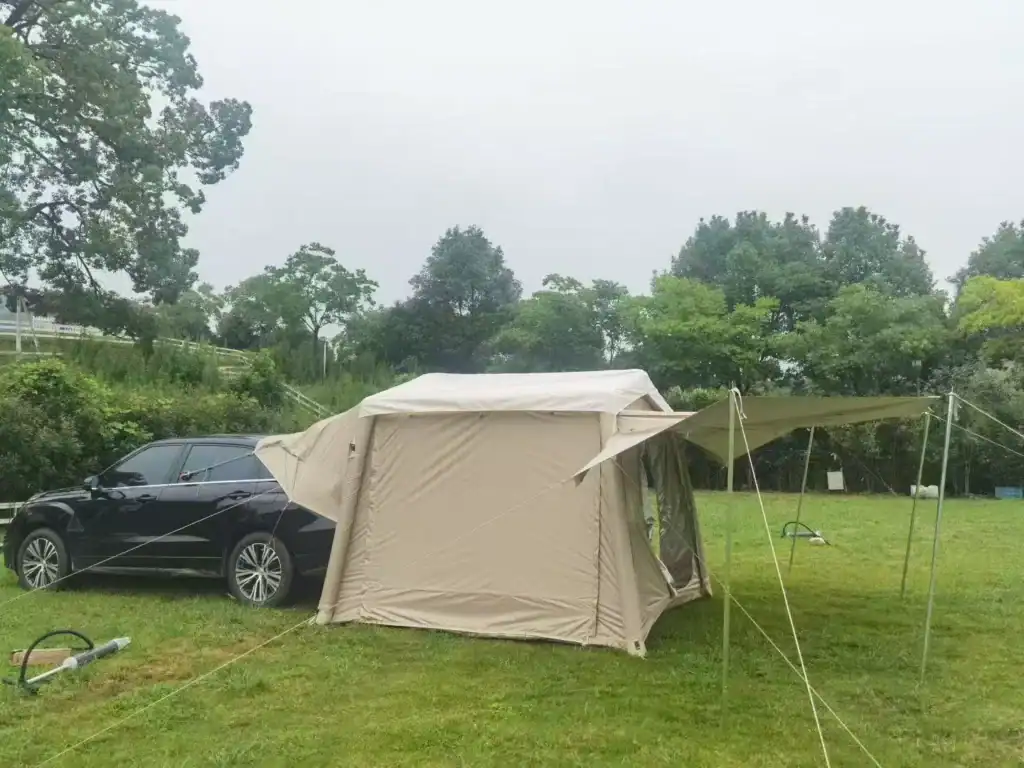
How to Set Up Your Own Inflatable Tent QC Checklist
A QC checklist only works if the factory sees it before mass production starts.
Kelyland Outdoors runs client projects through a fixed 10-step process: sample approval sits at step 3, pre-shipment inspection at step 8. Deliver your inflatable tent quality inspection checklist before step 3. The factory can adjust welding temperature, valve seating, and seam tape application before the line runs. Send it after step 8 and you are paying for a container of defects you already own.
A standard AQL 2.5 visual inspection checks appearance, workmanship, and basic measurements. It does not catch slow leaks. Many inflatable tent failures appear only after the tent has been inflated for 12 hours. Your checklist must therefore specify functional tests, not just visual criteria.
Sharing Inspection Criteria with Kelyland
Kelyland’s partner factories adhere to ISO 9001:2015, with inspections at every production stage and reports available on request. Factory reports carry bias, though. Ask for timestamped photos next to each check result. If a report says “valve OK” without a photo of the air retention reading, treat it as unverified.
-
- 12-hour pressure retention: Inflate each sample to full working pressure and hold overnight. Photograph the gauge at start and finish.
- 30-cycle valve test: The most common valve failure in Chinese inflatable tents is a one-way flap stuck by PVC residue from high-frequency welding. Run 30 inflation and deflation cycles on every sample.
- Full-pressure carton test: Specify pressure retention on every carton for critical orders, not just the randomly selected AQL sample.
Third-Party Inspection Options
For large orders, book a third-party pre-shipment inspection with AQL 2.5 on critical defects. That adds 2-4 days to the schedule and costs a fraction of what a 60-day claim process burns after the container lands. Give the third-party inspector your checklist, not the factory’s version. If the two documents conflict, you want to learn that before export, not after arrival.
Conclusión
Every defect on this list hides until the tent is actually inflated and pitched. Skip the pressure-retention check and you will not see the failure until 12 hours later, when the beam has sagged and a customer is demanding a refund. The cost of doing nothing is a container of unsellable product, a 60-day claim process, and a retail partner who moves to another brand.
-
- Require a 12-hour pressure-retention test on every carton; a standard AQL visual check will not catch slow seam leaks.
- Specify a 30-cycle inflation and deflation test to expose valve flaps stuck by PVC residue from welding.
- A third-party pre-shipment inspection at AQL 2.5 adds 2-4 days but prevents a 60-day claim process.
- Verify packed dimensions, peg counts, and repair kits before shipment; omissions trigger freight surcharges and returns.
Before you approve the next production run, put these tests into a written QC checklist and hand it to your supplier with the purchase order. Specify the 12-hour pressure-retention test, the 30-cycle valve test, and third-party inspection at AQL 2.5 — and treat hesitation as a red flag. Review Kelyland Outdoors’ inflatable gear range to see how a documented inspection protocol should work.
Preguntas frecuentes
¿Cómo deben probarse las costuras de las tiendas de campaña inflables?
Realice una prueba de retención de aire a plena presión durante al menos 12 horas para detectar fugas lentas en las soldaduras de las vigas. Hágalo en la inspección previa al envío, en lugar de depender de la aprobación de muestras o de inspecciones visuales. Luego confirme que el plan de muestreo AQL cubre esa prueba de presión.
¿Por qué fallan las válvulas de las tiendas de campaña inflables?
Las fallas de las válvulas generalmente provienen de núcleos de válvula de baja calidad que se agrietan o pierden retención para el ciclo de inflado número 30. Pruebe la retención de aire mediante ciclos de inflado repetidos, no solo una inspección visual, antes del envío. Incluya las pruebas de ciclos de válvula en su lista de verificación de control de calidad.
¿Qué causa la delaminación del recubrimiento de la tela?
El desprendimiento del recubrimiento proviene de un bajo peso de recubrimiento o una mala adhesión, y se manifiesta como pelado, ampollas o arrugas. Verifique el peso del recubrimiento contra la especificación e inspeccione la condición de la superficie en piezas al azar, porque afecta directamente la impermeabilización. Rechace los paneles con desprendimiento antes de la carga del contenedor.
¿Qué debe cubrir una lista de verificación de control de calidad para carpas inflables?
Una lista de verificación adecuada cubre sellos de vigas de aire, retención de válvulas, adhesión del recubrimiento, costuras en puntos de tensión, coincidencia de estampados, accesorios y dimensiones empacadas. Comparta estos criterios con Kelyland antes de la producción y confirme el plan de muestreo. Obtenga la lista de verificación acordada por escrito antes de la producción en masa.
¿Por qué verificar el tamaño del embalaje antes del envío?
El tamaño empacado determina las cotizaciones de flete, y unos pocos centímetros pueden cambiar la carga del contenedor y el costo de envío. Confirme las dimensiones y los pesos de las cajas durante la inspección previa al envío para evitar sorpresas en el costo total. Mida cada cartón antes de aprobar el envío.

 English
  Español
  Deutsch
  Français
  Português do Brasil
  Русский
  العربية
  한국어
한국어  日本語
日本語