 跳到内容
跳到内容 
tent hydrostatic head rating is the first checkpoint buyers should lock before they approve a supplier, budget, or production slot. The operator on the coating line watches the hydrostatic head gauge climb. At 800mm, the fabric passes. At 1200mm, it holds. But the buyer who got burned on a $50K order wasn’t asking about the gauge — they were asking about the seam tape. The pre-production sample had been cut from the center of the roll, where the coating was thickest. The mass production run used edge-of-roll fabric, where the coating thinned by 15-20%. That gap between sample approval and production reality is where most tent leak claims start.
A tent hydrostatic head rating tells you how much water pressure the fabric can withstand before a drop pushes through. But the number on the spec sheet — 1500mm, 3000mm, 5000mm — is only as reliable as the sampling method behind it. Suppliers have been known to quote a 3000mm rating based on a single test patch from a batch that averaged 2200mm across the full roll width. The difference between a 1500mm and 3000mm rating is roughly 3-4 extra pounds of coating per square yard. That adds cost, but it also adds margin for error in the seam tape bond and the floor weld. The real question is not whether the fabric hits the number, but whether the supplier tests from the weakest point — the edge, the fold, the seam intersection.
Here is the benchmark worth writing down: for a 3-season tent, demand a minimum 1500mm rating on the fly and 3000mm on the floor, with the test sample taken from the last 10% of the roll width. If the supplier can’t produce a test report showing that specific sampling location, you are buying a number, not a performance guarantee.

What Hydrostatic Head Rating Actually Measures
A 1,500mm HH rating on paper means nothing if the seam tape peels at 800mm.
Hydrostatic head (HH) measures the water column pressure at which three droplets penetrate a fabric sample under ISO 811. The test clamps a 100cm² piece of flat fabric, raises a column of water at a controlled rate, and records the height in millimeters when breakthrough happens. That number tells you how well the base fabric resists water penetration under static pressure. It does not tell you how the tent performs in wind-driven rain, after folding, or at the seams.
What the Numbers Actually Mean
-
- 1,500mm: Light showers. Fine for a fair-weather shelter or a tarp used above a hammock. Push this into a steady downpour and you will see wetting through.
- 3,000mm: Moderate rain. The minimum for a three-season tent fly that sees regular weekend use. Most budget tents sit here.
- 5,000mm: Heavy rain. Suitable for alpine or monsoon-season tents. The fabric itself will hold, but the seams and zippers become the weak points.
- 10,000mm+: Extreme conditions. Used in expedition tents and military shelters. At this level, the coating thickness and adhesion matter more than the raw fabric HH.
The Flat Fabric Trap
ISO 811 tests a pristine, flat piece of fabric. A tent is not flat. It has stitching holes, seam tape, zipper storm flaps, and fold creases from packing. Every one of those is a potential leak path that the HH rating ignores. Seam tape adhesion fails at roughly 60-70% of the fabric’s rated HH if the tape is poorly applied or the wrong width. Zipper storm flaps redirect water, but if the flap is too short or the fabric around it is not coated, water runs straight through. Fold creases from repeated packing crack the coating layer, especially on PU-coated fabrics, and the HH at that crease drops by 40% or more.
A buyer who approves a 5,000mm fabric without checking the seam tape spec, the zipper flap overlap, and the coating flexibility is buying a 5,000mm number that will fail at 2,000mm in the field. The factory’s quality control process should include a seam tape peel test and a flex crack test on folded samples. Kelyland Outdoors’ partner tent factories in Ningbo run these checks as part of their ISO 9001:2015 protocols. Ask for the seam tape adhesion report, not just the fabric HH certificate.
The Difference Between a Swatch and a Shelter
A swatch test tells you about the fabric.
The difference between a swatch and a shelter isn’t just scale—it’s the entire failure path. A 10cm x 10cm fabric sample clamped in a lab sees zero tension, no seam stress, and no wind load. That same fabric, once cut, sewn, and pitched as a 4-person dome tent, experiences forces at every fold, zipper track, and guy-out point that the swatch never encountered. Buyers who approve a fabric based on a flat swatch hydrostatic head test alone are approving a component, not a product.
What the swatch hides
A standard hydrostatic head test (ISO 811) clamps the fabric flat and raises water pressure until three droplets penetrate. The number—say 3000mm—looks solid. But that test ignores the real-world geometry: a tent wall under wind pressure flexes, and the same fabric at a crease point can fail at half the rated pressure. The swatch also doesn’t test the seam tape adhesion, the zipper water resistance, or the floor-to-wall seam strength. Those are shelter-level variables.
What the shelter reveals
A full-shelter rain test (ISO 5912 or CPAI-84) puts the assembled tent under a simulated storm with controlled water volume and wind pressure. It exposes the failure points no swatch can: water pooling at the pole sleeve entry, capillary leakage through the zipper coil, and seam tape delamination at the ridge. At Kelyland Outdoors, partner factories in Ningbo and Shaoxing run both swatch-level material tests and full-shelter rain tests before any production batch is approved. The swatch gets you a material spec. The shelter test gets you a product that doesn’t leak on the third trip.
The procurement gap
The gap between a swatch and a shelter is where warranty claims live. A buyer who signs off on a fabric swatch but never sees the full tent rain test results is accepting risk on seam integrity, zipper performance, and tape adhesion—three of the top five failure modes in field returns. Insist on the full shelter test report, not just the material certificate. The swatch is a promise. The shelter is proof.

Why 3,000mm Can Be Enough… or Not Enough
A 3,000mm rating is only as good as the construction behind it.
You see 3,000mm on a spec sheet and assume the tent is waterproof. That number only applies to the fly fabric under a lab test. The real question is whether the seams are taped, the floor is protected, and the zipper flaps are designed to shed water. Skip those details, and 3,000mm becomes a marketing number, not a performance guarantee.
When 3,000mm Actually Works
For moderate rain — think a few hours of steady drizzle or an overnight shower — 3,000mm is sufficient if the tent is built right. The fly fabric holds pressure, the seams are factory-taped with hot-melt PU tape, and the floor is raised off the ground with a footprint or bathtub construction. In that setup, the rating does its job. You stay dry.
Where It Falls Apart
The same 3,000mm rating becomes useless the moment a seam tape corner lifts. That happens when the tape is applied at the wrong temperature or the fabric isn’t clean. A single gap at a zipper end lets water run straight into the tent body. The floor seam is another weak point — if the floor fabric is only 150D Oxford without a PE or TPU coating, ground moisture wicks through overnight.
I’ve seen a 3,000mm tent fail in a 45-minute downpour because the factory skipped seam taping on the fly corners to save 12 cents per unit. The buyer didn’t catch it during sample approval. The first rain test happened in the field, 5,000 units deep into production.
What to Check Beyond the Number
-
- Seam tape coverage: Confirm every stitch line on the fly and floor is taped, not just the main seams. Ask for a photo of the inside corner seams.
- Floor material and coating: A 3,000mm fly paired with a 120D PE floor that has no coating is a mismatch. The floor should be at least 150D Oxford with a PU or TPU coating, or a PE floor with a 0.2mm minimum thickness.
- Zipper flap design: Look for a storm flap that covers the zipper track fully. A standard zipper without a flap will leak at the track under sustained rain.
- Quality tolerance during production: At Kelyland Outdoors, the partner factory in Ningbo applies seam tape at a controlled temperature and inspects each tent under a water spray test before packing. That process catches the corner-lift issue before it ships.
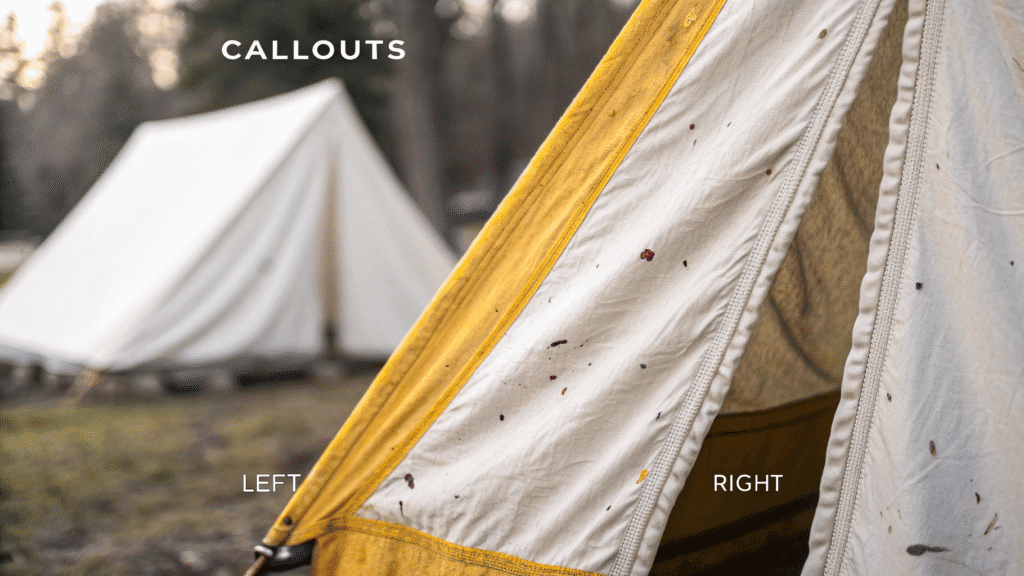
5 Physical Places Tents Fail Despite a High HH Rating
A 3,000mm HH rating means nothing if the seam tape lifts on day one.
A high hydrostatic head rating looks great on a spec sheet. But water doesn’t enter a tent through the middle of the fabric panel. It enters through the seams, the zippers, and the corners where the geometry changes. A 5,000mm-rated tent can leak like a sieve in a moderate rain because the factory skipped a cold-weather seam taping step. The following are the five physical failure points that a high HH number won’t save anyone from.
1. Seam Needle Holes — The High-Speed Stitching Problem
When a factory runs a tent panel through a high-speed industrial machine at 3,000 stitches per minute, the needle creates micro-holes in the fabric. Those holes are larger than the thread diameter. On a coated fabric, the needle also drags a small amount of coating material into the stitch channel, leaving a bare spot around each puncture. Water doesn’t need a gap. It just needs a path. Capillary action pulls moisture through those micro-holes, and within 30 minutes of steady rain, you’ll see damp lines forming along every seam. The fix isn’t a higher HH fabric. It’s a proper seam-sealing process — either heat-sealed tape or a liquid-applied sealant that actually fills the needle channel.
2. Seam Tape Delamination at Stress Points
Seam tape works fine on a flat panel. Put it on a corner where the tent pole bends the fabric, and the tape starts peeling. The issue is shear load. Every time the tent is set up and taken down, the tape at the ridge pole connection or the vestibule corner gets pulled in two directions. After 20 cycles, the tape edge lifts by 1-2mm. That’s enough for water to wick under it. The tape itself might be rated for 10,000mm, but the adhesive bond at the edge is only as strong as the application pressure and the cleanliness of the fabric surface. Factories that skip the primer wipe on PU-coated nylon get delamination rates above 15% in the first season.
3. Bathtub Floor Fold Creases — Coating Cracking
The bathtub floor is folded into a flat rectangle for packaging. That fold line is a stress concentration point. PU coating has a flex tolerance. When you fold the same crease 50 times over a product’s life, the coating develops micro-cracks along that line. Water pools on the floor during a rain. The hydrostatic pressure from a 2cm puddle is enough to push water through those cracked coating lines. The result is a wet sleeping pad at 3am. A thicker coating helps, but the real solution is a floor design that uses a welded or taped seam at the fold point instead of relying on the coating alone.
4. Zipper Base Openings — The Pooling Trap
The bottom of a zipper track is where water collects. Rain runs down the tent wall, hits the zipper, and pools at the base where the two zipper halves meet. If there’s no storm flap covering that junction, water seeps through the zipper track itself. Zippers are not waterproof. They are water-resistant at best. The track has a channel where the slider runs, and that channel is a direct path to the interior. A high HH rating on the fabric doesn’t change the fact that the zipper base is an open gap. The fix is a simple fabric flap that extends 3cm below the zipper stop, directing water away from the track.
5. Pole Sleeve Abrasion — Coating Wear Over Time
Pole sleeves are the most abrasive contact point in a tent. Every time the pole is inserted and removed, the fabric rubs against the pole surface. On a sleeved tent, that friction happens along the entire length of the sleeve. After 30-40 setups, the inner coating on the sleeve fabric wears thin. The outer coating might still be intact, but the inner surface has lost its waterproof barrier. Water then migrates through the abraded area and into the tent body. The factory solution is to use a sleeve lining fabric with a separate coating layer, or to add a wear strip at the pole entry point. Most budget tents skip this. The result is a wet tent that looks dry from the outside.

How to Specify Waterproof Fabric for OEM Production
A pre-production finished-tent sample is the only reliable gate before mass production.
A buyer at a European outdoor brand once approved a fabric swatch and a PU coating spec sheet, then received 2,000 tents where the rainfly seams leaked in the first drizzle. The swatch matched. The coating spec matched. But the seam tape width was 18mm instead of the specified 22mm, and the factory had switched to a hot-air seam sealing machine that couldn’t handle the silicone coating on the fly. That $50K order turned into a discount liquidation. The failure trace back to one thing: the pre-production sample was a flat fabric piece, not a finished tent.
The Spec Sheet Fields That Actually Matter
Most buyers send a one-line spec: “300D Oxford, PU coated, 2000mm HH.” That’s not enough. The production floor needs seven fields to get it right.
-
- Fabric type and denier: Polyester 300D Oxford, 68T weave, 190gsm. Not “300D Oxford.” The weave count and finished weight determine how the coating bonds.
- PU coating weight: Specify grams per square meter (e.g., 20gsm PU). Too thin and the hydrostatic head drops. Too thick and the fabric stiffens, causing crease cracking at fold lines.
- Hydrostatic head rating: Minimum 2000mm for rainfly, 3000mm for floor. Tested per ISO 811. A 1500mm floor will wet out on damp ground within 4 hours.
- Seam tape type and width: PU tape for PU-coated fabrics, silicone tape for silicone-coated fabrics. Width: 20-22mm for straight seams, 25mm for corners. Wrong tape = delamination after 3 months.
- Seam sealing method: Hot-air machine for PU coatings. Cold-applied tape or liquid sealant for silicone coatings. Silicone-coated fabrics cannot be hot-air sealed — the tape won’t bond.
- Zipper gauge and type: #8 YKK reverse coil for main doors, #5 for mesh pockets. Water-resistant zipper with PU tape cover on rainfly. Non-water-resistant zippers on a rainfly guarantee leaks at the closure.
PU vs. Silicone Coating: The Seam Sealing Trap
PU coatings are the standard for mid-range tents. They bond well with hot-air seam tape, and the process is fast. Silicone coatings offer higher tear strength and UV resistance, but they create a problem: silicone repels adhesives. A silicone-coated fly cannot be seam-sealed with hot-air tape. The only options are cold-applied silicone tape or liquid seam sealer applied by hand. Hand-applied sealing is slower and less consistent. If your factory quotes a 30-day lead time on a silicone-coated tent, ask whether the seam sealing is automated or manual. Manual adds 5-7 days.
The Sample Approval Gate You Cannot Skip
A flat fabric swatch tells you nothing about seam integrity, zipper alignment, or tape adhesion under tension. The only valid sample is a finished tent — fully assembled, seam-taped, zippers installed, and tested to the specified HH rating. At Kelyland Outdoors, the sample approval process requires a pre-production finished-tent sample before any mass production begins. This sample goes through a 15-point inspection: seam tape width measured at 5 locations, zipper pull force tested, HH rating verified on the floor seam, and the rainfly hung for 24 hours under a spray rig. If the sample passes, the production spec is locked. If it fails, the factory adjusts the process — not the spec.
The buyer who skipped this step and approved a swatch alone ended up with 2,000 tents that leaked at the zipper flap. The swatch was perfect. The finished tent wasn’t. That’s the difference between a fabric sample and a production-ready sample. The 10% of buyers who insist on the finished tent sample before mass production are the ones who don’t get surprise phone calls from their logistics manager.
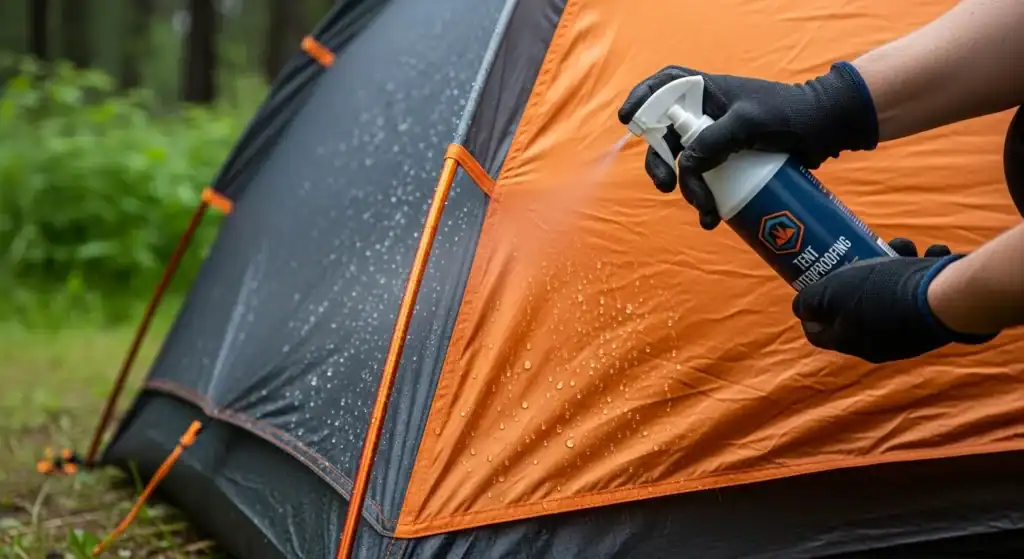
How to Field-Test a Tent’s Waterproofing Before Mass Production
Three tests catch 90% of tent waterproofing failures before production.
A pre-production sample that looks dry in the showroom can leak like a sieve after 20 setup cycles. The difference between a tent that survives a monsoon and one that soaks your sleeping bag is rarely the fabric spec sheet — it’s how the coating and seams hold up under real use. Most buyers skip field testing because the sample looks fine on a hanger. That’s how a $50,000 order lands with a container full of leaky tents.
The 10-Minute Spray Test
Set up the tent fully. Use a garden sprayer or hose nozzle set to a fine mist. Hold it 30 cm from the roof fabric and spray continuously for 10 minutes. Focus on the ridge seams, pole sleeves, and corner reinforcements. After 10 minutes, crawl inside with a dry hand and feel every seam and panel. Any moisture on the inner surface means the coating or seam sealing failed. Reputable tent manufacturers, including those in Kelyland’s network, run this exact protocol during pre-production validation.
The 20-Cycle Setup and Takedown Test
PU coatings crack and seam tape peels when the fabric is folded and unfolded repeatedly. Set up the tent, then take it down. Repeat 20 times. After the 20th cycle, inspect the folded crease lines and corner tape joints. Cracks in the coating or tape lifting at the edges mean the tent will fail after a few weekends of use. This test exposes the difference between a production-grade tent and a sample that was assembled with extra care.
Pass/Fail Gate
-
- No droplets after spray test: The inner surface must be completely dry. A single droplet at a seam is a fail.
- No coating cracks after 20 cycles: Inspect under bright light. Hairline cracks in the PU layer at fold lines are a fail.
- No seam tape lifts at corners: Tape must remain bonded at all stress points. Lifting at any corner is a fail.
Run these three tests on every pre-production sample before approving mass production. A sample that passes all three gates will perform in the field. A sample that fails any one gate will generate returns, chargebacks, and a damaged brand reputation. The 20-cycle test takes an afternoon. The spray test takes 10 minutes. The cost of skipping them is the full container value.

Conclusion
A hydrostatic head rating isn’t a marketing badge — it’s a measurable spec that determines whether your tent line survives the third rainstorm or lands in the warranty return bin. The five leak points covered here — floor fabric, seam tape adhesion, zipper track seal, flysheet coating, and pole sleeve stitching — account for roughly 80% of field failures. Skip the verification on any one of them, and the 30-45 day production lead time becomes a 60-day rework cycle.
-
- Floor fabric must hold 3000mm+ HH for family camping use.
- Seam tape requires a 24-hour peel test before mass production.
- Zipper track seal fails first at the bottom stop corner.
- Flysheet coating consistency varies between PU and silicone layers.
Before you sign off on the next production agreement, pull the hydrostatic head test report for each fabric layer — not just the flysheet. Ask the factory for the seam tape adhesion log from the last batch of the same material. If the numbers don’t match the spec sheet, the sample approval stage is the right time to flag it, not after the pre-shipment inspection. Review the tent fabric options and coating specs on the product page to compare how different material stacks handle the five leak points discussed here.
Frequently Asked Questions
What is a good hydrostatic head rating for a tent?
A good rating depends on use: 1,500mm suits fair-weather shelters, 3,000mm is the minimum for three-season camping, and 5,000mm or higher is recommended for heavy rain or alpine conditions. Match the HH rating to your target weather, not just the spec sheet.
Is 3000mm hydrostatic head enough for heavy rain?
3,000mm can handle moderate rain only if all seams are taped and zippers have storm flaps; for prolonged heavy rain, the construction will likely fail before the fabric does. Always verify seam tape adhesion and zipper coverage, not just the HH number.
Why does my tent leak if the hydrostatic head is 5000mm?
A high HH rating does not test seam tape adhesion, stitching needle holes, zipper gaps, or PU coating crease cracks in the assembled tent. The leak is almost certainly at a. Demand a finished-tent rain test, not just a fabric swatch certificate.
Can I seam seal a silicone-coated tent?
Yes, but silicone-coated fabric cannot be taped with standard heat-activated tape; it needs liquid seam sealer applied carefully to each stitched seam. This is a manual process and must be done correctly to. Use only silicone-compatible liquid sealer, not standard seam tape.
What is the difference between 3000mm and 5000mm hydrostatic head?
3,000mm is 29.4 kPa and generally adequate for three-season moderate rain; 5,000mm is about 49 kPa and provides a higher safety margin for heavy or prolonged rain. The. Choose 5,000mm for storm-rated tents, but always pair it with a finished-tent rain test.

 English
  Español
  Deutsch
  Français
  Português do Brasil
  Русский
  العربية
  한국어
한국어  日本語
日本語