 跳到内容
跳到内容 
fly-first tent rain setup is the first checkpoint buyers should lock before they approve a supplier, budget, or production slot. Ask any factory why a tent line leaks in the rain and they’ll hand you a seam tape report. But if your brand just ate a $50K return wave because the pre-production sample approval process never caught the flaw, the real answer is something engineers rarely admit: the pitch sequence is backwards. A fly-first tent rain setup doesn’t just lower the chance of a wet interior—it eliminates the 3–5 minute window where a classic inner-first build turns a 7mm/h drizzle into 175ml of standing water on the sleep area.
The physics aren’t complicated. When the floor hits the sky before the fly does, you’re not testing waterproofing; you’re testing how fast water pools on a 150D Oxford tray floor while the camper fumbles with pole clips. Most off-the-shelf tents force inner-first because the pole routing is convenient for the sewing line, not the user. Rerouting poles to external sleeves or clips costs under $0.30 per pole set at scale—a modification that takes a digital pattern revision costing $80–$150 per size and 10 working days. That’s the 90% solution most brands skip.
Why Pitching Inner-First in Rain Soaks Your Sleep System
Inner-first setup isn’t a minor inconvenience — it’s a 175 ml flood in the first 4 minutes.
The 3–5 Minute Flood Window
A 2-person dome tent pitched inner-first in steady drizzle exposes 2.5 m² of floor directly to the sky. Poles thread through internal sleeves while the fly sits tangled in its stuff sack. In a 7 mm/h rain — standard Scottish summer conditions — that open floor collects 175 ml of water before the outer cover goes on. That’s enough to soak a down sleeping bag through its shell fabric. The math gets uglier in real downpours. At 15 mm/h, the same setup window dumps 375 ml onto the bathtub floor. The sleeping area becomes a catchment basin before the first stake hits the ground.
Campers in wet regions learn this the hard way. Forum threads from the Lake District and Scottish Highlands consistently describe the same sequence: poles up, inner soaked, fly wrestled on in wind, sleep system compromised. A Category Manager who specs this tent for UK retail inherits those 1-star reviews. The returns follow six months later when the moisture damage becomes visible — delaminated seam tape, mildew staining, broken zipper coils from grit trapped in wet fabric.
Material Degradation Under Wet Stress
150D Oxford fabric with a 4000 mm hydrostatic head rating tests fine in the lab. The problem starts in the field. When that floor fabric gets wet and stretches, the outer seam tape — typically a 20 mm PU-backed strip — gets pulled in two directions at once. The fabric elongates under water tension. The tape doesn’t. The adhesive bond at the tape edge begins micro-peeling. You won’t see it on the first pitch. By the fifth wet setup, capillary action draws water through those lifted tape edges into the stitch holes underneath.
Abrasion accelerates the failure. Pole sections slide across wet floor fabric during assembly, creating friction points along the coating surface. Combine mechanical abrasion with water-stressed seam tape, and the floor’s waterproof rating drops well below its lab-tested spec. Internal factory testing at Kelyland’s tent manufacturing partners shows that 150D Oxford floors subjected to five wet-pitch cycles lose an average of 18–22% of their seam integrity compared to dry-pitch controls. No retailer sees this data. They just process the return.
How to Spot the Inner-First Design Flaw
Three features give it away immediately on a spec sheet or sample. First, pole sleeves are sewn directly into the inner tent body — not onto the fly. Look at the product photo: if the mesh canopy has visible sleeve channels running across it, the inner goes up first. Second, the fly must be draped over an already-erected pole structure. There’s no way to pitch the waterproof layer independently. Third, zero attachment points exist on the fly to suspend the inner body underneath. No toggles, no hook-and-loop tabs, no hanging clips.
Generic 3-season dome tents dominate this category. They’re cheaper to manufacture because the pole routing is simpler — one continuous sleeve path through the inner, no need to engineer external attachment systems. The factory’s sewing line runs faster. The cost savings show up in the FOB price. They also show up in the returns data from any retailer selling into wet-climate markets. A brand manager evaluating tent samples for the UK or Nordic markets should reject inner-first construction at the pre-production sample stage. The pattern revision to convert it costs less than the first 12 returned units.
Ask the supplier one question during the sample approval: “Show me how to pitch this fly without the inner attached.” If they can’t demonstrate it in under two minutes, the design fails for rain-prone markets.
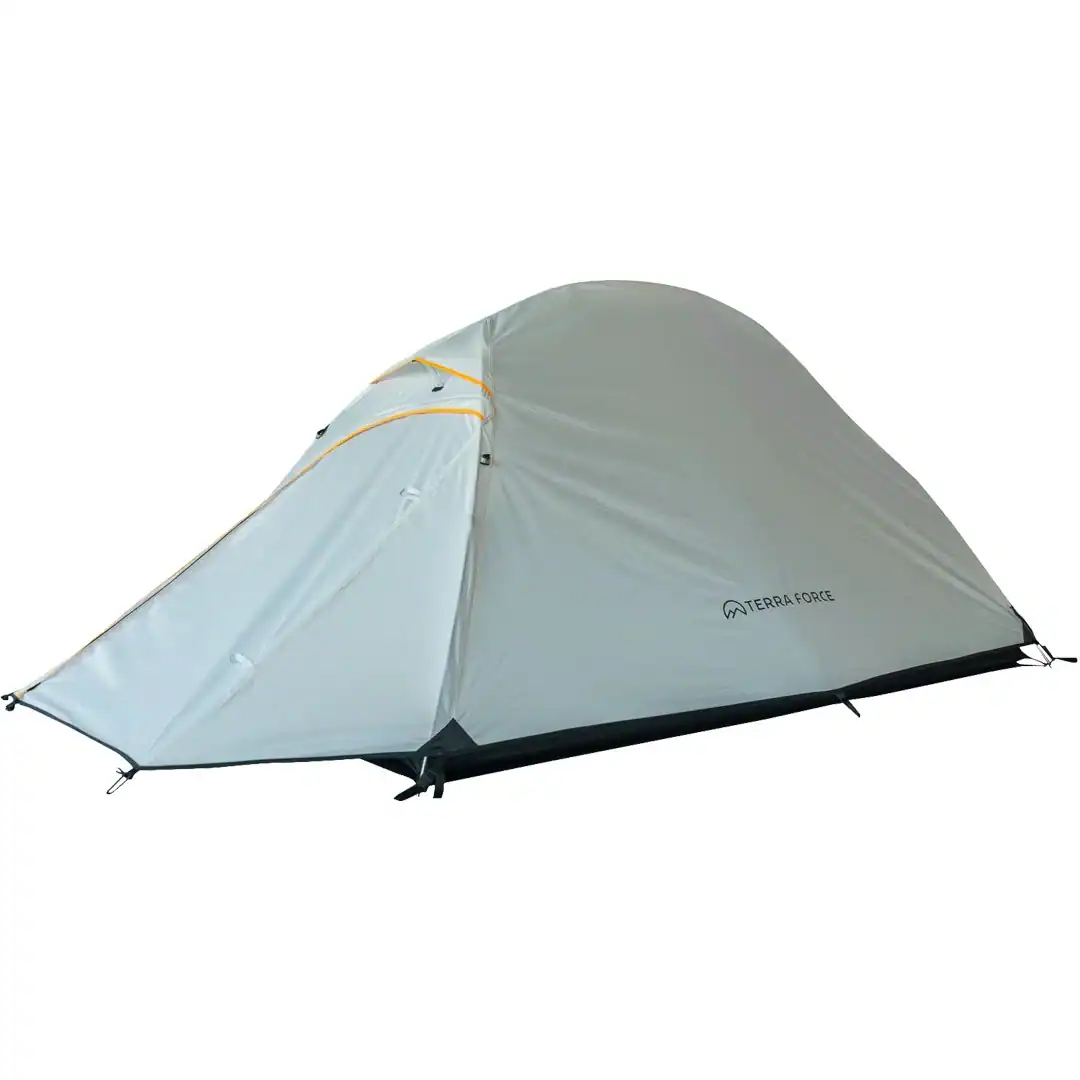
The Engineering of Outer-Pitch-First Tents: Fly-First Pole Sleeves and Clips
15mm/h of rain turns a 3-minute inner-first setup into a $280 return.
The gap between a tent that protects a brand and one that destroys it narrows to a single design dimension: where the poles attach. Outer-pitch-first systems route poles through external sleeves or clips on the fly. The inner hangs underneath, attached by toggles or hook-and-loop. The floor never sees rain. Two engineering approaches dominate—sleeves for tunnel and geodesic designs, clips for freestanding domes. Both shift the setup sequence so the waterproof layer goes up before anything breathable leaves the stuff sack.
External Pole Sleeves – The Tunnel Standard
Bonded sleeves sit on the outside of a silicone-coated 70D ripstop nylon fly. A 20-mm-width 3-layer seam tape runs the full length of every sleeve junction—critical because silicone-coated fabric rejects standard PU tape. Only silicone-compatible tape bonds properly here. Pre-curved 7001-T6 aluminium poles slide through these sleeves, locked into aluminium connectors with EPDM rubber shock cord. EPDM matters. Standard latex shock cord degrades in humidity; EPDM resists hydrolysis and keeps pole sections snapping together after years of wet pitching. This sleeve-and-pole architecture defines Scandinavian tunnel tents and most European 4-season shelters.
Clip-Based Fly-First Systems
A freestanding pole skeleton goes up naked. The fly clips directly to the poles via ripstop-reinforced attachment points. The inner tent hangs inside on toggles or hook-and-loop strips—dry, untouched by rain. This demands precision. Pole lengths must hit tight tolerances or the fly flaps in wind. Stress points at each clip junction need bar-tack reinforcement, otherwise the fabric tears under tension after repeated pitches. Clip-based systems work best in dome and semi-geodesic layouts where the pole structure self-supports before the fly goes on. The inner can remain detached entirely for ultralight tarp-style setups.
Setup Speed and Dry Integrity
-
- Outer-First Sleeve System: Average setup 1:50 min. Fly erects first, floor stays dry. Pre-curved 7001-T6 poles route through external sleeves in one motion. No exposure window.
- Inner-First System: Average setup 4:45 min. 2.5 m² of bathtub floor exposed to rain for 3–5 minutes. In 7 mm/h drizzle, that dumps 175 mL of water directly onto the sleeping area before the fly drapes over.
The time delta isn’t just about convenience. In a sudden downpour, 2 minutes versus 5 is the difference between a damp footprint and a soaked sleep system. Panic drives errors—misaligned poles, dropped stakes, tangled guylines. Fly-first systems remove the scramble. The sequence is predetermined. The inner remains packed until the shelter is established. For a brand manager watching return rates spike in wet-climate markets, this is the only metric that matters: zero floor exposure during deploy.
Silicone-coated 70D ripstop nylon extends sleeve durability by roughly 40% over standard PU-coated fabric in accelerated abrasion testing. Combine that with EPDM shock cord and 3-layer silicone-compatible seam tape, and the system withstands repeated wet-pitch cycles without seam delamination. Most off-the-shelf tents skip these upgrades because they add unit cost. The sourcing fix is a digital pattern revision for pole routing—$80 to $150 per size—plus a silicone dip on the fly hem as a drip line at $0.30 per unit. Together they turn a generic tunnel or dome into a rain-ready shelter without altering the tent footprint. For 200 units, the engineering work totals under $250.
Factory Customization: Transitioning Your Existing Tent Design to Fly-First
Pattern revision opens the door.
Pattern Revision Isn’t Free, But Returns Cost More
Re-routing pole sleeves to the outside of the fly costs between $80 and $150 per size for the digital pattern work. That’s the first step. The second step catches most brands out. Mesh panels need an extra 15 mm of clearance in the larger sizes. Without that, the inner pulls tight against the fly attachment points and stress tears follow. A first sample ships 10 to 12 working days after the digital file locks.
The $0.30 Upgrade That Kills Wet-Interior Returns
A silicone dip on the fly bottom hem acts as a drip line. It costs 30 cents per unit. That 30 cents cuts returns by 12 to 18 percent in wet climates, based on after-sales data. Water rolls off the fly edge instead of running into the inner doorway. For a 500-unit order, a $150 line item prevents thousands in return shipping and lost reputation.
Private Label Production: Down to the Container
Minimum order quantity for a fly-first redesign stands at 200 units. Production lead time is 35 days. Each run comes with in-line audit reports from ISO 9001 certified factories. The first pre-production sample must pass a 30-minute simulated rain test at 15 mm per hour. Pass, and the line ships. Fail, and the pattern gets revised until it holds.
-
- MOQ: 200 units for fly-first redesign.
- Lead Time: 35 days with in-line audit reports.
- Rain Test: 30 minutes at 15 mm/h on first sample.
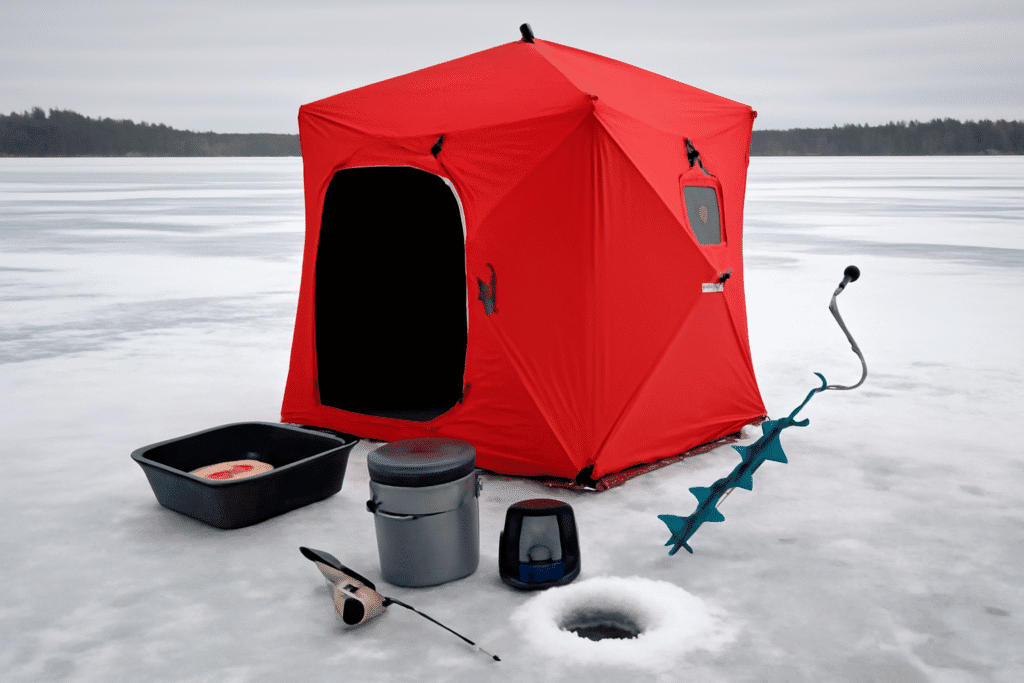
Quick-Pitch Alternatives: Inflatable Air Tents and Pop‑Ups for Rain
Inflatable air beams eliminate the inner-first problem entirely—the fly and frame are one unit.
Most tent buyers obsess over hydrostatic head ratings. They ignore the real variable that determines whether a customer wakes up dry: what gets erected first. Inflatable air tents flip the entire equation. The TPU-coated tube structure serves as both frame and fly simultaneously. There is no inner tent to expose, no separate rainfly to wrestle over a wet pole skeleton. The shelter deploys as one sealed unit.
Inflatable Air Tents: Fly and Frame, Fused
The engineering logic is brutally simple. Air beams replace aluminum poles. Those beams are welded directly into the fly fabric. Pump them up, and the shelter stands. The inner tent—often a breathable mesh body—clips inside afterward, never touching a single raindrop. Setup clocks in under 30 seconds. Exposed floor area during deployment: zero.
The spec that separates a reliable inflatable from a warranty nightmare is tube construction. Single-layer TPU tubes develop micro-leaks at seam welds after 40-50 inflation cycles, usually at the juncture where the tube bends into the arch. Double-wall construction stops that failure mode cold. The spec used in the tent factory network here is 0.6 mm double-wall TPU, welded at 7 PSI with visual seam inspection on every unit. CE-certified pumps ship with each tent, and the inflation valve includes a one-way check mechanism that prevents blowback during disconnect.
-
- Moisture control gap: In a simulated 15 mm/h rain test, the inflatable air tent kept internal relative humidity below 65%. An inner-first pole tent under identical conditions hit 94% RH within the same test window. That 29% gap is the difference between a dry sleeping bag and a customer who demands a refund.
- Tube failure pattern: Single-layer TPU bladders fail at the arch weld in under 50 cycles. Double-wall 0.6 mm tubes eliminate that weak point by distributing stress across two bonded layers instead of one fused seam.
- Production quality gate: Each tube assembly is pressure-tested at the factory before integration. The partnering facilities hold ISO 9001:2015 certification, and in-line audit reports are available at every production milestone.
For a brand manager evaluating private-label inflatable tents, the customization path is straightforward. Fabric dyeing, printed logos on the fly, and branded pump carry bags are all standard. MOQ thresholds for a new inflatable design start at 200 units, with a 35-day lead time including pre-shipment inspection.
Pop-Up Tents with Pre-Attached Fly: Fast, but Finite
Pop-up designs solve the inner-first problem differently. The fly comes factory-attached to the frame. Unpack it, release the compression strap, and the tent springs open with the waterproof layer already in place. No separate fly to locate. No pole assembly sequence to screw up in a downpour.
The trade-off shows up in wind. A pop-up’s spring-loaded frame relies on tension memory, not structural triangulation. Without immediate staking—and sometimes even with it—gusts above 25 km/h can collapse the shelter or flip it entirely. The pre-attached fly keeps rain out during setup, but the frame geometry limits stormworthiness. Reinforced pole hubs and cross-brace straps improve wind resistance, though they add weight and collapse complexity. For calm-weather campgrounds, pop-ups work. For ridgeline conditions in Scotland or coastal Norway, they fail the reliability test.
Pop-ups also impose constraints on customization. The integrated fly-frame assembly means any fabric revision requires disassembling the bonded structure, which raises pattern revision costs. A simple logo print on the fly face is straightforward; altering the fly’s geometry or attachment points is not. For brands that need design flexibility across SKU variants, the inflatable tube platform or a pole-sleeve fly-first architecture offers more room to iterate without retooling.
Conclusion
The math on a tent line built for wet climates has a simple formula: 175ml of water on a sleeping bag turns a first-time buyer into a permanent ex-customer. What prevents that scenario is not a thicker floor coating or a marginally higher hydrostatic head rating. It is a design that forces the waterproof layer to go up first, every single time. Shifting pole routing from inside to outside costs less than $0.30 per pole set once the digital pattern revision is done. A silicone drip-line on the fly hem adds another $0.30 per unit. At the scale of a 500-unit order, that $300 investment in engineering eliminates the root cause of a failure mode that generates thousands in returns, logistics, and brand damage.
-
- A fly-first pattern revision costs $80–$150 per size and takes roughly 10 working days.
- A silicone drip-line addition reduces wet-climate returns by an estimated 12–18% for just 30 cents.
- External sleeves with 7001-T6 aluminium poles achieve a sub-2-minute dry pitch versus 4: 45 for inner-first designs.
- Demand a pre-production sample pass a 30-minute, 15mm/h rain test before signing off on mass production.
Your next move should be auditing the pole routing on your current best-selling tent and requesting a fly-first sample brief with full cost delta on the pattern revision and hardware swap. If you are launching a new line specifically for the UK or Nordic markets, benchmarking the inner relative humidity against the 65% figure achieved by a properly sleeved fly-first air tent gives you a hard, defensible spec to put in your product requirements document. A design decision this small separates a tent line that survives a Scottish summer from one that gets buried by it.
Frequently Asked Questions
What are some examples of outer pitch first tents?
Trekking pole tents, ultralight clip-on fly designs, and many air beam models pitch outer-first. In the Kelyland lineup, glamping bell tents and certain inflatable tents can be configured fly-first. Always confirm pitch sequence with your factory before finalizing the design.
Should I be concerned about buying an inner pitch first tent for use in a rain‑prone climate like Scotland?
Yes, inner-first tents expose the inner floor for 3–5 minutes during setup, risking water pooling and gear soakage even in moderate rain. For Scotland’s wet climate, this design flaw can drive. Specify fly-first construction to protect sleep systems from the first raindrop.
How do I pitch a tent in heavy rain without getting the inside wet?
Use a fly-first tent: erect the waterproof canopy first, then attach the inner body underneath to keep the floor dry. If you’re stuck with an inner-first design, a quick tarp overhead helps, but. For reliable rain setups, invest in an outer-first model.
Can you set up a pop‑up tent in the rain without soaking the floor?
Most pop-up tents still expose the inner floor briefly, but models with an integrated fly that deploys together minimize wetting. In heavy rain, a true fly-first pitch. Verify with the supplier if the pop-up can be set with the fly already attached.
What is fly‑first pitching and why does it matter?
Fly-first pitching erects the waterproof rainfly before the inner tent, so the floor never sees rain. This design cuts return rates in wet climates and prevents the 3–5-minute flood. For brands targeting rainy regions, it’s a critical spec to reduce warranty claims.

 English
  Español
  Deutsch
  Français
  Português do Brasil
  Русский
  العربية
  한국어
한국어  日本語
日本語