 跳到内容
跳到内容 
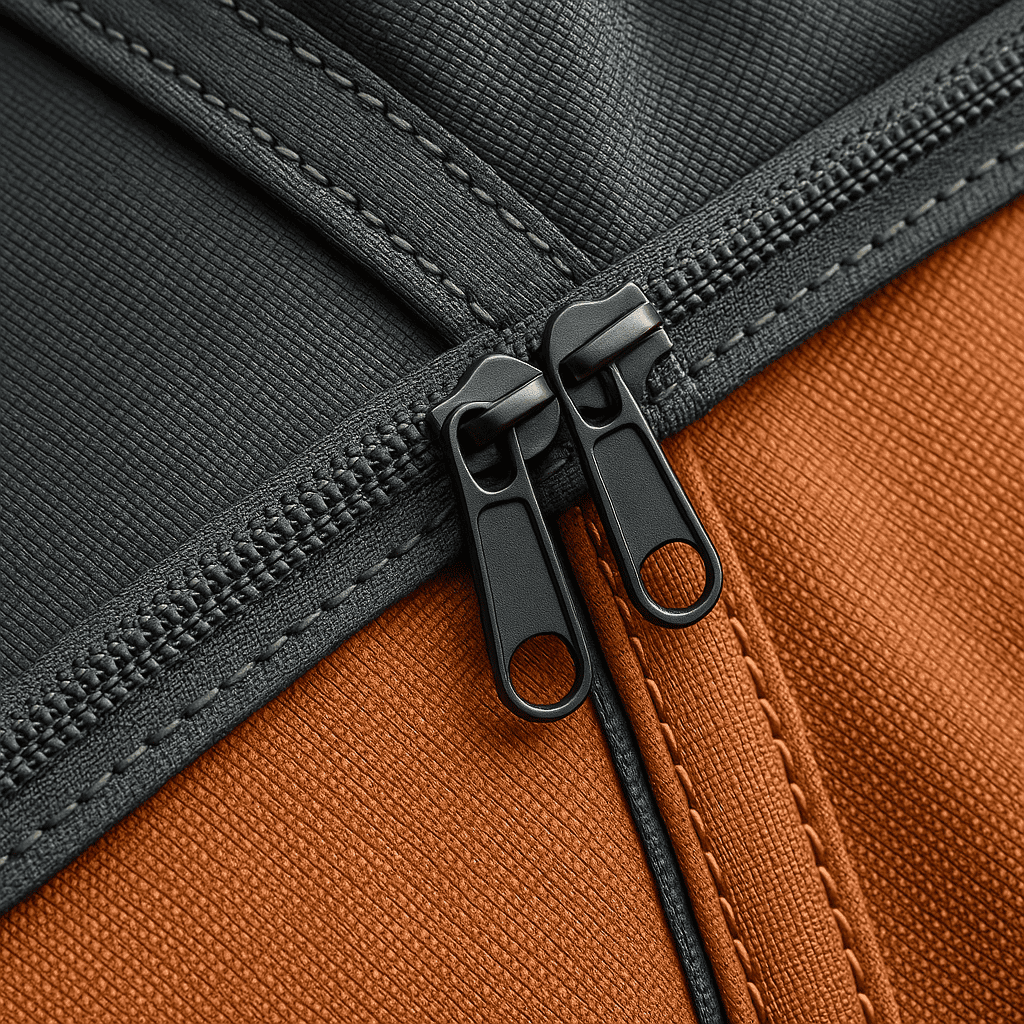
glamping tent zipper repair is the first checkpoint buyers should lock before they approve a supplier, budget, or production slot. A guest checks into a glamping tent and the main door zipper jams halfway down. You have a $50K rental fleet sitting on a site with sand, pine needles, and daily guest abuse. The difference between a quick field fix and pulling the tent out of service often comes down to whether you know the zipper size and have a $5 slider in your kit. Most glamping tent door zipper jams aren’t a broken chain — they’re a thread or grain of sand caught in the slider track.
Glamping tents use #10 nylon coil zippers on doors and #5 on windows and mesh screens. The nylon coil is flexible and runs smoothly when clean, but it’s also a magnet for grit. A guest who yanks the slider at an angle spreads the jaw just enough that it can’t compress the coil teeth together anymore. That’s when you get the classic “zipper separates behind me” failure. Replacing that slider costs $3–$8 and takes ten minutes with pliers — no sewing required.
The real cost hits when someone jumps straight to replacing the whole zipper chain or calls in a repair shop for $50–$150 per door. That’s unnecessary for roughly four out of five failures you’ll see in a rental season. A paper clip, needle-nose pliers, and silicone-based lubricant will clear most jams on site. Only pull the full zipper replacement trigger when coil teeth are missing or the fabric tape has torn away from the seam.
Why Glamping Tent Zippers Fail
80% of zipper failures come from a worn slider jaw, not a broken coil.
Glamping tents sit outside for months. Sand, dirt, and pine needles work into the nylon coil track. Guests yank the slider at odd angles when the door doesn’t align perfectly. Once the track gets misaligned, every pull grinds the coil edges against the slider channel. User abuse causes most jams — not a manufacturing defect.
The Slider Spread Problem
After hundreds of open-close cycles, the slider jaw spreads by fractions of a millimeter. That tiny gap means it can no longer compress the coil teeth together firmly. The result is the classic failure: a zipper that separates behind you as you pull it. The coils look fine, but the slider itself is worn out.
UV Degradation Weakens Tape
UV exposure makes zipper tape brittle over time — especially on glamping tents in high-altitude or desert sites where UV intensity is higher. If you see fraying near the stitches that hold tape to fabric seam, that’s tape integrity failure even if the coils still look new. At that point, replacing just the slider won’t fix it.
The ‘Guest Pull’ Factor
Tension from pulling across an uneven door alignment bends individual coil teeth permanently. Once bent, those teeth won’t straighten with lubrication or cleaning alone. The fix requires either replacing that section of chain or swapping in a new slider with tighter clearance to force deformed teeth back into alignment — which works temporarily but accelerates wear on that same slider.
Field Fix 1: Clear a Jammed Coil
Most jams come from a loose thread or sand, not a broken slider.
A guest pulls the door zipper and it stops halfway. The instinct is to yank harder. That’s the fastest way to turn a 2-minute fix into a $50–$150 full zipper replacement. Stop pulling. Back the slider slowly toward its open position. Do not force it forward.
Clear the obstruction
Use needle-nose pliers or a paper clip to pull out any thread caught between the coil teeth and the slider channel. Sand grains lodge in the same gap—brush them out with a stiff toothbrush or compressed air. Never yank an obstruction straight through. Forcing it will separate the coil teeth permanently, turning a quick field fix into replacing the entire chain length.
Clean and lubricate
After clearing debris, dry-brush both sides of the coil track, then apply silicone-based tent zipper lubricant sparingly. Coat both sides of the coil, work the slider back and forth a few inches, and wipe off excess. Petroleum grease attracts grit and accelerates future jams—avoid it entirely.
Clean & Lube Procedure
Grease traps grit.
Most site managers reach for the wrong spray when a glamping door starts sticking. They grab WD-40 or a multi-purpose grease because it’s what’s in the truck. That decision costs them a full zipper replacement 60 days later.
Why Dry Brushing Comes First
Sand, pine needles, and loose threads get pulled into the slider channel. That’s the cause of 80% of jams, not a broken slider. Start with a stiff brush — dry brush the coil track on both sides. Don’t use water or solvent at this stage. You just want to knock the loose debris out. If you skip this step and go straight to lubricant, you’re sealing the grit inside the mechanism.
Silicone Spray: Less Is More
After the track is clean, apply silicone spray sparingly along both sides of the coil. A thin coat is all you need. Too much attracts more dirt and turns the track into a paste trap. Kelyland Outdoors’ partner factories — like the Shaoxing glamping tent line that produces 300,000 units annually under ISO 9001 — use silicone lubricant in their QC loop because it doesn’t degrade the nylon coil or the zipper tape.
Petroleum Grease Is the Enemy
Petroleum-based lubricants (WD-40, lithium grease, motor oil) attract and hold grit. After a few cycles, the track becomes an abrasive strip that grinds the slider jaw and the coil teeth. The zipper will fail faster than if you’d used nothing at all. A $4 can of silicone spray protects a $50 zipper replacement. The math is simple.
Every 30 days, run a stiff brush over the coil and follow with a light silicone coat. Your rental fleet’s zippers will last 3x longer, and your guests won’t call the front desk mid-stay.

Emergency Lubrication Alternatives
Unscented lip balm works in a pinch but melts under midday sun.
When silicone spray isn’t on hand and a guest door is grinding, you still need to get that slider moving. Rub unscented lip balm, bar soap, or candle wax directly along the coil track. Any of these will reduce friction enough to finish the zipper stroke.
Why Chapstick fails in direct heat
Chapstick melts under direct midday heat. Once it cools, it leaves a sticky residue that attracts sand faster than a dry track. Its effect fades after three or four cycles — then you’re back to grinding. Dry brushing the coil first extends the window slightly, but don’t count on Chapstick lasting through a full turnover day.
Conclusion
Most zipper failures on glamping tents are caused by loose threads or sand, not a broken slider. Replacing a #10 slider costs $3–$8 and takes ten minutes with pliers. Before you call a repair shop, run through these three checks.
-
- Is the slider the correct size (#10 for doors, #5 for windows)? Replace with the right size to avoid re-jamming.
- Is the slider auto-locking? Non-locking sliders allow doors to sag open, which causes misalignment.
- Is the zipper tape intact and the coil teeth complete? If yes, replace only the slider; if not, plan for a full zipper replacement.
If you’re replacing sliders every season, the issue is likely the zipper spec. Ask your supplier about upgrading to #10 auto-lock coil zippers on your next order. For custom builds with reinforced zippers that survive sand and guest abuse, request a private-label inflatable glamping tent build sheet from Kelyland Outdoors.
Frequently Asked Questions
How to get a quote for Glamping Tent Zipper Repair: 4 Field Fixes?
The exact answer depends on the product specification, quantity, and order setup. The safest approach is to confirm the commercial terms only after the final requirement sheet is locked. Final terms should be confirmed against the exact product specification and order conditions.
Can I request samples first?
The exact answer depends on the product specification, quantity, and order setup. The safest approach is to confirm the commercial terms only after the final requirement sheet is locked. Sample availability should be confirmed against the current stock and shipping plan.

 English
  Español
  Deutsch
  Français
  Português do Brasil
  Русский
  العربية
  한국어
한국어  日本語
日本語