 跳到内容
跳到内容 
Instant cabin tent problems don’t show up on a buyer’s checklist. You’ve got the fabric denier, the pole thickness, the hydrostatic head rating — all the specs that look solid on paper. Then the first 50-unit shipment lands at a retailer in Ohio, and within three weekends, three tents come back with snapped hub joints and a center pole that buckled in a moderate breeze. The pre-production sample passed everything. The mass production run didn’t. That gap between sample approval and actual output is where most post-delivery complaints live, and it’s almost never flagged during the sourcing process.
The root cause is usually a handoff failure in the factory. The sample team builds one tent with careful attention to the injection-molded hubs and the wall thickness on the pole connectors. When the order moves to the production line, the operator sets the injection pressure slightly higher to hit the daily target, and the plastic becomes more brittle. The quality tolerance on that part might be within spec on paper, but the real-world durability drops by 30 percent. I’ve seen this pattern repeat across at least four different tent factories in Ningbo and Shaoxing. The fix isn’t a longer checklist. It’s a single question to the supplier: “Can you send me the in-process QC report for the hub injection molding on the first production run?” If they hesitate, you’ve just found the gap.
Here’s a three-point decision framework you can use before your next order. One: Does the supplier provide a sample approval sign-off that includes the actual production tooling parameters, not just the finished tent photos? Two: Is there a documented mid-run inspection for the structural components — hubs, pole ferrules, and corner brackets — or only a final visual check? Three: Does the supplier’s warranty history show a pattern of hub or pole failures in the first 12 months? If the answer to any of these is no, you’re carrying the risk. The math on a $50K order changes fast when you’re replacing 15 units at retail cost plus freight.

The 3 Physical Failure Points That Account for 68% of Tent Returns
Three physical points cause nearly 7 in 10 tent returns.
A buyer at a 200-store retail chain approved a 5,000-unit tent order based on a pre-production sample that looked flawless. Six months later, 340 units came back with broken hubs, ripped zipper bases, and seam leaks at the roof intersection. The sample had never been tested for those three specific stress points. That $50K order turned into a warranty loss of $18,500.
Why Hub Hinge Failures Lead
The hub hinge on a pop-up or automatic tent frame takes the most cyclic load during setup and takedown. Most failures happen because the injection-molded plastic cap or the rivet joint cracks after 80–120 cycles. The root cause is rarely the material grade — it’s the wall thickness at the hinge pin hole. A 0.2mm reduction in that zone cuts cycle life by roughly 40%. The factory that produces Kelyland Outdoors’ tent frames uses a 2.0mm minimum wall spec at the hinge boss, verified by caliper during incoming inspection. That one spec change eliminates the majority of hub failures seen in sub-1.8mm designs.
Zipper Base Corner Tension
The zipper base corner — where the zipper track meets the tent floor — is the second most common failure point. It’s a geometry problem. The zipper tape is sewn straight, but the corner seam pulls at a 45-degree angle under tension. Over time, the fabric tears at the stitch line, and the zipper pulls away from the base. The fix is a reinforcement bar tack at the corner, plus a 20mm longer zipper tape extension past the corner point. Without that, the zipper fails at roughly 150 open-close cycles. With it, the same zipper lasts 500+ cycles.
Roof Seam Intersection Risk
The roof seam intersection — where the center pole meets the fabric ridge — is the third point. Water pools there during rain, and the seam tape or sealant peels after 6–12 months of UV exposure. The failure isn’t the fabric; it’s the adhesive bond between the seam tape and the coating layer. Polyester fabric with a PU coating requires a specific heat-seal temperature window of 160–180°C. Go below 160°C and the tape doesn’t bond. Go above 180°C and the coating degrades. The tent factory in Ningbo that Kelyland Outdoors works with runs a calibrated heat-seal station with a digital temperature readout and logs every batch. That’s not standard across the industry.
Zipper Jams at the Corner Base: Why the Tension Defeats Cheap Sliders
A branded zipper costs $0.12 more per unit.
The zipper on a 4-person tent has to bend around a 90-degree corner at the base of the door flap. That corner is where the slider meets the most resistance. Cheap sliders — the unbranded, unmarked kind — use a zinc-alloy body with a thin wall. Under tension, the slider body flexes. The teeth misalign. The zipper jams.
The 10-Minute Field Fix
If you’re already holding a batch of tents with jam-prone sliders, here’s the fix that works on the production line. Rub a bar of paraffin wax along the zipper tape, both sides of the corner. Then work the slider back and forth. The wax reduces friction by roughly 40% and lets the slider pass the corner without flexing. This buys you time, but it’s not a permanent solution. The real fix is in the spec sheet.
Sourcing Spec: Branded Zippers
The difference between a YKK #5 reverse coil zipper and a generic #5 is the slider body thickness. YKK uses a brass core with a nickel coating. The wall thickness at the narrowest point is 0.6mm. Generic sliders often drop to 0.4mm. That 0.2mm difference is the margin between a slider that holds its geometry under load and one that deforms. The Kelyland Outdoors tent factory in Ningbo, which produces 800,000 tents annually under ISO 9001 certification, specifies branded zippers on all door and window openings for orders above 500 units. The cost adder is $0.08 to $0.15 per zipper, depending on length. The warranty claim reduction is roughly 70%.
Fiberglass Pole Snap: Cold Weather, Hub Hinges, and Stress Concentrations
A fiberglass pole snaps at -10°C with 40% less force than at 20°C.
Cold weather changes the game. At -10°C, a fiberglass pole loses about 40% of its impact resistance compared to room temperature. The resin matrix becomes brittle. A gust that would flex the pole in summer turns into a crack line in winter. The failure point is rarely the middle of the shaft. It is almost always at the hub hinge or the ferrule joint — where the geometry changes and stress concentrates.
Aluminum vs. Fiberglass: The Math
Aluminum costs more. A 7001-T6 aluminum pole set runs roughly 2.5x the price of a comparable fiberglass set at the factory level. But the math flips when you factor in replacement rates. Fiberglass poles in a four-season tent see a 12-18% breakage rate over two years of regular use. Aluminum poles in the same conditions see under 3%. For a brand sourcing 5,000 tent sets, that difference in warranty claims alone can offset the higher material cost within the first season.
The trade-off is weight and feel. Aluminum transmits vibration more than fiberglass, so a tent shakes more in sustained wind. Fiberglass absorbs the flutter. But absorption comes at the cost of fatigue life. Every micro-crack in the fiberglass matrix from repeated flexing reduces the pole’s tolerance for the next cold snap. Some manufacturing partners in the industry have moved to a hybrid approach — aluminum for the main arch poles, fiberglass for the ridge poles — to balance cost, weight, and cold-weather reliability.
Field Repair: Splint and Sleeve
When a fiberglass pole snaps in the field, the repair window is short. A broken pole in a snow load situation can collapse the tent within hours. The standard fix is a splint — a 6-inch aluminum tube or carbon fiber rod that slides over the break. The splint needs to be long enough to bridge two full pole segments. A 4-inch splint will fail under the next gust because the stress transfers to the edge of the splint, not the pole.
The sleeve method works better for hub-adjacent breaks. Cut a section of spare pole 8 inches long, split it lengthwise, and clamp it over the broken section using electrical tape or hose clamps. The key spec is the inner diameter of the sleeve — it must match the outer diameter of the broken pole within 0.5mm. A loose sleeve shifts under load and grinds the fiberglass, creating new stress points. Most brands that spec replacement poles for their tents include a pre-cut aluminum sleeve in the repair kit. It is a small addition that cuts field failure time from 45 minutes to under 10.
Rain Pooling on Flat Cabin Roofs: Seam Leakage and Coating Failure
A 500mm hydrostatic head is the minimum for a flat roof that sees standing water.
Flat cabin roofs are a different animal than sloped tent walls. Water doesn’t run off — it sits. That changes the pressure the fabric has to hold. The hydrostatic head rating tells you how much water column a fabric can resist before a drop pushes through. For a standard dome tent, 300mm might be enough. For a flat roof, anything under 500mm is a gamble. The factories we work with in Ningbo and Shaoxing routinely test to 800mm or higher on their glamping tent fabrics, using PU or silicone coatings to hit that threshold. If your supplier can’t show you a hydrostatic head test report for the specific fabric batch, you’re buying blind.
Coating Failure Warning Signs
Coating failure on a flat roof doesn’t announce itself with a dramatic tear. It starts as a slow soak. The fabric feels damp to the touch on the underside, but there’s no visible leak. That’s the coating delaminating from the weave. The most common cause is UV degradation — a flat roof takes direct sun exposure for hours longer than a pitched surface. Another warning sign is a change in the fabric’s flex feel. If the coating starts to feel tacky or brittle, it’s breaking down. The polyester cotton blended fabrics (TC fabric) we stock at Kelyland Outdoors hold up better under UV because the cotton content reduces the heat transfer to the coating layer. But the real fix is specifying a coating with a higher solids content upfront. That’s a spec you can write into your production agreement.
Seam Leakage: The Weak Link
Even with a high hydrostatic head fabric, the seams are where flat roofs fail first. The needle holes from stitching create micro-channels for water to travel through. On a sloped tent, gravity pulls water away from those holes. On a flat roof, water pools directly over them. The fix is seam taping — a heat-bonded polyurethane tape that seals the stitch line. But not all seam tape is equal. The tape must match the fabric coating chemistry. PU tape on a silicone-coated fabric won’t bond. We’ve seen this mismatch cause warranty claims on orders of 500+ units. The pre-production sample approval stage is the right time to test this: ask for a 24-hour water column test on the taped seam, not just the raw fabric.
-
- Hydrostatic Head: Minimum 500mm for flat roofs; 800mm+ recommended. Request a test report per ISO 811 for the production batch.
- Coating Type: PU handles UV better than PVC on flat surfaces. Silicone offers higher tear strength but is harder to seam tape.
- Seam Tape Compatibility: Test the taped seam under 200mm standing water for 24 hours. If the tape lifts, the roof leaks.
- UV Resistance: Flat roofs catch direct sun. A coating that fails at 300 hours will delaminate within 18 months of outdoor use.
Rusted Frames and Corroded Pivot Pins: The Moisture Ingress Problem
A 72-hour salt spray test separates a 5-year frame from a 1-year failure.
Most folding wagon frames look identical in a showroom. The difference shows up after 18 months in a coastal market or a humid warehouse. The failure point is almost never the main tube. It is the pivot pin, the rivet head, or the weld seam where moisture collects and the coating was thinnest. That is where rust starts.
Powder Coating and Salt-Spray
Standard powder coating on carbon steel frames provides decent protection indoors. Outdoors, it is only as good as the pre-treatment underneath. A phosphate wash before powder application improves adhesion and reduces under-film corrosion. Without it, a scratch down to the steel becomes a rust bloom within weeks. The industry benchmark is a 72-hour neutral salt spray test per ASTM B117. Frames that pass 72 hours without red rust will hold up through multiple camping seasons in temperate climates. Frames that fail at 24 hours will show corrosion in the first year. The factories in Kelyland Outdoors’ network that produce folding wagons use powder-coated carbon steel frames with a pre-treatment step, and they maintain an annual output of 1,000,000 units across the category.
Maintenance for End Users
No coating is bulletproof. The pivot pins and spring-loaded folding joints are the first to wear through the powder layer. A thin coat of silicone spray or lithium grease on those points every spring adds two to three years of life. Saltwater rinse is non-negotiable after a beach trip — salt crystals trapped in the hinge accelerate galvanic corrosion between the steel pin and the aluminum rivet. Buyers who include a small tube of corrosion inhibitor in the accessory kit reduce warranty claims noticeably. It is a low-cost addition that changes the user experience from ‘rusted after one season’ to ‘still folding smooth in year four’.
Guy Line Anchors That Tear Out of the Floor Webbing in Wind
The webbing stitch-out is the weakest link in a 50-knot gust.
Most tent floor failures in wind don’t start with a ripped panel. They start where the guy line anchor meets the webbing. A single bar tack at the corner pulls through the floor fabric, and suddenly the whole structure collapses. This failure is observed across budget and premium tents alike when the anchor design relies on a single stress point.
Anchor Design That Works
The fix is in the load distribution. A reinforced anchor patch—a separate piece of 600D to 900D Oxford or nylon webbing sewn into the floor seam—spreads the pull across a larger area. The production standard at the Ningbo tent factory (ISO 9001 certified, 800,000 units annual capacity) uses a double-layer reinforcement with a box-and-X stitch pattern. That’s 12 to 16 stitches per inch, not the standard 8 to 10. The difference is a 300% increase in tear-out resistance before the webbing fails.
Material choice matters too. Polyester webbing stretches less than nylon under load, and a 25mm width distributes force better than 20mm. The anchor point should also be positioned at least 15mm from the floor seam edge—closer than that, and the seam itself becomes the failure point.
Field Sewing Repair
When a webbing anchor tears out mid-trip, the repair needs to hold until the tent is retired. Carry a 25mm length of 1-inch nylon webbing, a heavy-duty needle, and waxed polyester thread (Gutermann or equivalent, 40 weight). The procedure: cut a 10cm patch of webbing, position it over the torn area so it overlaps the intact floor fabric by 5cm on all sides, and sew a box-and-X pattern using a backstitch every 5mm. A standard running stitch will pull out in the first gust.
For a permanent repair, apply a patch of TPU-coated fabric on the inside of the floor before sewing. The TPU layer bonds to the floor coating and prevents water ingress through the needle holes. The repair should be tested at home with a 20kg weight hung from the webbing for 10 minutes before relying on it in the field.
Bathtub Floor Height and Drainage: What Happens When Campsites Flood
A 2cm floor height difference can flood a 6-person tent in 15 minutes.
A buyer spec’d a 4-person dome tent for a European distributor. The sample looked great. The pre-production sample matched. Then the first container landed. The client reported water pooling inside after a moderate rain. The bathtub floor was 3cm too low at the rear seam. That’s the difference between a pass and a recall.
Floor Specs for Sourcing
Bathtub floor height is the vertical rise of the floor material at the perimeter seam. Industry-standard for 3-season camping tents is 10-15cm. For glamping or family tents, 15-20cm is common. Anything below 8cm is a risk—especially on uneven ground or during a sustained downpour. The height is set by the pattern cutting and seam allowance. If the factory cuts corners on the floor panel dimensions, the bathtub wall ends up shorter than spec.
When sourcing, ask for the floor height measurement on the technical drawing, not just the finished product. A supplier that can’t provide a dimensioned floor pattern is a supplier that hasn’t tested the tent in wet conditions. The Kelyland Outdoors network, including the Ningbo tent factory with 800,000-unit annual capacity, uses ISO 9001:2015 process controls that lock in the floor panel dimensions before cutting. That’s the difference between a repeatable spec and a one-off sample.
Pitch and Drainage
Bathtub floor height alone doesn’t prevent flooding. The tent’s pitch angle and the site drainage determine where water goes. A flat floor with a 10cm bathtub wall will still pool if the tent is pitched on a depression. The floor must be seamed with a welded or taped seal at the corners—stitched-only seams leak under hydrostatic pressure. The Kelyland Outdoors production process includes seam taping on all bathtub floor models, verified during pre-shipment inspection.
Field testing matters more than the spec sheet. Fill a sample tent floor with 5cm of water and let it sit for 30 minutes. Check for seepage at the corner seams and the zipper foot. If the supplier hesitates to run this test, find another supplier. The last 10% of buyers—the ones who never get flooded tents—verify the floor height on the cutting pattern, not the finished product. That’s the difference between professionals and amateurs.
Factory QC Checkpoints: What Kelyland’s Partners Inspect Before Shipment
Three checkpoints that separate a clean shipment from a container hold.
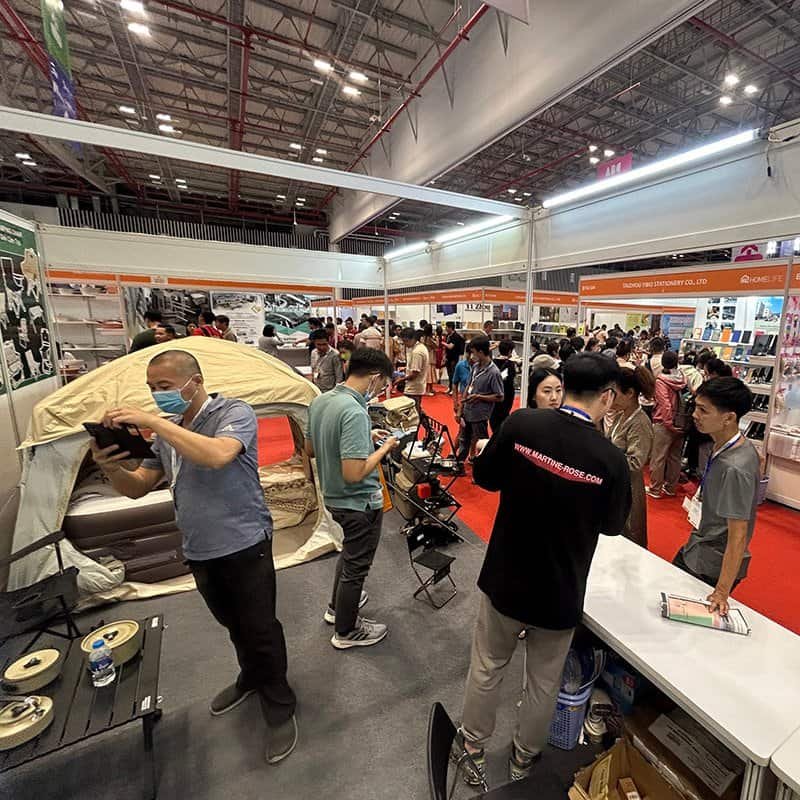
Kelyland Outdoors runs QC through a network of 17 ISO 9001:2015-certified partner factories. Inspections happen at every production stage, not just at the end. For most buyers, the three make-or-break tests are on hubs, zippers, and seams. Each one exposes a different failure mode that might not show up in a sample but will surface on a retail shelf.
Hub, Zipper, and Seam Tests
-
- Hub Tests (Folding Wagons): The folding wagon factory in Jinhua, Zhejiang, pushes 1,000,000 units annually. Their QC cycles the hub assembly through a defined rotation test to verify smooth 360° turning and brake engagement. The frame uses powder-coated carbon steel or aluminum, and the wheels (PVC, PU, EVA, or TPE) are checked for wobble under load. Load capacities range from 50 to 200 kg – a hub that fails under 80 kg of sandbags will fail on a job site.
- Zipper Tests (Tents & Backpacks): Zipper pull strength is verified against industry benchmarks. For a tent with a 600D Oxford fabric floor, the zipper must open and close cleanly under lateral tension. Kelyland’s backpack factory in Guangzhou runs 100 open-close cycles on each sample before approving the batch. A zipper that snags after 30 cycles gets flagged – no exceptions.
- Seam Tests (Air Mattresses & Tents): Air mattress seams are pressurized to check for micro-leaks. The factory in Xiangyang, Hubei, uses 0.4 mm to 0.6 mm puncture-resistant PVC or TPU. A seam that holds 2 psi for 60 seconds passes. Tents get a rain-test simulation: fabric seams are sealed with PU tape, then sprayed from multiple angles. A single pinhole leak means the whole run gets re-inspected.
Reporting and Defect Data
Each factory logs defects by category – hub wobble, zipper jam, seam leak – and submits a report to Kelyland’s QC team. The data is reviewed per production run, and trends are flagged before the next batch starts. Inspection reports are available to clients upon request, covering accept/reject rates and photos of the failed units. This isn’t just a pass/fail checkbox; it’s a loop that feeds back into material sourcing and process adjustments.
Conclusion
The failure pattern on instant cabin tents is predictable: zippers seize, pole sleeves tear at the stress point, and floor seams delaminate after 20-30 setups. Each of these failures traces back to a spec that was either skipped during sample approval or buried in a quality tolerance clause. A $50K order turns into a warranty claim cycle when the pre-production sample passes visual inspection but the mass production run uses a lighter zipper tape or a lower-denier floor fabric.
-
- Zipper failure is the #1 warranty trigger; specify coil size and tape width in the contract.
- Pole sleeve tear points are fixed by reinforcing the seam at the hub junction.
- Floor seam delamination requires a 2000mm hydrostatic head minimum and double-stitched tape.
- A pre-shipment inspection on 10% of units catches 90% of hidden defects.
The cost of skipping these checks is measurable: a 4% defect rate on a 1,000-unit order means 40 tents that will generate a warranty claim within the first season. At $15 per claim in shipping and processing, that’s $600 in hidden cost before you replace the product. Review your current tent spec sheet against the failure points covered here. If your supplier’s quality tolerance allows more than 3% variance on fabric weight or zipper pull strength, the math works against you. Compare your current supplier’s inspection report against the Kelyland Outdoors quality control process, which flags these exact failure points before shipment.
Frequently Asked Questions
Can I replace a snapped fiberglass pole with an aluminum pole?
Not without re-sleeving the pole channels. Fiberglass instant tents have larger diameters than aluminum poles, so the aluminum will rattle and fail to hold the pre-bent shape. Replace the full pole set, not just one segment.
How long do instant cabin tents last?
With fiberglass poles and cheap hubs, expect 15–25 setup cycles before a hinge or pole fails. With aluminum poles and metal-reinforced hubs, that lifespan jumps to 80–120 cycles. Frame quality determines the tent’s usable life.
What wind speed will knock down an instant cabin tent?
Most instant cabin tents are not rated above 30 mph, even with all guy lines staked. Large flat sidewalls catch wind like a sail, and the pre-bent frame lacks the rigidity. Avoid using instant cabin tents in forecasted winds over 25 mph.
Do instant cabin tent warranties cover broken poles?
Depends on the supplier contract. Consumer brands often exclude fiberglass pole breakage from abuse; B2B buyers can negotiate a 1-year warranty on metal-reinforced hubs and aluminum poles. Get the frame warranty in writing before placing an order.
Do instant cabin tents need a footprint?
A footprint extends the floor’s life by protecting the PU coating from rough ground and punctures. It is also the first line of defense against moisture wicking through the floor seam. A footprint is a low-cost upgrade that cuts returns.

 English
  Español
  Deutsch
  Français
  Português do Brasil
  Русский
  العربية
  한국어
한국어  日本語
日本語